#thelittlereddressproject:Update 2

Well, I think I’ve found the pattern for my LRD in regarding to #thelittlereddressproject …. Cue the drumroll everyone … meet Alix, the new pattern from By Hand London. 

Alix is only available in PDF form, so I’m going to have to get my skates on if I want it printed out by a print shop (i.e. I can’t be bothered sticking numerous amounts of A4 pages together!) buts it’s such a me dress! I love the long length as well as the short length so at the moment I’m toying with the final chosen length! 

The Alix is looking gorgeous in red 😍

Short Version of Alix
Long version of Alix

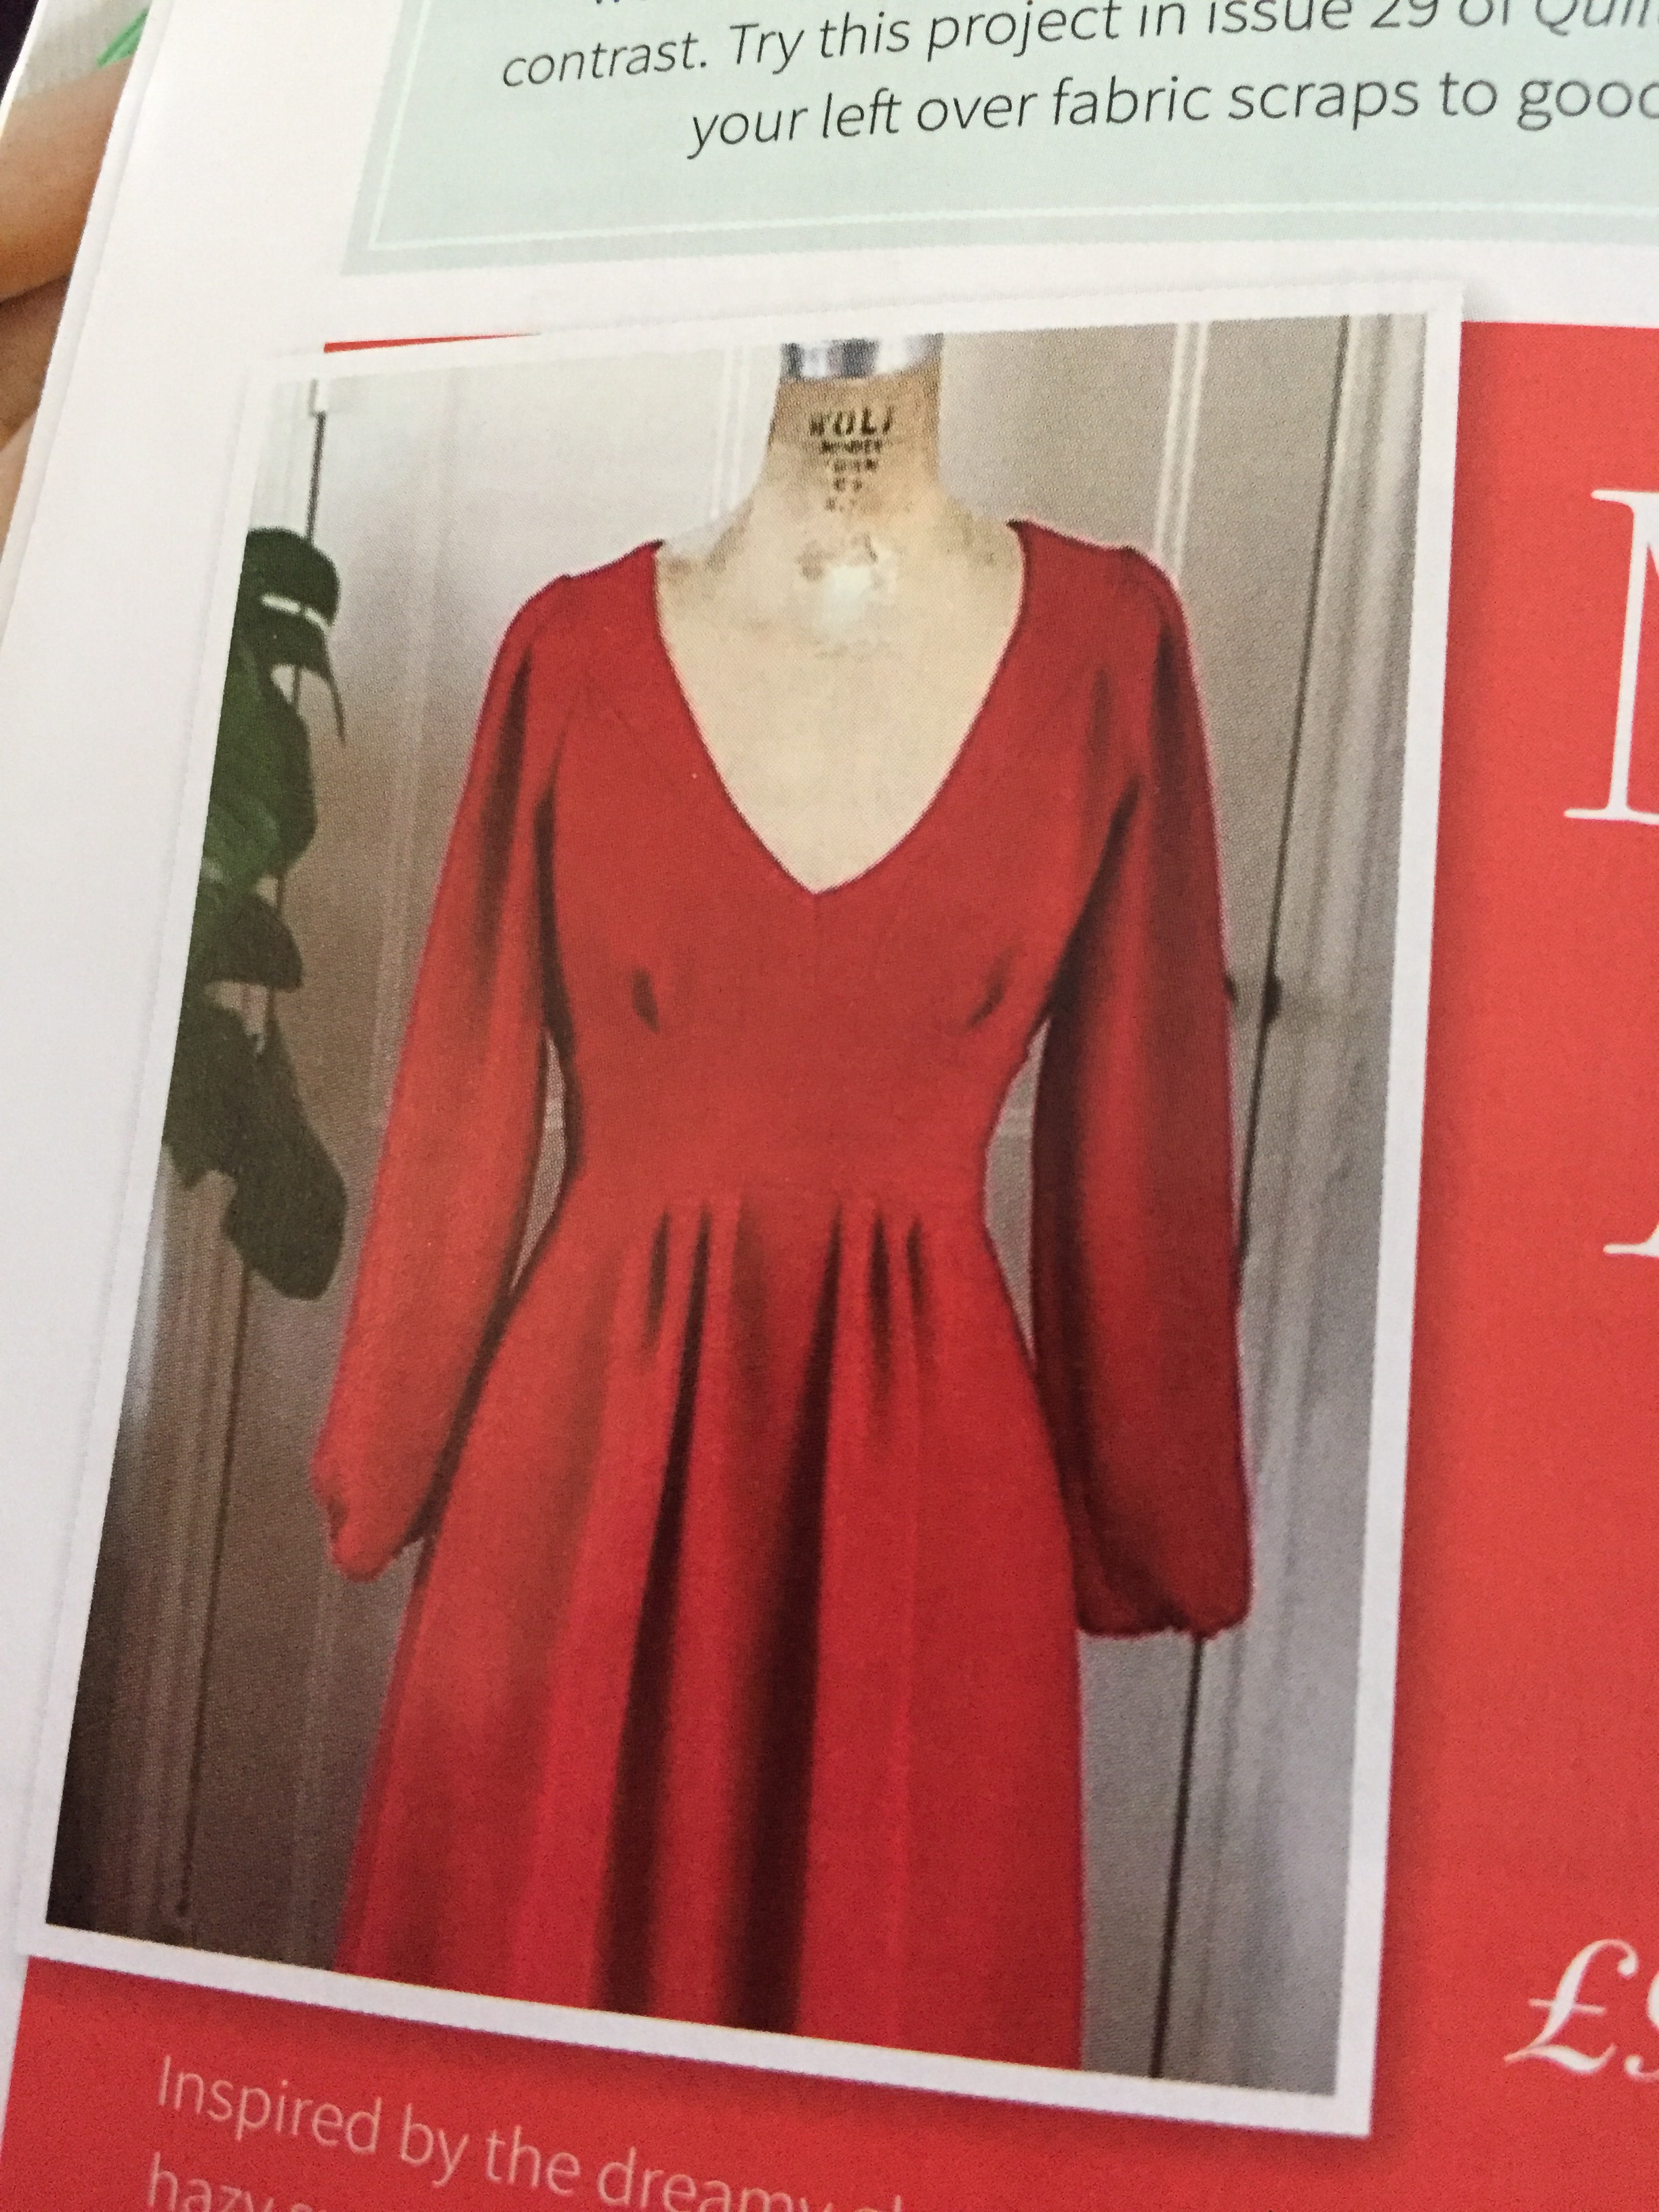
Ohhhh which one!?!? Because I’m short, I think having it just below the knees will suit me best and I’m pretty sure if all goes well I might even do the long version!

“Light to medium weight wovens will bring out the best in Alix – cotton lawn, voile, chambray, annel, double gauze, cotton silk, sandwashed silk, silk noil, wool crêpe, viscose crêpe, rayon and cupro.” 

Oooooh – cotton lawn? Chambray? Silk? Crêpe? 

Which should I choose? 

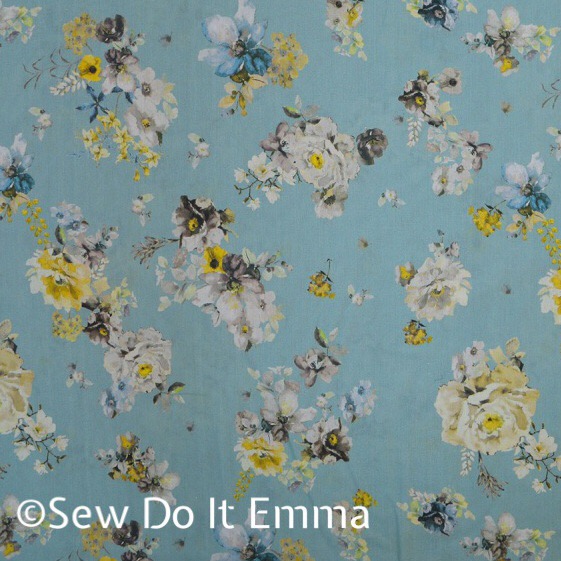
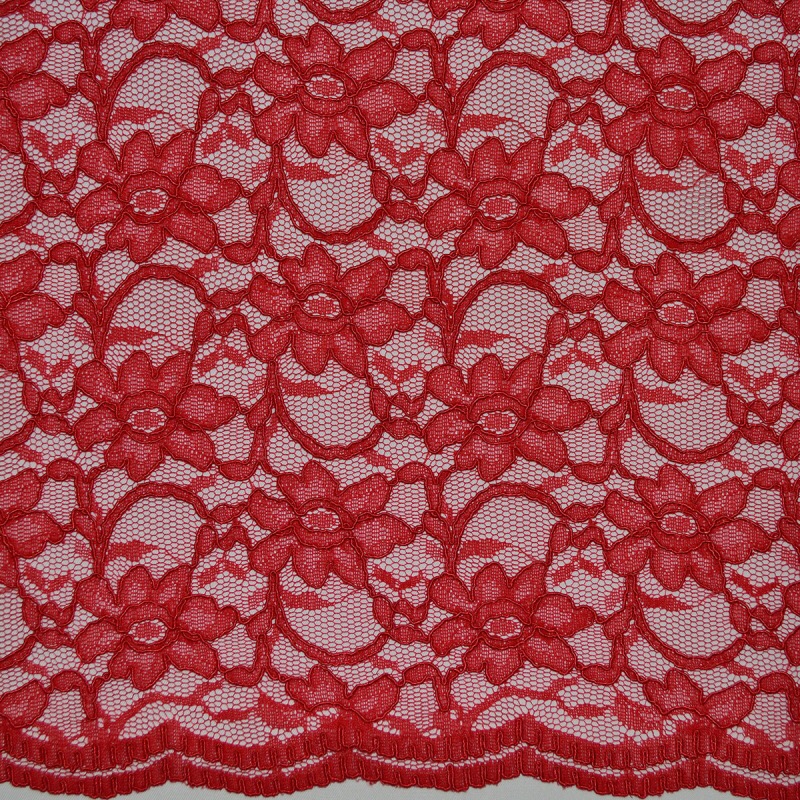
I think 💭 Alix will look stunning in red silk … but I haven’t worked with silk before – eeeek! 

What is sand washed silk? Silk noil? That’s something I’ll have too look up and see if it’s a viable option x

Until next time

Fabric Addictions: Recent Additions

Some of you may know I have a little problem with fabric and I just love collecting it, so much so that my little Billy “fabric wardrobe” is full (I can just about squeeze in a couple more, but it will be a squeeze!).

Processed with MOLDIV
you could say it’s full

I can’t say no to a bargain or a fabric pattern that catches my eye.   Working in a fabric shop is sheer dangerous for me as I rarely walk out from week to week without purchasing something sewing related.  Then again if I don’t get something as work then I usually buy fabric online or another shop.

In this post, I’d thought I’d share my recent purchases with you.  Usually, I post the fabric on my Instagram feed but I thought I’d give you a little more detail on what project/pattern I’m going to pair it up with, where I purchased it and the story behind it.

“Make Another Wish – Hedgerow” Lewis & Irene

screenshot-2016-11-03-08-40-16

It all started with a customer trying to find the ivory version and I was helping to source it. We didn’t have much luck, but I did find the navy variation on eBay.  I kept this in mind and decided to splurge as I love the nature theme on it.  There’s definitely enough for a simple shift …

30712473866_65ca0fd90e_z

Vintage Roses on Cotton 

This was bought from The Cloth Shop by Remnant Kings for my dress that I’m doing in the class I mentioned in this post.

I love the vintage print of the roses.  Those of you who have read the class post will know what pattern I’m using.  I’m going to pair it with a grey lining as it’s slightly thin and you can see through it.  The lining will also help give it a bit more body.

Processed with MOLDIV
Can’t wait to have tea and cakes in this dress!


Seeing Red

No. I’m not angry!  But it’s getting closer to the deadline for #thelittlereddressproject as I write!  It won’t be long until have to down the thread and scissors and show off my creation with the hashtag.  I’m crapping myself!  Have I taken on something too short of a time period?

Anyway, I saw this Ditte cotton Fabric in Ikea and thought what the heck, it’s only £3 per metre!  I don’t think it will be for the #thelittlereddressproject but it’s back up.  I think I have found a shade that I like and that would suit my skin tone at Fabric Focus but want to check that out when it’s daylight!


30114017583_0bc7111167_z
It’s not that easy get the right shade with a solid colour!

That’s the 3 most recent fabric spurlges  … you will probably see another injection of colour pretty soon on the blog!

Emma


Lessons: Fabric Focus

Yeap, I’ve signed up for a block of lessons: Dressmaking for beginners at Fabric Focus, Edinburgh. Ok I’m no beginner but I’m no expert. I think confidence is the key but it’s always good to pick up tips and tricks for future projects and gain that extra confidence and experience to make a garment. I’d say I was a borderline novice. I’m happy to go at the class’s speed and not show off. Plus it’s always interesting to see what other sewers are using for both fabric and pattern! I’ve already noted a McCalls pattern which I like the look off! Yes, I AM A PATTERN MAGPIE! 

Lesson one:

We were all sat down and guided through our hand outs. Abi introduced us to our surroundings and what we would cover in our classes. 

Lots of room in the sewing room!

There is a sheet for marking all your measurements in the handout, which will be handy for the project and for future ones too. Our task was to take our measurements and jot them down – Hips, upper hips, waist and bust are the important ones for this now as I’m making a simple shift dress, Well at least I’m hoping too!

Grading the pattern – my hips are wider than my waist, which is seriously annoying sometimes. Abi showed me how to do this for the front and then I did it for the back. We then all cut out our patterns according to our sizes. 

Abi has sent us all home with strict instructions to pin the pattern pieces to the fabric for the next lesson. This includes ironing the pattern but absolutely NO CUTTING! I’m chomping at the bit, I will NOT CUT THE FABRIC

Next class we will cut the fabric and start sewing! 

I’ve chosen this beautiful Vintage blue cotton twill digitally printed fabric (see image below) from The Cloth Shop.

I can’t wait to wear this!

It’s a simplicity number for the pattern and it’s good value being the “easy-to-sew wardrobe elements” pack as I’m eyeing up the coat to do next. 

Great value with Simplicity’s 4789!

I’m going with the “simple” shift dress (option C) for classes. I just want to be able to finish and wear it!

I’ll continue to update you with my lessons as I go to each one! 

The Little Red Dress Project: Inspiration & Research (1 of 4)

So I’m scrolling through my instagram feed and there’s this image of a lady wearing a little red dress with @runningwithstyle ‘s handle and a hashtag #thelittlereddressproject and I’m immediately intrigued.  And before I question it, I’ve signed up – eeeeeeek!


Why on earth would I go for red? It’s not a colour I would normally opt to wear but it’s probably because I’ve haven’t found that perfect red shade. Well now’s the time to change that then! Positive thinking and all that jazz.

So the dear old Pinterest came out and I’ve made a board … yes another board of umpteen ideas of ooooohsss and ahhhhhhssss! 


The biggest problem at the moment is choosing the pattern.  I have a love affair with the Butterick 5748 as I’ve made a emerald number (which needs hemmed) a navy number (a tad more work) and a summer number (skirt bit done) – there is a pattern with the 5748 pattern and I’m determined not to not finish the red dress. It’s a great challlenge, so why would I not want to finish it?!! It’s a stunner of a dress but there a few other contenders …

Flippin’ sew the hem Emma!
The good old classic option navy here!
Summer colours here with a contrast purple for the top part
Butterick’s 5748, a firm favourite!
 

Next pattern – contrast to go there or not to go there? I’ve not worked with lace before, like ever. So is this the challenge to do such a thing? So I’d love to do something in lace but I might just hold my horses and do a simple number! 

Ooooh nice contrast with Butterick’s 6280
Beautiful lace from Remnant Kings
Cotton stretch sateen from Remnant Kings
 
I’m still floating back to a cotton stretch sateen. Perhaps because I’ve worked with it before. I would love to add a black edging to give the dress an extra element but I’ll see how I cope! 

Then it’s actually hunting down a red that I would like to work with and wear. I’m going to troll the local fabric shops in November as I’m off for a week then. I’ll also order a few samples from online fabric shops and then I’ll decide from there. I’ve not came across much online though … it’s quite meeeeh. I’m thinking of going for a wine red but if forced to do a red like in the image above, I will. 

Patterns, patterns, patterns … I’ve still not homed into my final choice but here’s just a few of my options … 

Butterick’s 5748
Butterick’s 6280

Another easy option with red drawing me in towards the dress!
Another lace option with B ? I don’t make it easy for myself, do I?
I’m liking this option C – it floats but I think it’s too long for a LRD?
Something cute for the back detail with option C!
Grading up option A would be nice!
Should I go all retro with option B?
I love C – but is it because of the Red?!
It would have to be C or D for this one!

That’s all for the moment but I will give you an update on my final choice!

#SewScottish – let’s meetup!

The last 24 hours have been whirlwind but it’s all good.

Here’s the thing, both Lesley (sew_sleep_deprived) and I know that there are fantastic sewing blogger meet ups south of the border but we’ve yet to see anything in our bonnie land. As Lesley mentioned, Leeds meet up and The Fold Line are now well and truly established. 

We are both excited to start something off in Edinburgh with fellow sewing bloggers.


scotlandsewingbloggers
Come on all you budding #ScottishSewingBloggers!

I’ve got a great feeling about meeting #scottishsewingbloggers and talk all things #sewing over cake and your chosen cuppa! 

How could you turn down cake and sewing talk?

Come on, let’s embrace this as it would great to exchange tips, news, hidden gems and also celebrate our talents!
Both Lesley and Myself are open to suggestions, so please contact us!

Would a WordPress site be a good place to start as a central base for meetings and chat?

Meanwhile please spread the word by using the hashtags below and #sewing #scottishsewingbloggers #meeting and of course,  #sewscottish !

Ooooh excited for #SewScottish

The Big Day is Sunday 27th November.  The venue is yet to be finalised, but at least we have a date!  All you need to be is a sewer, be it novice, beginner, intermediate or professional and have a current sewing blog!

I’m hoping we can build a community just like Leeds and The Fold Line but have our own niche! 

Super excited to meet all you lovely Scottish Sewing Bloggers!

Sewing Adventures – Biggar Stitches, Biggar

Situated in the Scottish Borders, in a not so sleepy town is a little haven of craft fabric galore. It’s a little gem for patch workers, quilters and dressmakers alike and It’s definitely going to be an addition on my “fabric shop” page.

I’d been looking at the website for a wee while now – then today I had a couple of hours to spare, so I hit the nail on the head and just went for it. I jumped in the car and headed down to Biggar Stitches.

Pandora’s box awaits!
Biggar Stitches is situated just off the High Street. Between Spar and Ladbrokes there is a  close, follow through and you shall find the wee gem. There’s plenty of parking on the high street too.

Just wait until you go inside!
Fabric & sewing accessories galore – just marvellous!
I wonder if you can have fabric dreams if you lay your head down for short while …
What to choose, What to choose??!!!
This is being added to my shopping list for my next trip!
I am in love with these buttons!
Craft Fabrics can be also used for dress making as they are 100% cotton!
I am in fabric heaven
It was a beauty of a day to drive down through the Scottish Borders.
What I bought – a few bargains from the sale bolts (still gorgeous craft cotton).

My goodies from Biggar Stitches

Fabric – Brown and Pink, enough to make a dress, Blue flower fabric, will be a skirt and the small triangles are fat quarters for my FQ Stash! I couldn’t not help myself and buy the print by local Custom Vinyl Decals. 

Travelling by car – it took me about 40 mins from Bonnyrigg.

By bus – Stagecoach 101&102 from Edinburgh City Centre (Bus Station). I think the bus stop is very close to the shop, but don’t quote me on that please!
Disclaimer: All views are my own And I had permission to take photos inside the shop!

Sewing: Sequin Time with Simple Sew’s – #017 Sophia (Update 3 of 4)

When I decided to cut out the sequin fabric with my rotary blade I had no idea how tough it was going to be, but that didn’t stop me from doing just that! Actually was that wise?

I did it.  But I’m sure my rotary blades will now a) need a sharpen with tin foil or b) need a new blade.  Oh well – a lesson learnt there.

Talking of rotary blades I may be purchasing a new one for ease of use. Spotted a fiskars blade that looks a little less fiddly in Biggar Stitches!


So after cutting out the front and back of the top I then pinned it all together and  tried it on.  I knew that I had to put darts in because I made up a toile earlier, so I did just that and then had to get my mum to straighten then up whilst I wore it!

Now I just wished I removed the sequins along the seams to ease the job for my machine (I’m sure it felt pain when stitching the sequins – I did).


Sewing the sequins was nerve racking (my first time doing sequins).  My Brother did the job, the top does need a press as the darts haven’t got the finesse finish I wanted.


I’m glad I added the lining – less jaggy!

Time is running out and rather get into a state like below, I’ve opted to wear a “bought dress” – fear not the dress will be completed for Christmas and worn then!

Trying the homemade garment on was a near death experience as the pins scratched my arm – ok, maybe not near death but still, beady sore!

The backup garment: Katya Kimono Wrap Dress

At this point, the top needs hemmed and finished off.  The skirt still needs the waistband on (which itself needs interfacing applied!! (Note to self: you need to buy blinkin’ interfacing!!)), zip applied, possibly now lined and then hemmed.

The final update should contain a picture of me wearing it! Watch this space!

Happy Sewing!

Some places I went to online for advice:

http://www.burdastyle.com/blog/sequin-savvy

Sewing: Great little chart!

Pinterest is fascinating and very addictive! I often find myself pinning loads to my boards and creating new boards to try and keep organised – ha (laughing at myself on this one)!

This morning I found this great little chart via Take Lessons and thought I’d share it with you all! 

There is also a free printable for your sewing space too!

Seamwork: Why I love it.

Colette has always been a firm favourite for patterns which me and as you should all know by now I am a sucker for patterns.  Learning that they go that extra bit is quite exciting and since I have signed up for a subscription to Seamwork I’ve been reaping the rewards.

Processed with MOLDIV
Sucker for patterns, like I said!

Every month I get two credits to spend on 2 patterns from the Seamwork library and on top of that I get top tips, articles, techniques and creative ideas into my inbox!


My Seamwork Library


I’ve got quite a collection now, but I’m eager to start on the ‘Akita’ as I have two pieces of fabric that fit the bill.  But more on that, once I have finished the Sophia Top & Skirt!  I just love Akita!


Seamworks’ ‘AKITA’

Most of the top tips have proven quite useful have helped me in my sewing adventures!

I’m also signed up to Snippets with Colette and get regular updates and tips via email – they are just great and spur me on with my creative juice – like I need any more juice.

I have a referral link if you would like to join, that way you get your first month 1/2 price – we all win!

I’m not being sponsored but any company or anyone – just trying to share the sewing love!

On that note of patterns – I am trying to have an online database of all my patterns to date! I’m currently noting all of them down and then I will input them into a spreadsheet and I can then access it via drop box – go me!

Have a nice day.

Emma


Sewing: Tuille Time with the Simple Sew “Sophia”(Update 2 of 4)

On the last update, I mentioned that I had graded the pattern up following a couple of resources online, which I did but then I back tracked and went for the biggest size on the pattern as they said they were the sizes are quite roomy.

The skirt has worked out rather quite well with pleats too. Fairly chuffed with myself considering it was probably quite foolish and risky to do so.

On reflection, I may add 1/2 inch to all sides just to give a little room for that wedding breakfast!

Please ignore the PJ top 😉

I like the length, it’s ideal as it will show off the shoes I intend to wear and I won’t (hopefully I won’t) trip up running (ahem I mean dancing 😂😂😂) around in the Ceilidh!

Like I said in update one, the top should be fine, in fact, it isn’t – as it back needs altering as the fabric catches. I also need darts either side of the front bodice. It also needs an inch to have that hanging effect the pattern shows! Argh! 

Carefully marking out the blueprint
Here’s me thinking it would be a breeze, yeah right ..

It doesn’t look too bad from this angle!
Defo needs darts on front bodice!
again, ok.
Drat!
I’m going to have to amend the top somehow, better get cracking!

And so I did amend the top by going back to the pattern and adding 2cms to the seam. There is a lot less scrunching up at the back and I feel I can actually breathe in it 😁

The amended top bodice blueprint!
High five to me! 

Side on and smiling!
A lot less scrunching now and it should lie better in the sequin fabric!
Grinning like a Cheshire cat – still need darts!
 

I will let you all know how it all goes in Update 3 – cutting the real fabric!!

Oh the funny thing is that my husband thought I was wearing this tuille to the actual wedding – EH NO!!  I had to give my reason to why I wasn’t wearing white to the wedding of my closest friends’!

 ​

Online Resources used to figure out how to grade up these sneaky pleats:

How to Grade the Kelly Skirt

http://www.jenniferlaurenvintage.com/2014/09/the-dalloway-pattern-grading-hips.html

How to Grade a Pattern Up: The Easy Way