As I start to write this, it’s 3 days into this brand spanking new year and for the month of December 2021, I’ve been really narrowing down what I want to sew for the Make Nine Challenge 2022.
A lot of people don’t like set goals and although I started off well in 2021 (I completed 4 out of nine garments before April) but then all the patterns were like “make me Emma”! For some reason, for once this didn’t overwhelm me into a loss of sewjo, in fact I made over 70 items, most of which was clothing for myself apart from one or two presents including a Jude Beanie and a Jackson Pullover for Paolo, my husband.
I’m trying to make this years goals more realistic using mostly fabrics and patterns from my stash, which seems way too sensible for me.
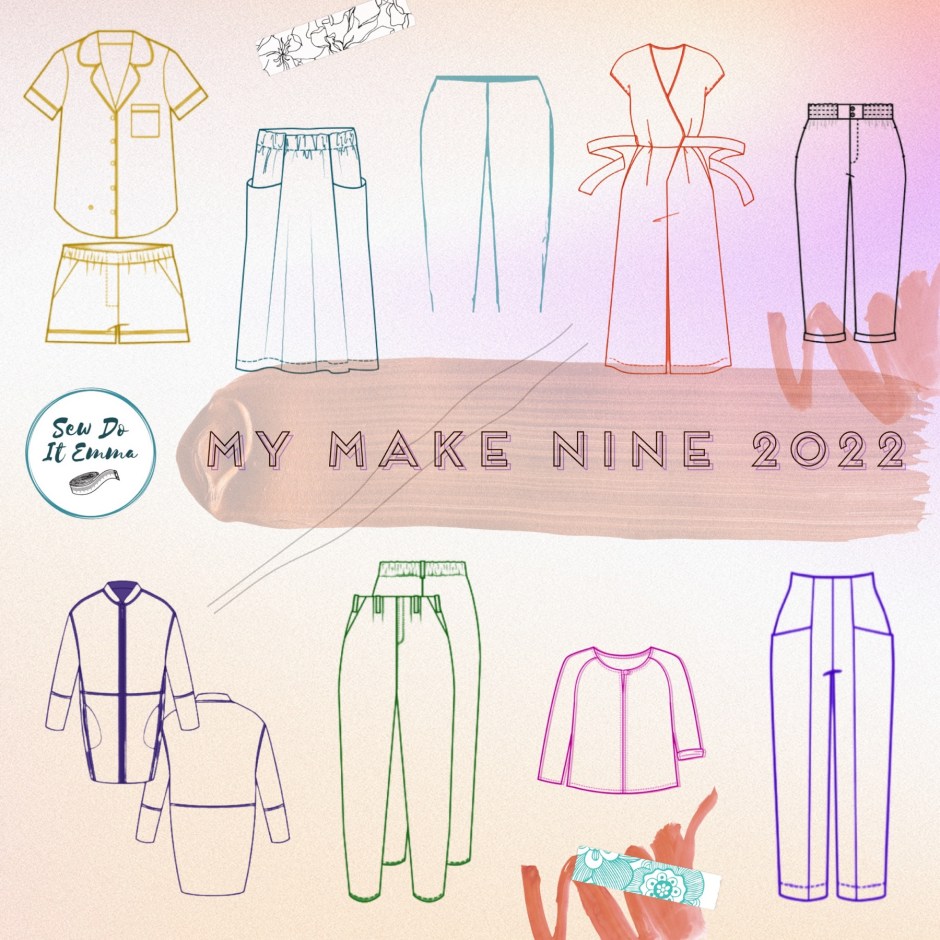
But anyway here’s my make nine 2022 plans …
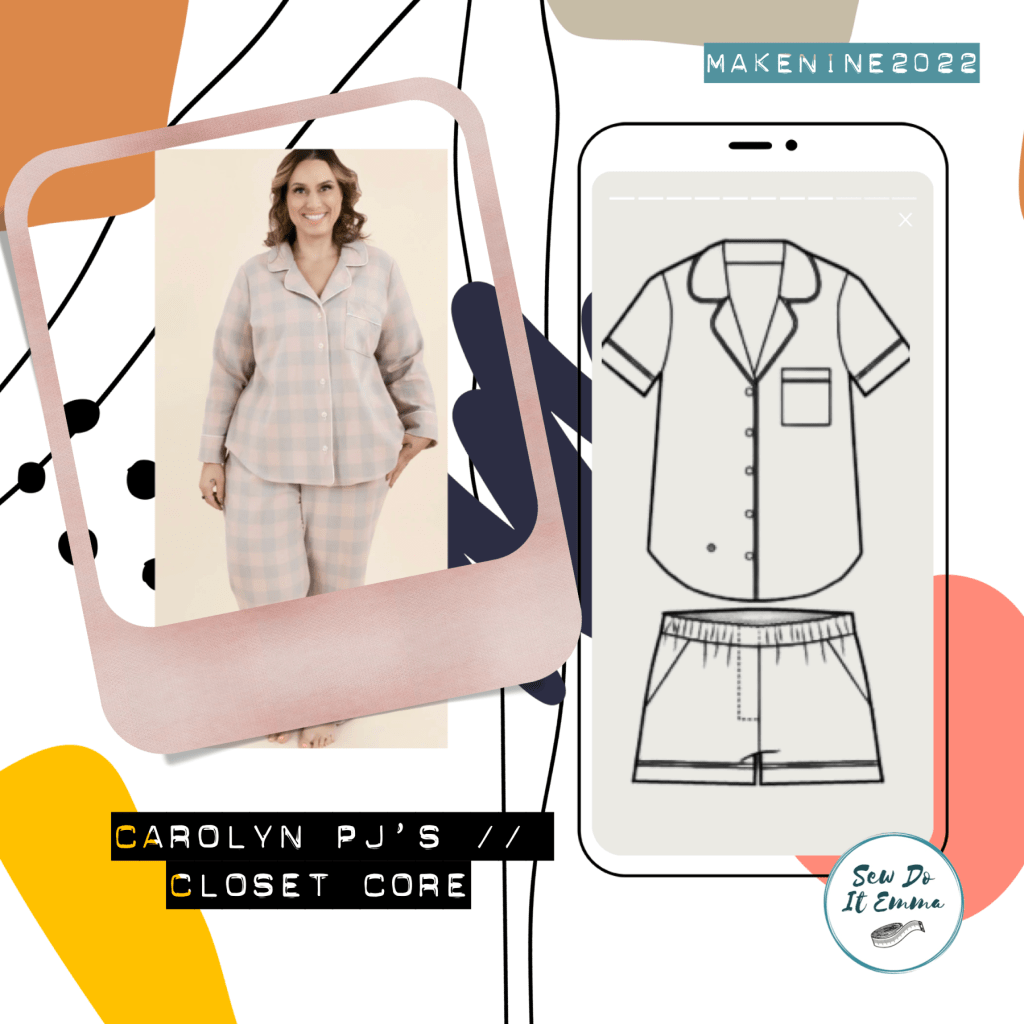
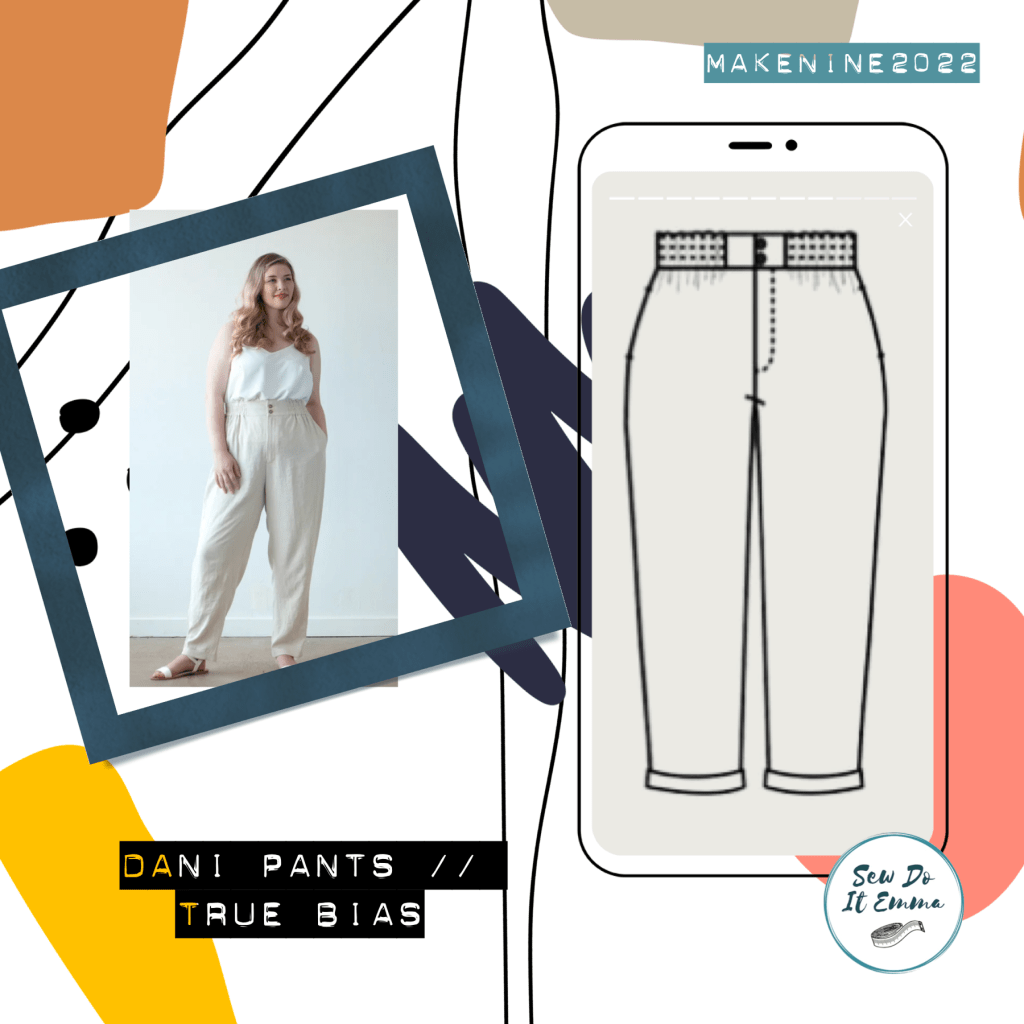
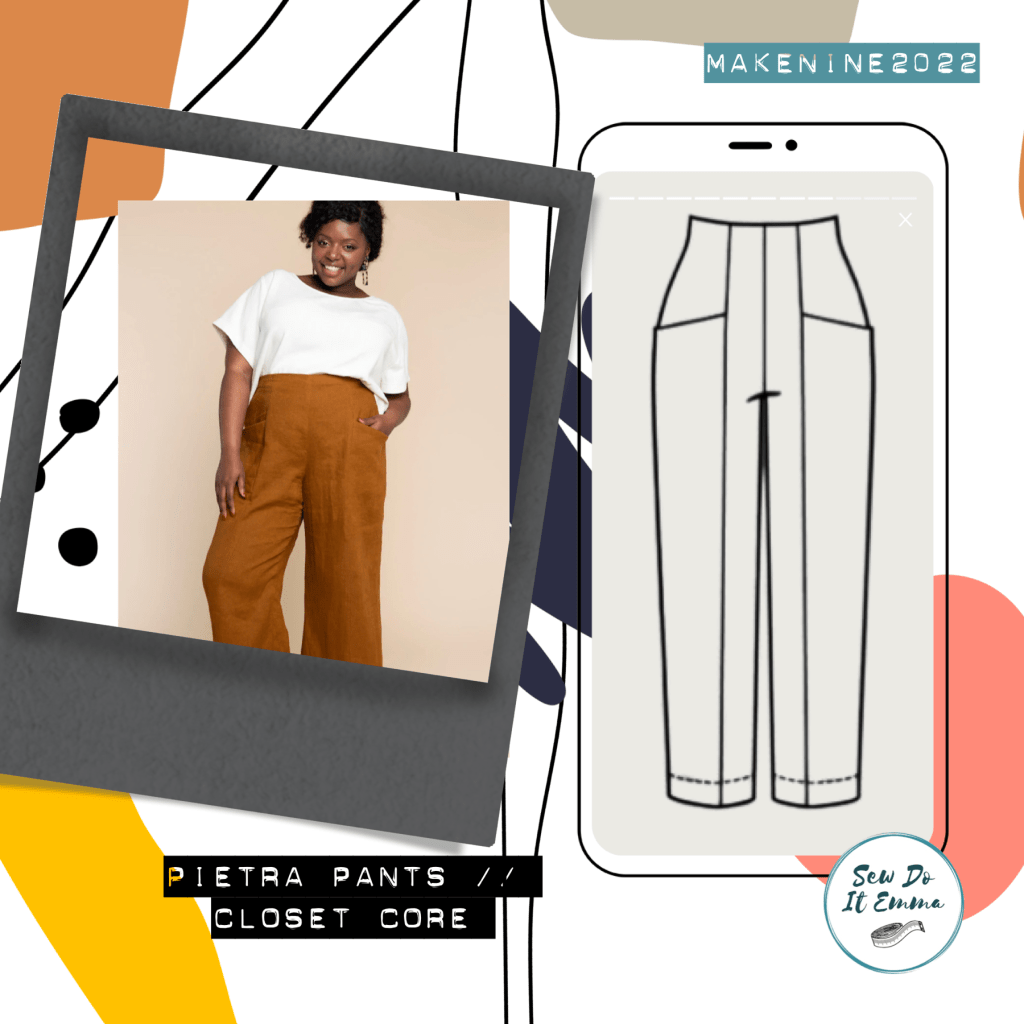
Magna Pants from Jenny Rushmore of Cashmerette Patterns. The Paper Theory’s Zadie is the only pattern being carried over from last year’s Make Nine. I’m opting for the shorts when I do the Carolyn PJ’sHoping to make a linen Remy! I think these will be my new to reach for when make them! I gotta feeling! Spurred on from Yvette aka @blossomsandwich on Instagram from her recent vlog on her YouTube channel – gonna give the Dani’s a spin too!I think this will be my first make nine project to tackle this year! Yes, I’m on a whole trouser journey- can’t wait to make the Pietras!There’s a gap of Skirts in my wardrobe, so opting for the Pocket Skirt this year.
So that’s my choices of patterns for my Make Nine 2022 and I’m planning to write a blog post with the choices of fabrics to go with each project, which I’m finalising at the moment.
I hope however you celebrated your holidays, it was a good period and regardless how it was I really hope 2022 is bigger and better for you.
Oh wow! What a Year. I’m super grateful for all the unforgettable and amazing experiences that I’ve collaborated on, whether it’s been testing for designers, blogging in return for fabric or being part of an amazing community on Instagram.
It’s been a rather busy one regarding testers as there has been 15 so far … I’ve had to turn away a few because let’s face it, I was burning the candle at both ends and running on empty. But it’s good I know my limits, well sort of – it’s been a steep learning curve!
I’ve been counting up the makes that I’ve made this year and there are over 60 – yes, I’m not sure how I’ve done that but somehow I’ve sewn over 60 garments this year and yes it’s still adding up as the year is not over yet – It’s only mid-December, we’ve still got over a fortnight to go.
I’m always taken aback about how many likes, comments and engagements I receive, I’m still absolutely humbled by the kindness of strangers, some of which, now really good friends that I’ve met IRL, some that I’d love to share a day with and meet. I keep looking at my stats on Instagram and still shake my head in utter disbelief that I’m over 4.1K. It’s been a lot of hard work on my part, but I’ve enjoyed it. Interacting with you, whether it’s been on IG, email, youtube has been one of the best parts of 2021 – it’s kept me going.
My YouTube channel has been organically growing since I picked it back up over a year ago and I enjoy thinking of ways to bring you content on that media. I must admit, it’s hard work doing the editing – but I’ve learnt lots, and still continue to. I often have ideas bubbling over in my head for months before I get the momentum and confidence to actually do it. I was particularly slow at taking up VlogMas due to the commitment thing, but I’m enjoying showing some parts of my day to viewers and subscribers alike.
I’ve not thought about my favourite make of 2021 – yet! I better get thinking though, time is running out. One of my favourites is the Davenport in the pink spotted viscose as part of collab with felicity fabrics and the other is one of my Wildergowns.
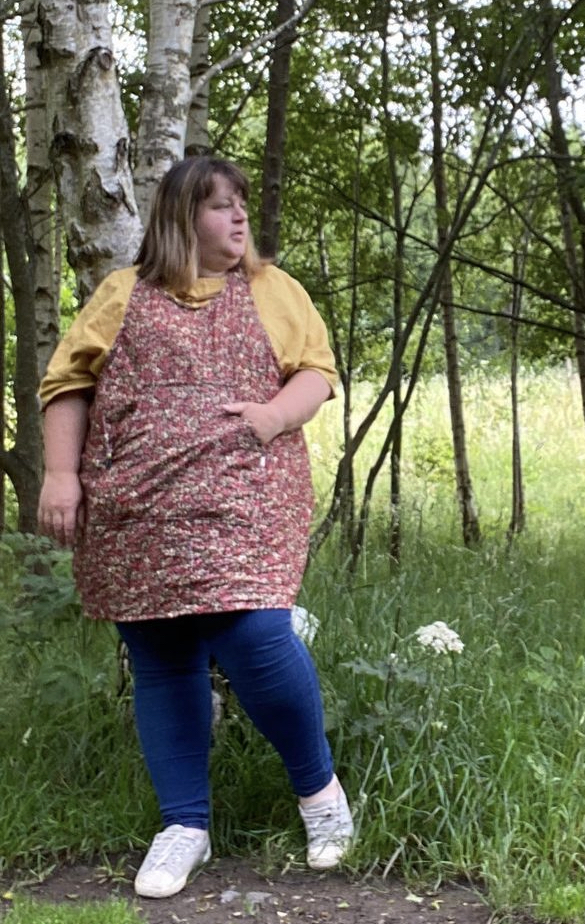
You may have noticed a shift with my makes. Earlier this year on my IG stories I shared a whole load of fabric pulled from my fabric stash which I put potential outfits together and asked on stories if it worked. I’ve kinda got a good eye for this and really do get a buzz out of it. This was the start of something huge for me – OH BOY … HUGE!
For me, dresses will always thrill me but I need to and I want to invest in separate pieces such as skirts, blouses, tops, cardigans and of course trousers. My make nine 2021 mirrored that as well, which must have been an underlying catalyst to start this shift from just sewing dresses.
Ok, I’ve not completed my 2021 Make Nine but it’s been my best year so far, In previous years I’ve only completed 1 of those! I’m on the fence about carrying over the makes I haven’t completed/sewn from my make nine 2021 to next year. I still want to make them but feel if there’s a fresh board for nine makes, it might spur me on. There’s still 5 makes on 2021 make nine but I’m taking four and a toile as a win!
My Make Nine 2021 – a win?
I still want to add separates, particularly trousers. If you follow me on Instagram you may have seen the fitting drama with the Megan Neilson Dawn Jeans. Like many others in the sewing community, the Dawn Curve hasn’t been straightforward. Before I even looked at the instructions I knew it wasn’t going to be straightforward as a pair of culottes (jeezo, I love culottes!) but I think that worked in my favour. I wasn’t overwhelmed – my brain was open to “ok, we can fix this in a rational state .. at some point in the future” (we still need to re-toile them with the adjustments – maybe 2022?!).
Looking at what I need in my me-made wardrobe, has maybe helped me with my fabric stash – ok I’ve been on a ban since the latter half of the year and am due to come off it in January but that hasn’t really made a huge dent in what I’ve got, perhaps this coming year it will, only time will tell. I am in a privileged position to have such a stash and I have to admit still feel overwhelmed with how many projects I have planned or with the actual stash. I have had very successful destahes in the past, most of which have allowed new fabrics into the stash, which beats the point of destashing, doesn’t it? But the ban has opened me to potential outfits from my already existing stash rather than shop, which is good. I’d like to keep pushing myself to use the stash and make new outfits. So I think that’s one pledge I can take into 2022. It’s quite a big pledge.
It’s been a good year for my confidence and sewing. I’ve learnt to really accept my body, whilst others might not – but that is their problem and not mine. I’ve just accepted what I have is me. Sure, I still have many moments in my head doubting if I can pull a certain outfit of but that’s half the battle.
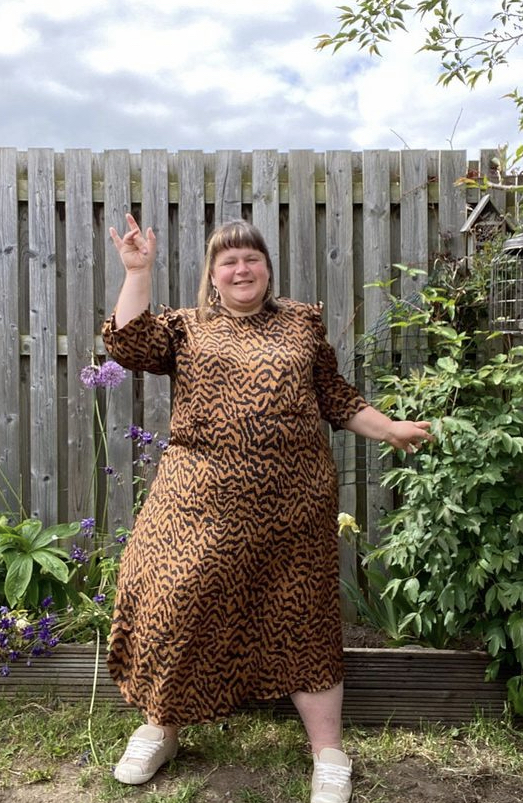
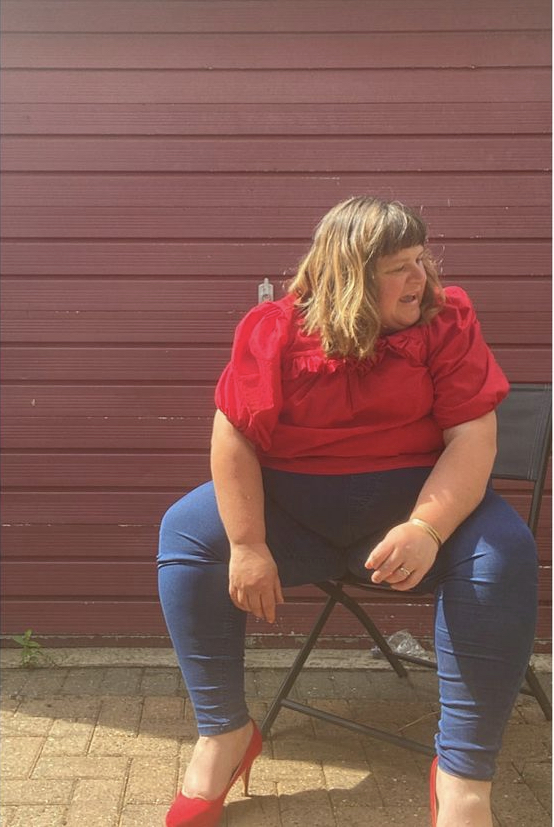
I’ve put a slide show of some of the garments that I’ve made in 2021 for you to enjoy.
As Always – Thank you so much for taking the time to read.
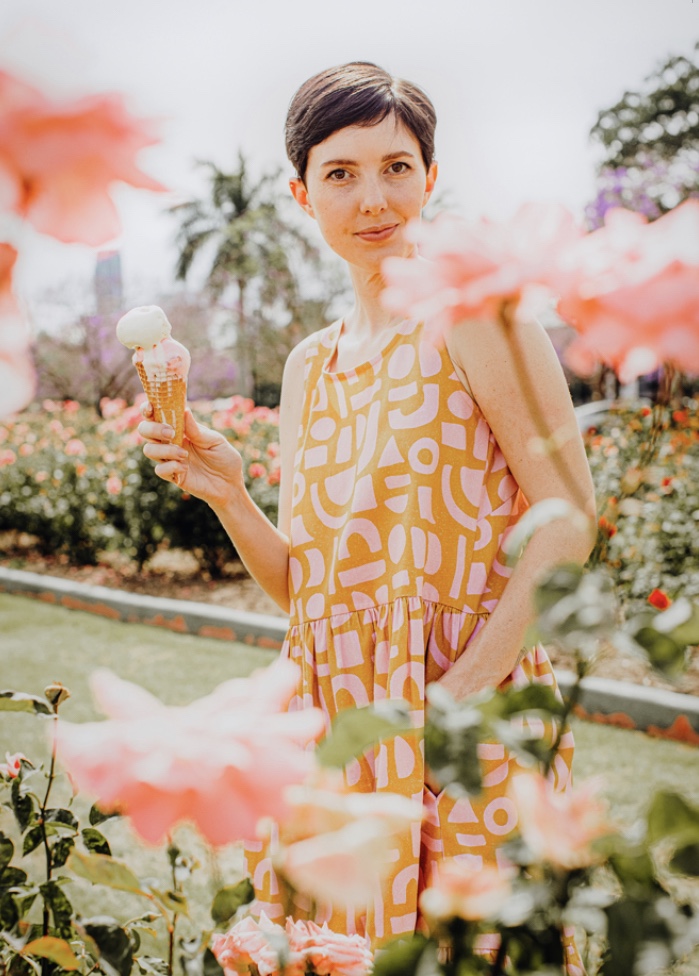
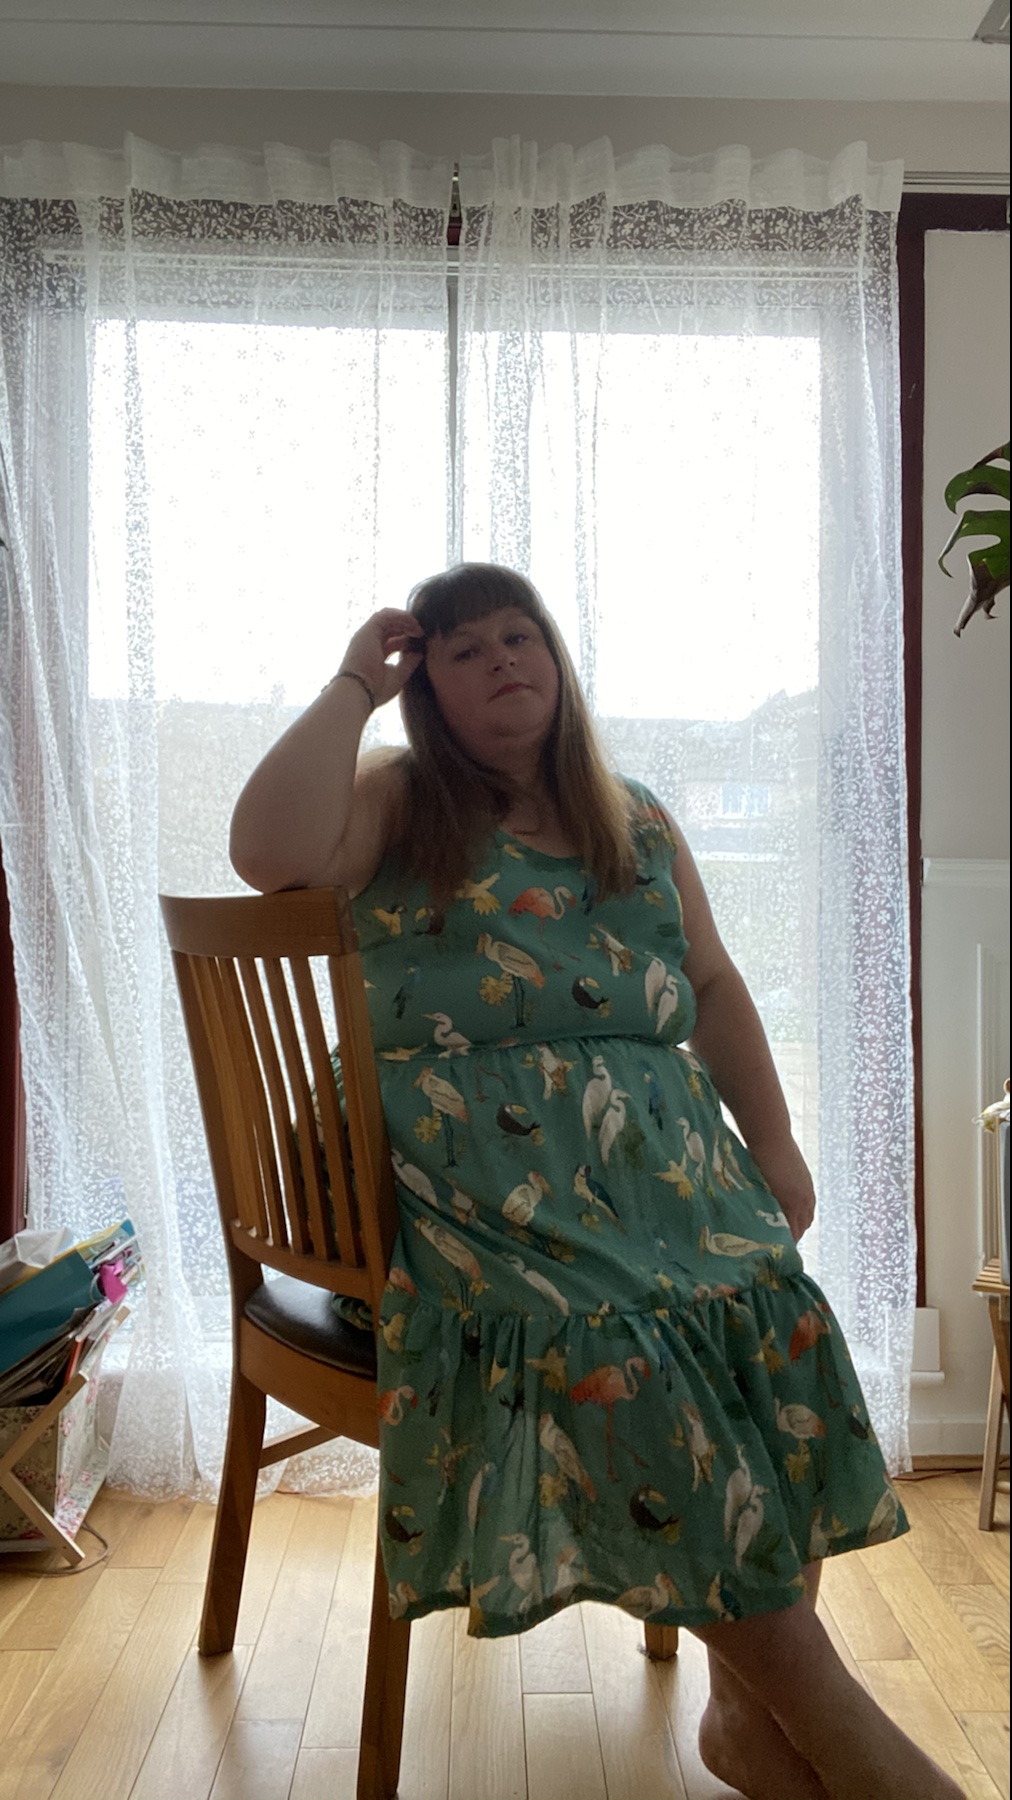
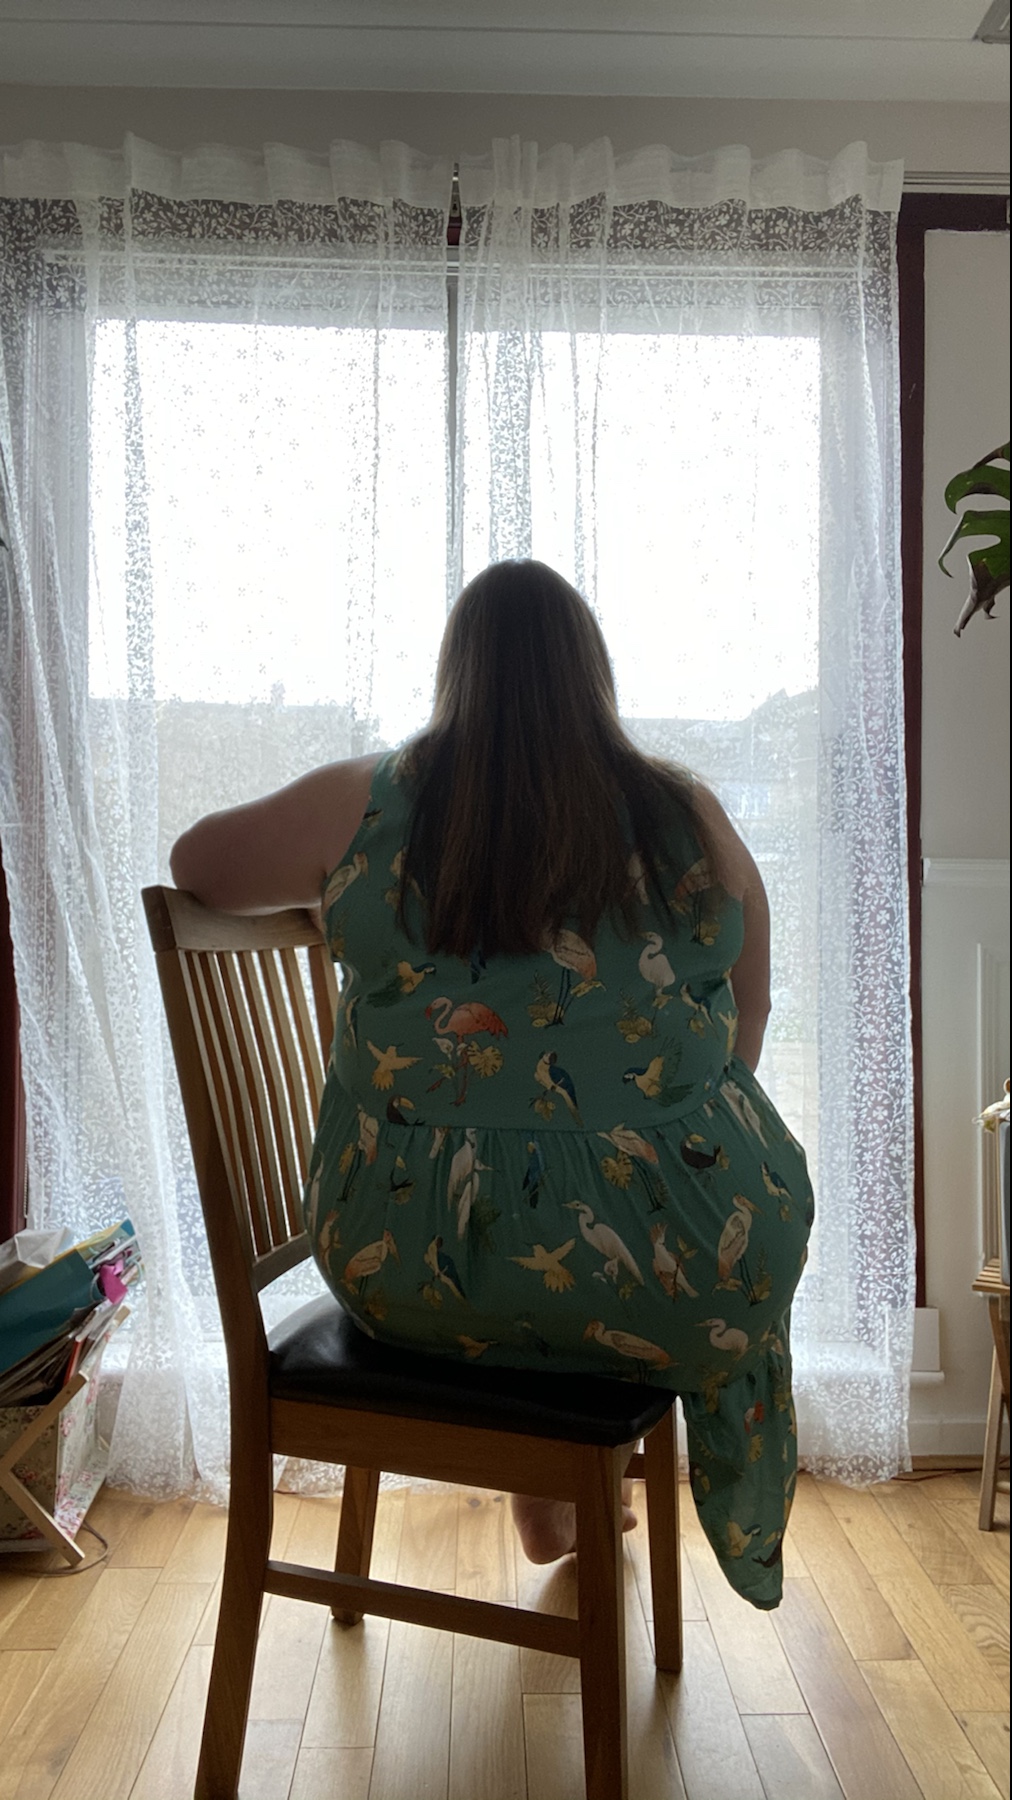
The Bardot Dress has a decent size range and a good amount of ease. The body measurements start from high bust 28, full bust 31, waist 24.4 and hips 34.6 inches to high bust 51, full bust 53, waist 46, hips 56.3 inches.
Because of the ease and the amount of fabric I had I choose size H for the bodice and I.
The fabric that I choose was “Bird Parade” viscose twill from @FabricGodmother … which I think suits this dress so well, especially for a spring summer print and dress!
I used 3 metres of this viscose twill and that’s all I had. I didn’t use the fabric layout … recently I’ve been playing pattern Tetris and loving the challenge!
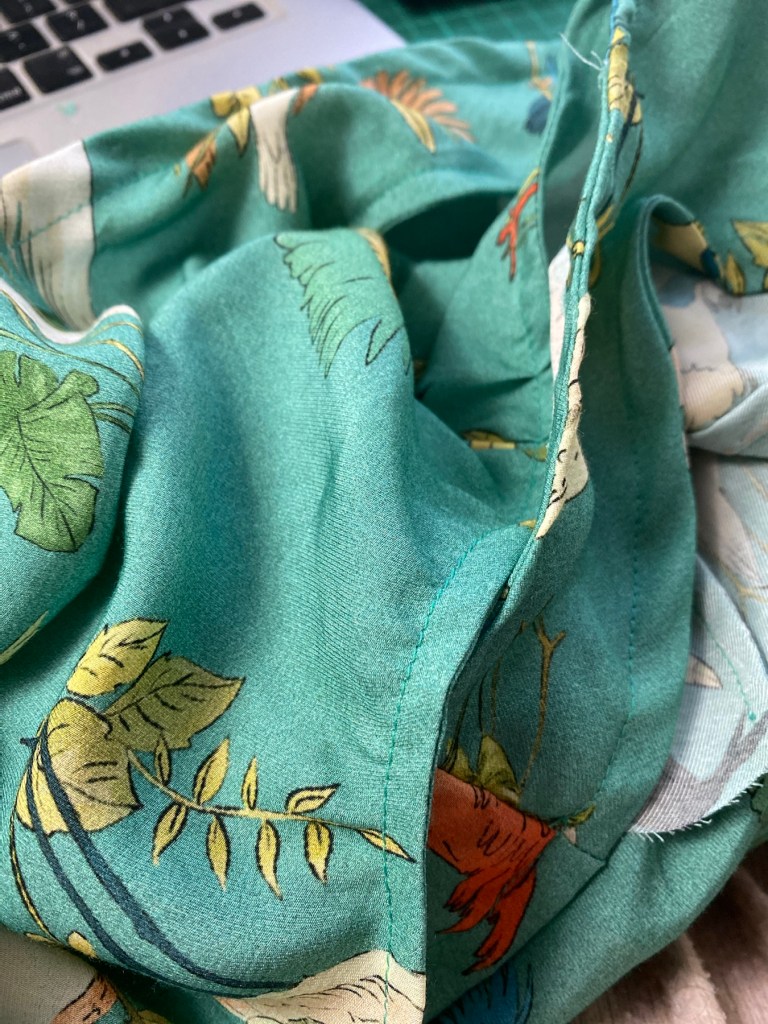
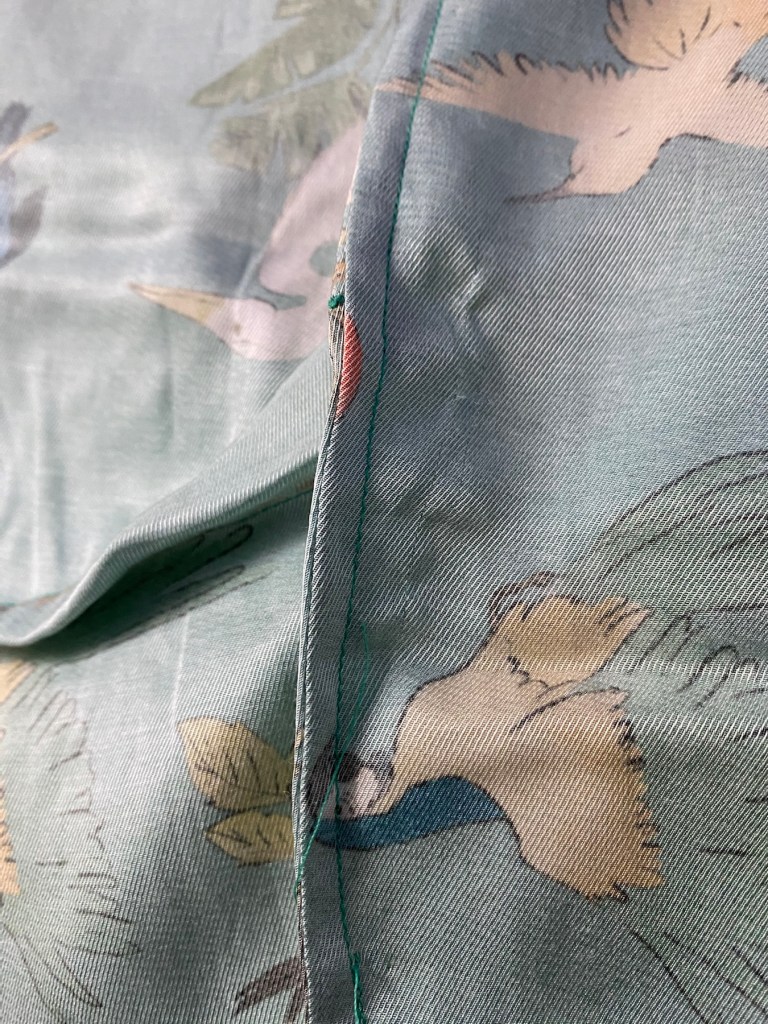
Sewing this up I noticed the fabric was fraying ever so slightly but it was as bad as other viscoses but I did try out French seams and they are on the majority of seams including the pockets and the bodice! This was my first time trying out such skills and I’m gobsmacked that it worked out so well.
French Seams!
I made my own bias to add to the edges just by cutting out strips of 2cm wide on the bias on a s small piece of left over fabric. It wasn’t straight or neat but it does the job and you can’t see the wobbly edges as they are on the inside.
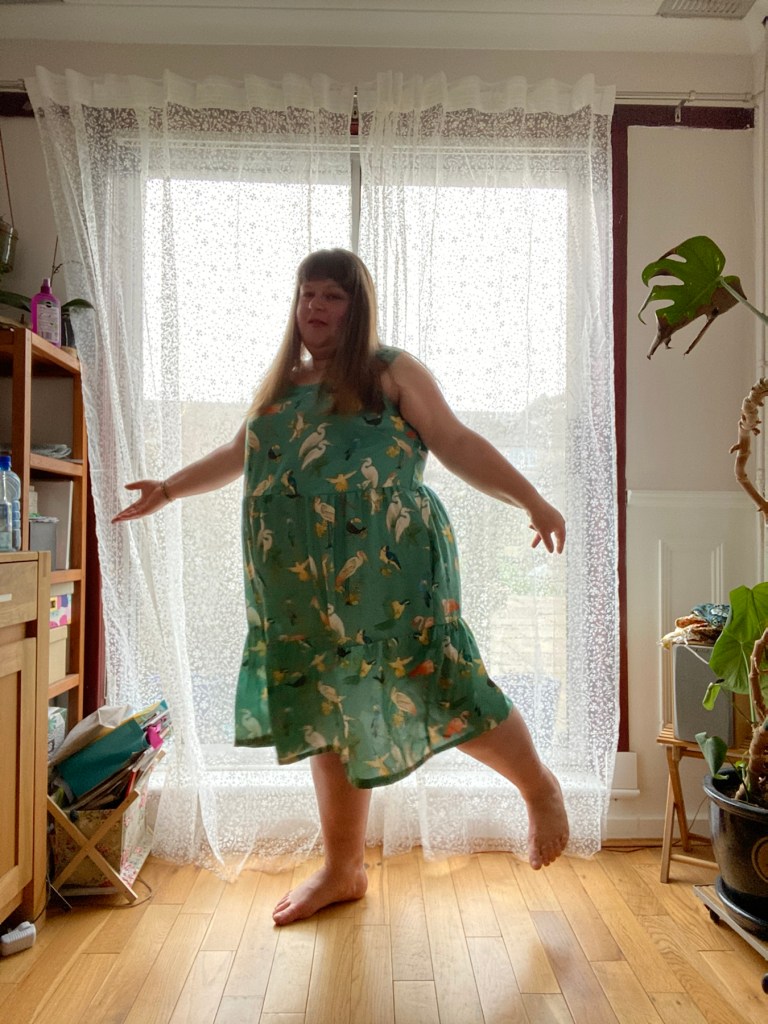
This dress took a lot of gathering and I mean a lot! Lots of patience, even more pins and delicate precision were required to get even gathers.
I’d definitely recommend this dress for summer holidays or lounging about at home on a hot day. The instructions are really good but I really didn’t use them that much. I kinda just went for it!
When I do this dress again and I will do it again, I’ll size down further on the bodice and shorten the shoulder straps and I’ll probably shorten the bodice. I’ll still swan about in this dress though as it’s got swoosh appeal!
I just want to thank both Ruan and Sam for this amazing challenge. It’s been so nice to see so many lovely makes from the community and find some more free patterns that are size inclusive. On that note, I think I’ll be trying the Peppermint Maxi Dress and the Lucia from Mood fabrics, very soon.
Disclaimer: I was given the Block Tee from Tara (Paper Theory Patterns) in exchange for my thoughts. I didn’t have to post anything but here you have it!
Image from paper theory – the block tee
Formerly known as the Kabuki Tee it’s been given the new name and now goes under The Block tee.
Line Drawing of the Block Tee
After some feedback and consultation with the community, Tara felt that having no Japanese heritage herself, it was only right to change the the name.
As well as a big name change, The Block Tee has has some small changes in the grading. This was also from feedback from previous customers. The change is small yet will help with the fit on the shoulders. The shoulder grading increments has decreased between the sizes 18-28, so the length of the sleeves aren’t as long.
Making the Block Tee was fun, quick but somewhat challenging as doing sharp right angle turns is not a quick job and you want to take care doing it.
If you are stuck and I was just needing that little extra visual, Tara has a really good video of how to do the Right Handed corners on her website, which helped me a lot.
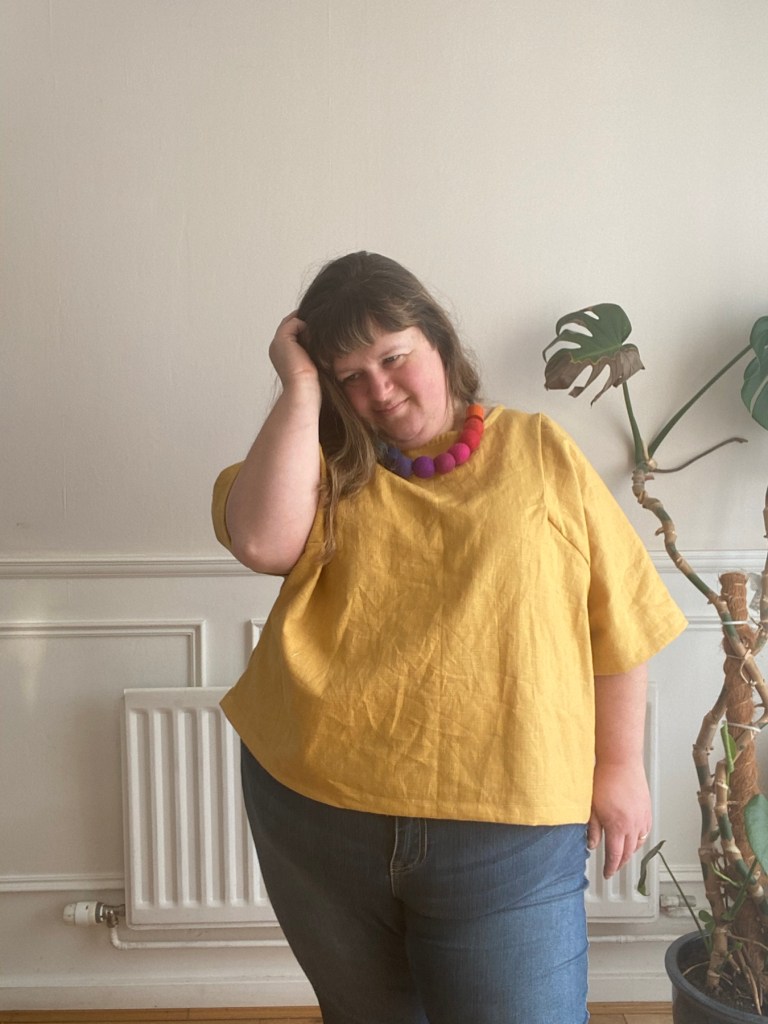
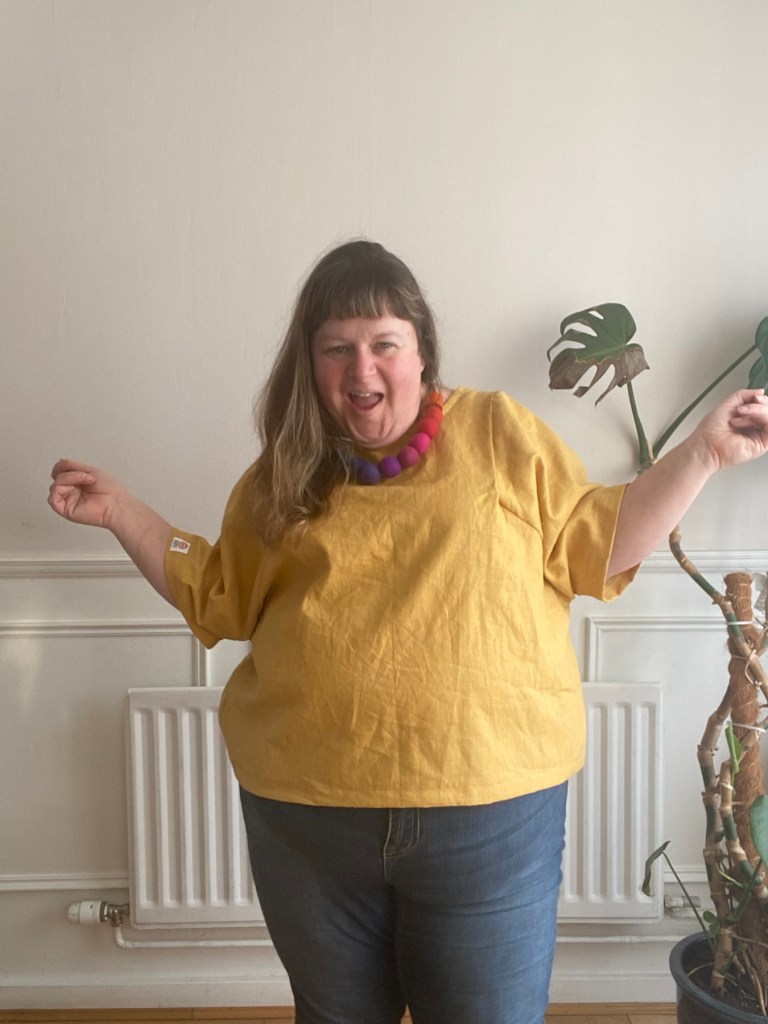
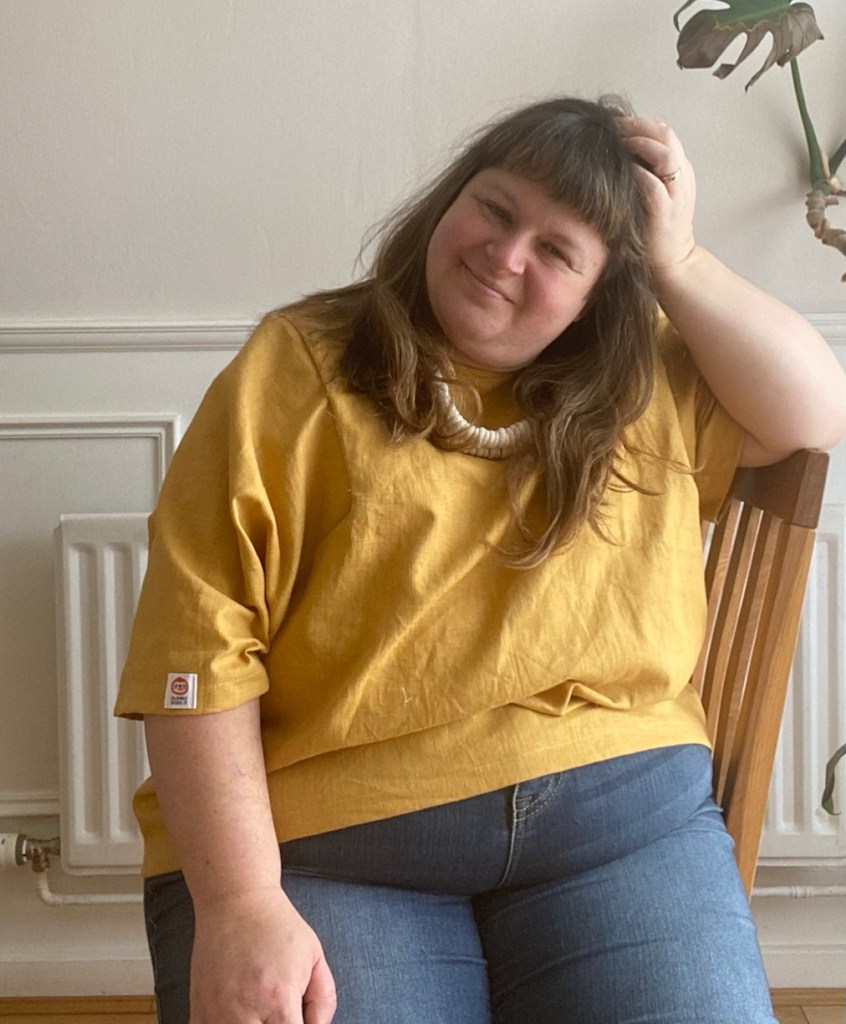
Without any doubt, I cut two Block Tees’ … yep I didn’t do a toile, yep I’m a bad ass but I had totally faith in Tara’s design. I used linen: mustard yellow from Selvage and Bolts and the green from Blackbird Fabrics.
I graded from a 22 at the arms and bust to a 26 at the hips. I could always go down a size all over since the pattern has lots of ease.
I found that I used under 1.5 metres especially without needing to cut the piece for the bias binding as I wanted to use some of the bindings that I bought from The Specky Seamstress (The “Sewing Appreciation Society” Bias was received as a gift).
It’s quite a handy pattern and I feel I’m going to potential do a Block Tee with some of my scraps (watch out for that!).
I’m pretty chuffed with the results and yes I feel I need to practice these right angles! It’s a lot trickier than I thought but don’t let that put you off. Just take your time and pin pin pin!
Like most makes these days, before I start sewing pieces together, I overlock the edges. One for finish and two, to stop any fraying.
The details of the Block Tee are really smart. I like the lines that it has. It’s just has a different spin on the Box top.
I’m super chuffed that the block tee goes to 57.5”/146cm hip body measurements. It’s got a good amount of ease in it too. It’s going to be a nice staple in my wardrobe, especially in linen over the summer period.
If you haven’t tried The Block Tee yet and would like to give it a try, I’d definitely give you a gentle nudge of encouragement. However (again!), go slow round those corners!
The Mustard Yellow Block Tee Details:
Mustard Linen from Selvedge and Bolts
Label – “Handmade” This is for Makers
Label – “Slowly Does It” The Pink Coat Club
Bias Binding “Ruler” – The Specky Seamstress
Label – “Sewing is the F♥️cking Best” – Kylie and the Machine.
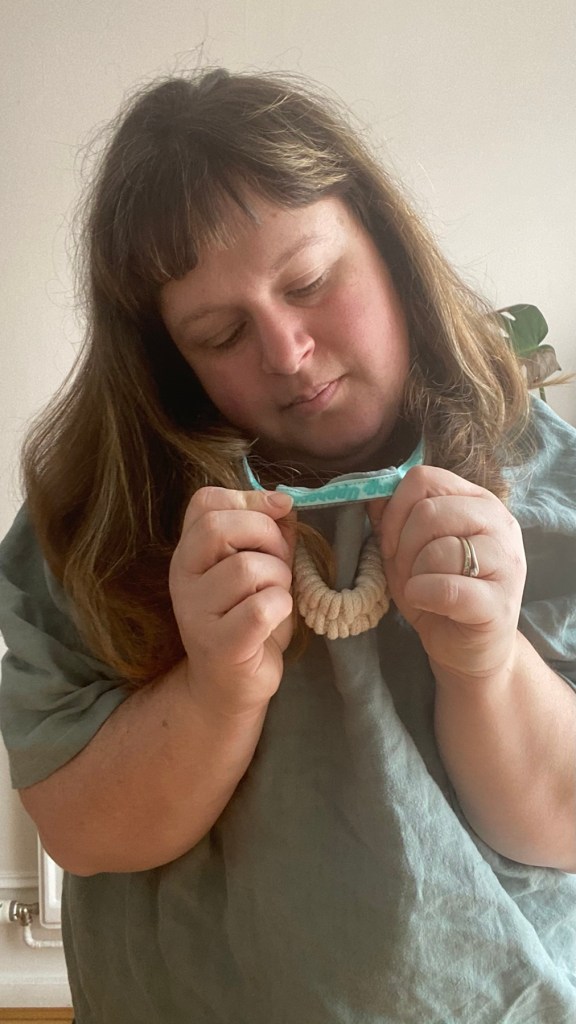
Necklace from Lynsey Walters
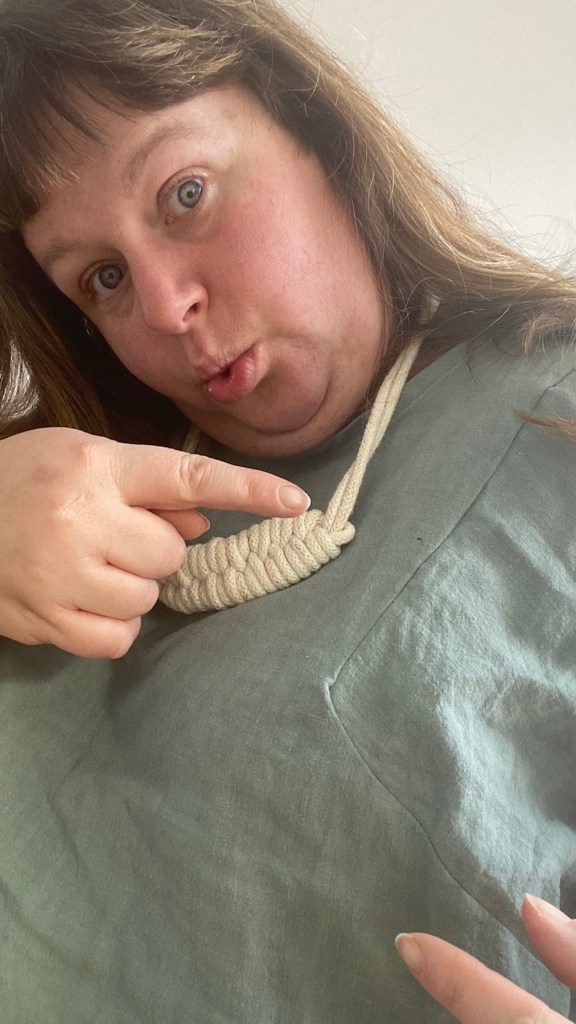
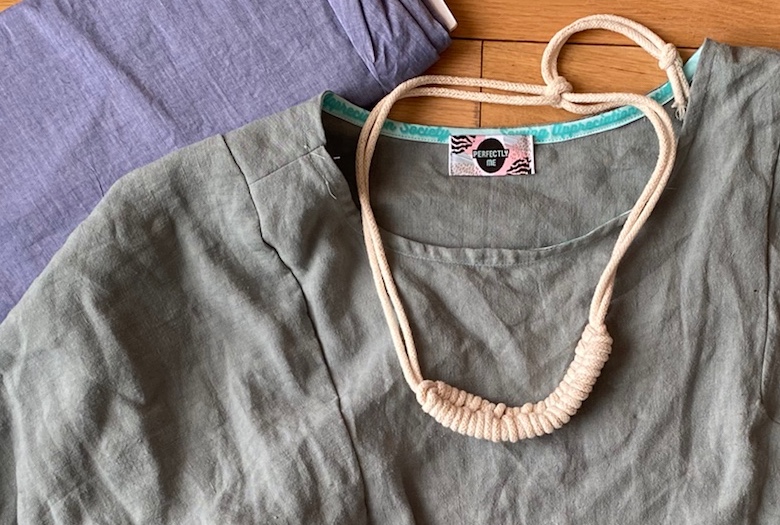
The Green Block Tee Details:
Green linen from Blackbird Fabrics
“Perfect Me” label from Little Rosy Cheeks
Bias Binding “Sewing Appreciation Society” – The Specky Seamstress.
Gold and white cord necklace from Stitching Me Softly
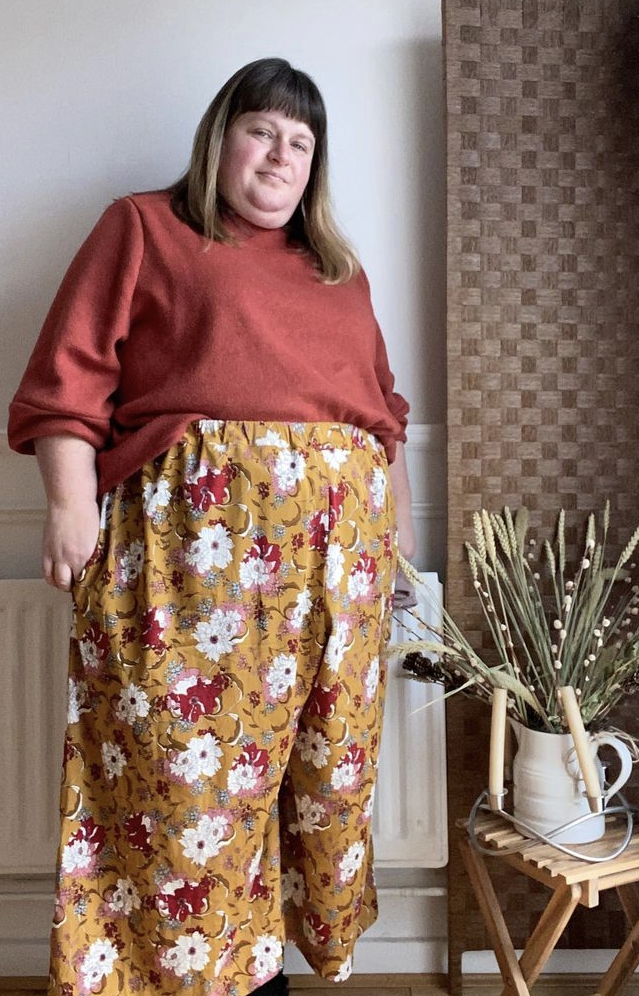
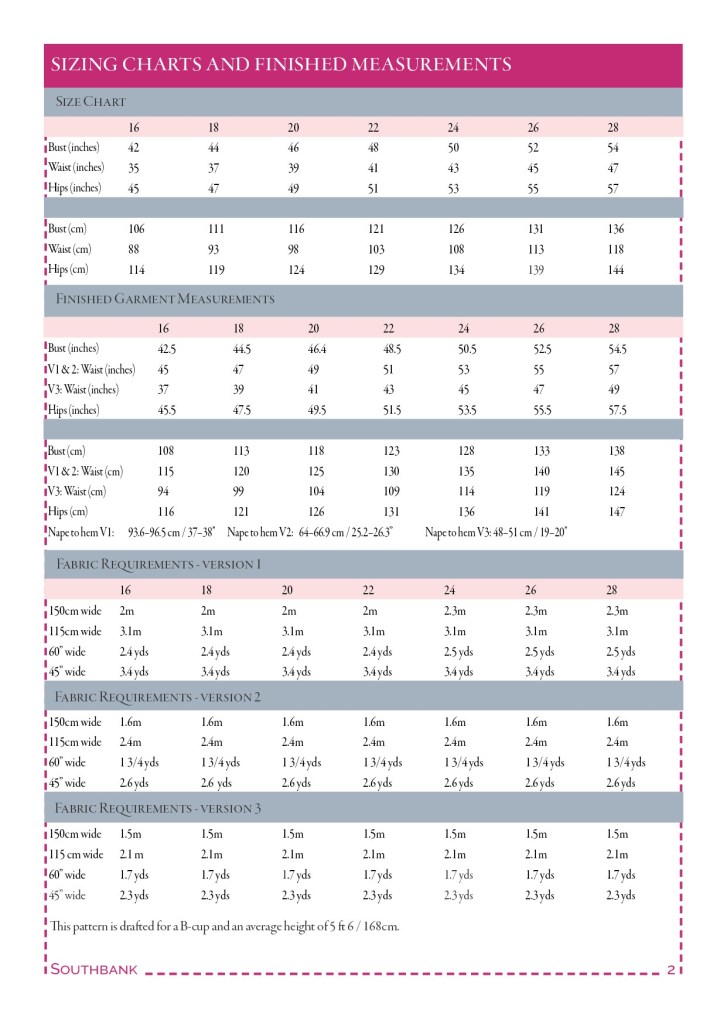
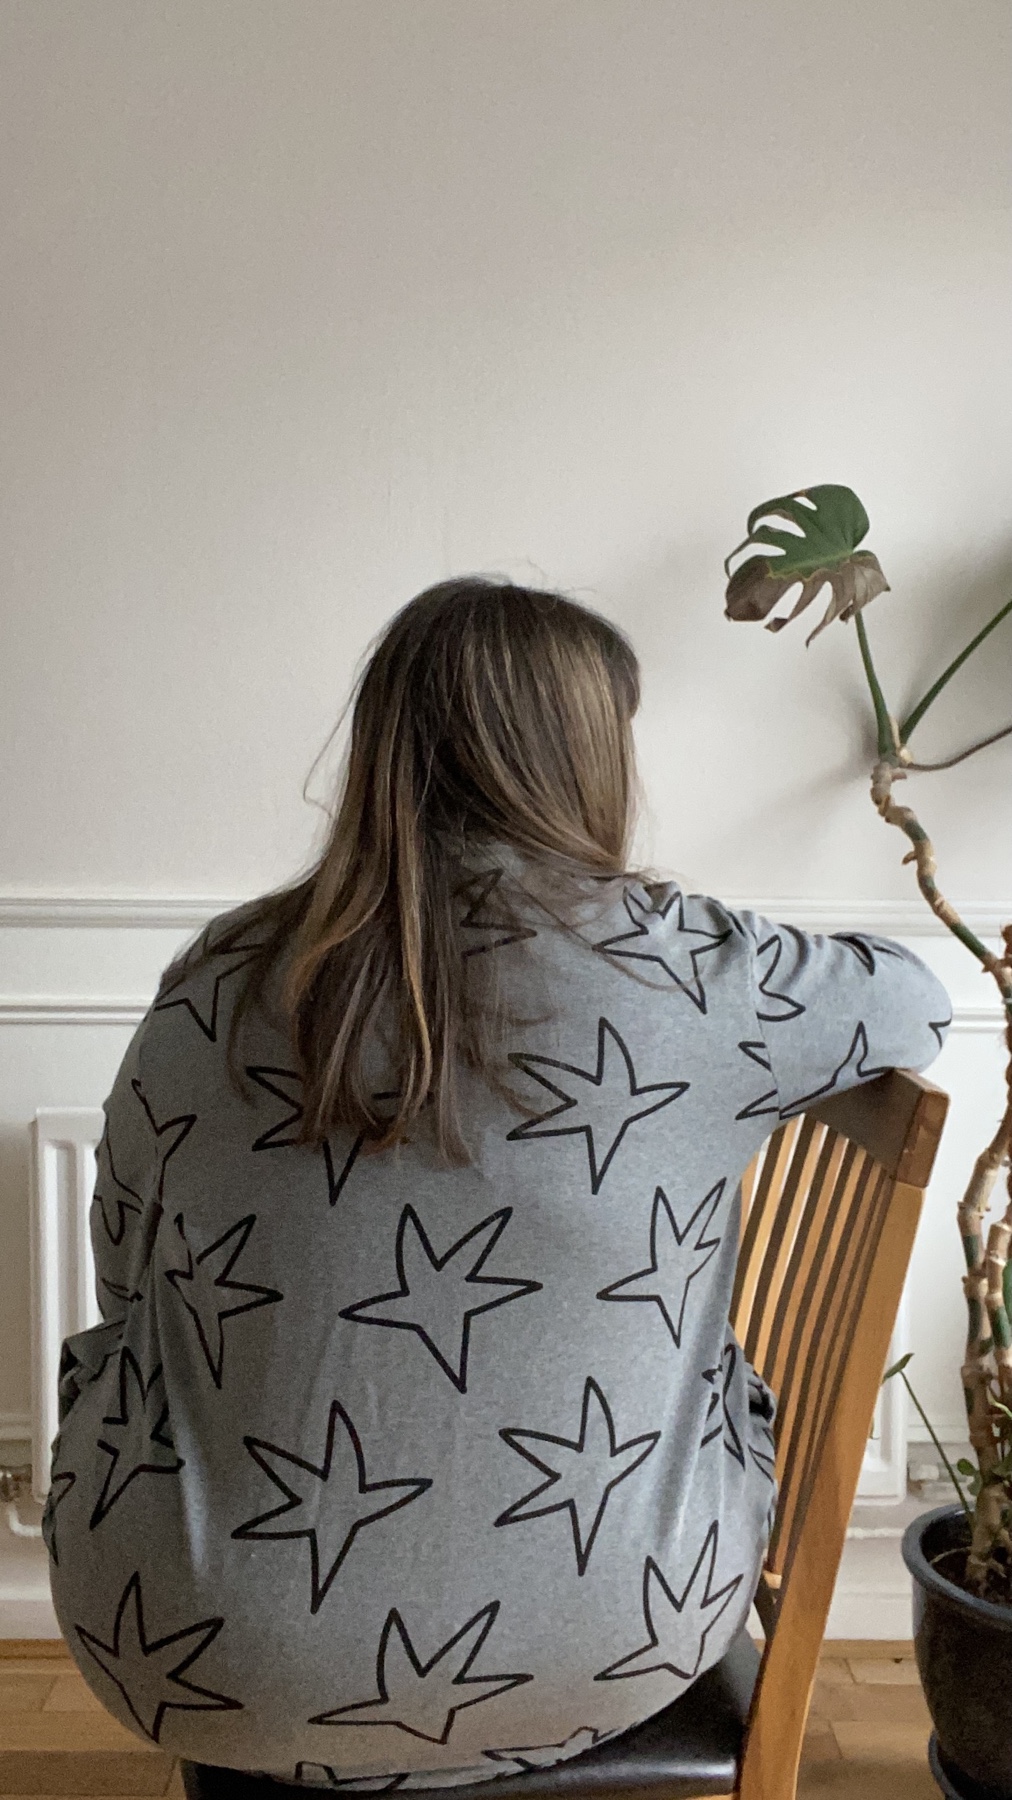
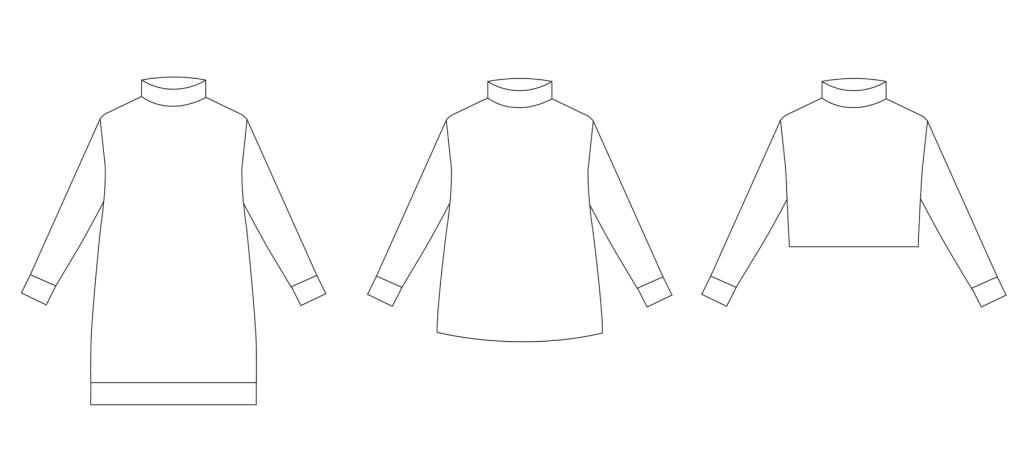
The Southbank Sweater is one of those patterns that since it was released was on my radar.
Unfortunately, when it was released back in the day, the sizing wasn’t inclusive but it didn’t stop me from buying the paper pattern and forever procrastinating whether I should or should not try and grade it up.
But when Nina Lee updated the Southbank with more inclusive sizing I quickly bought the pdf and then destashed the paper pattern to a new home.
However, the pdf lay waiting to be used for a while until December 2020 when Caroline (cme_202) and I collaborated on the Sew Cosy Winter Party.
The Southbank Sweater was one of the 6 sweaters I had on my short list but me being me, I always take too much on and only get half done … Southbank was in the batch cut though, it just didn’t get Sewn up until very early February.
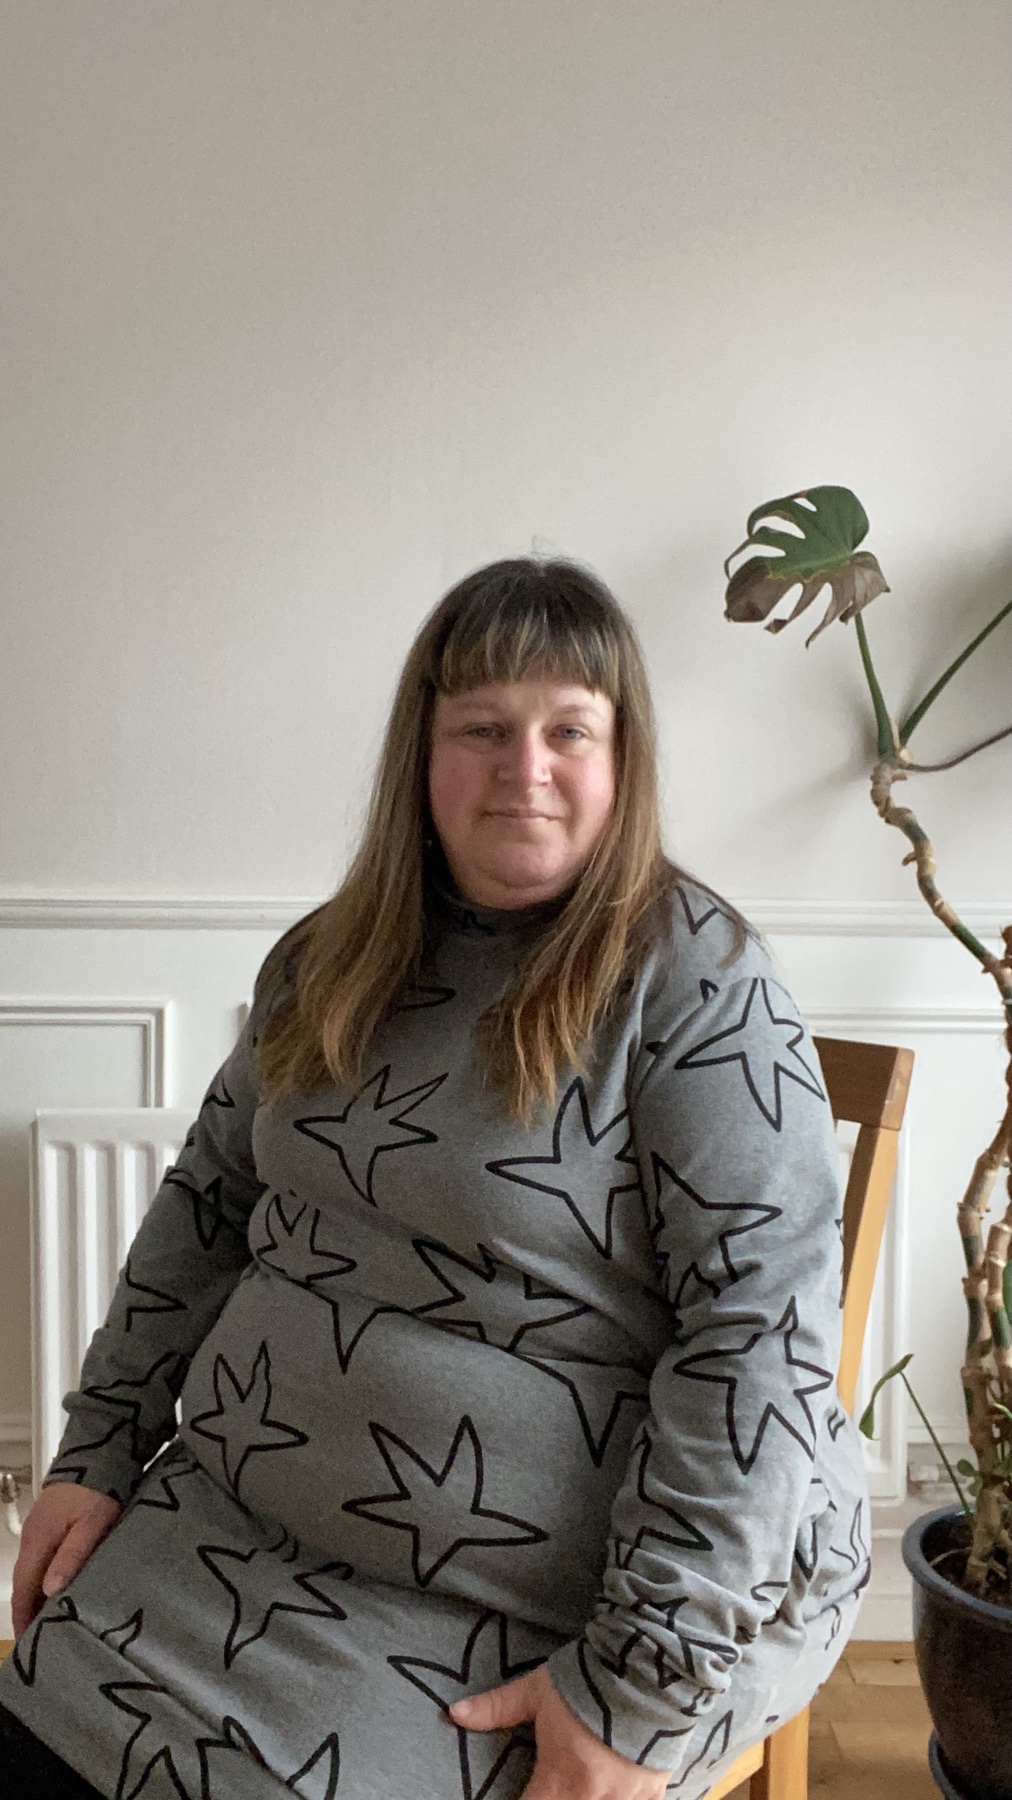
Nevertheless, I love it. It’s so cosy and easy to wear. I can also layer up underneath or treat it as a cosy dress.
The fabric is from Pin and Sew UK. It’s a sweater loopback jersey and like always, it’s amazing quality!
Again, another pattern that I can see I’ll get more use out of. I see myself using the cropped version over a dress and trying out the hip length with a pair of jeans or dressed up with a skirt.
Disclaimer: Jennifer Lauren Handmade gave me a copy of the Dulcie Pinafore in return of a honest review.
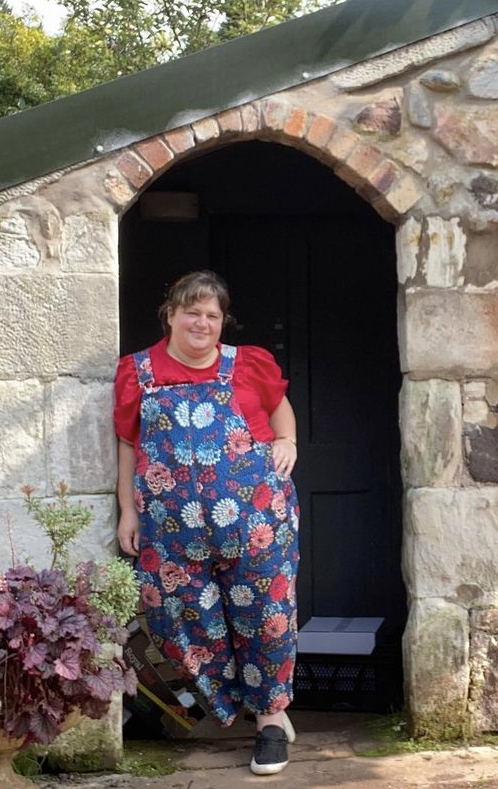
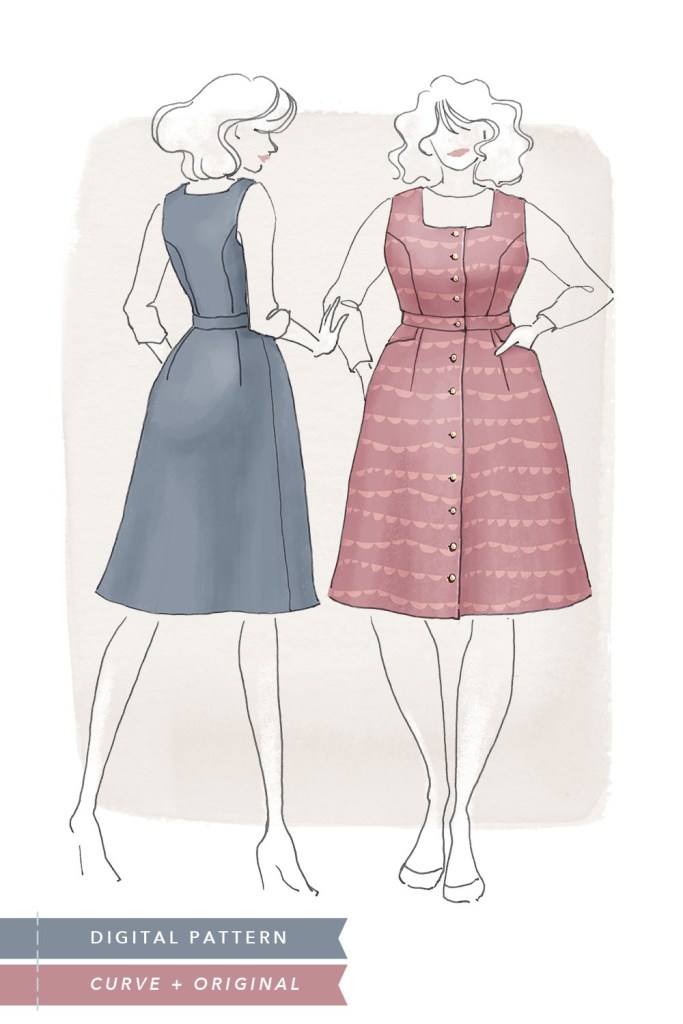
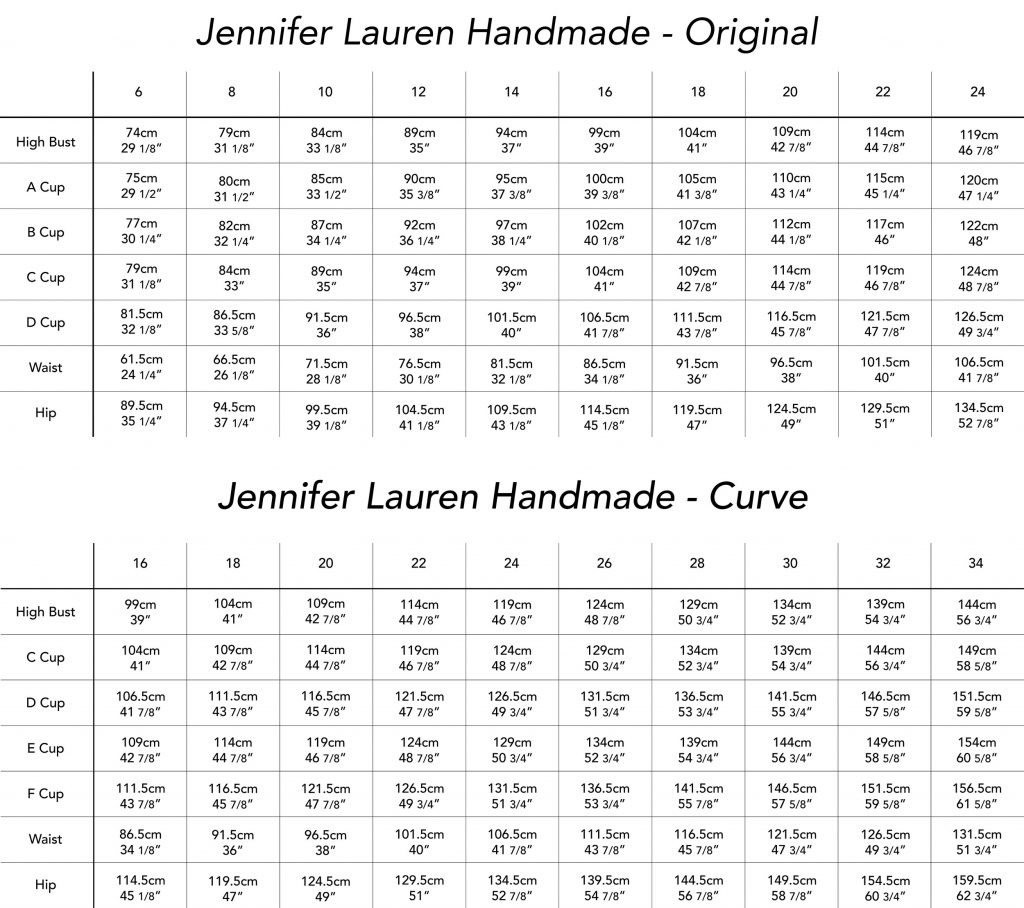
The Dulcie Pinafore is one of JHL’s most recent patterns and it really did appeal to me. The pinafore is in the new size range which goes from a size 6 to a 34 and also includes 6 cup sizes.
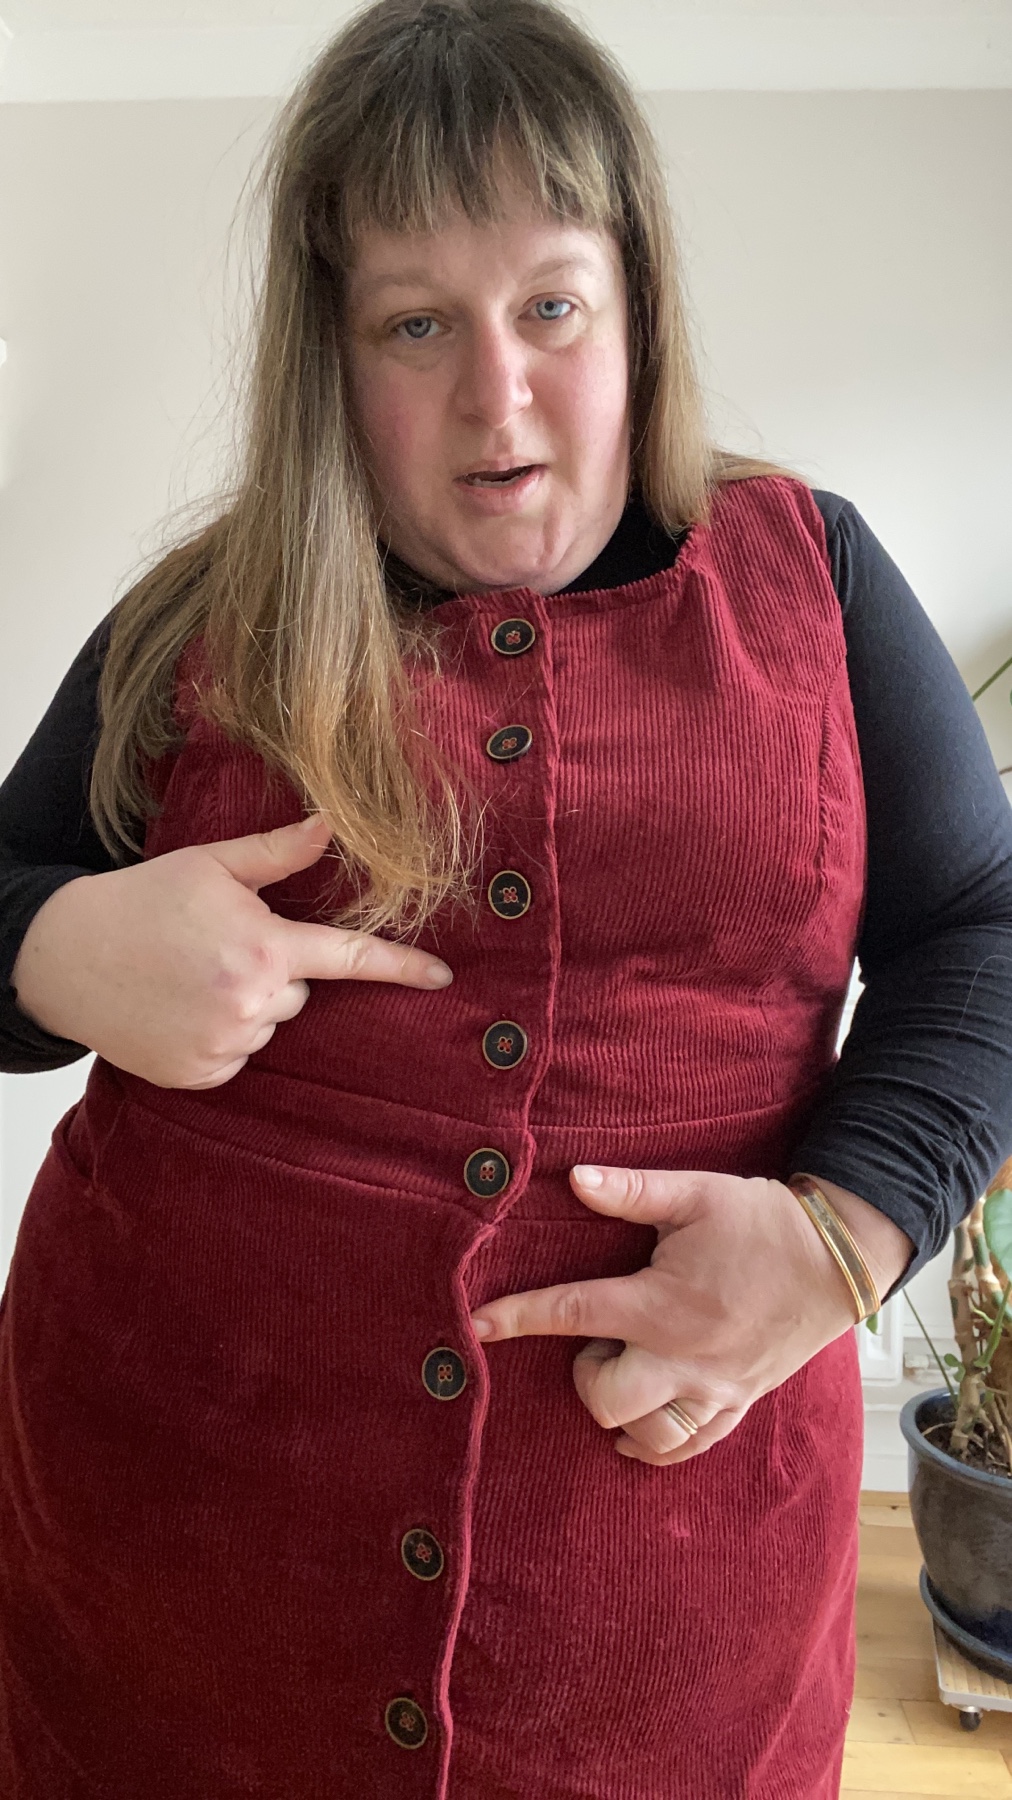
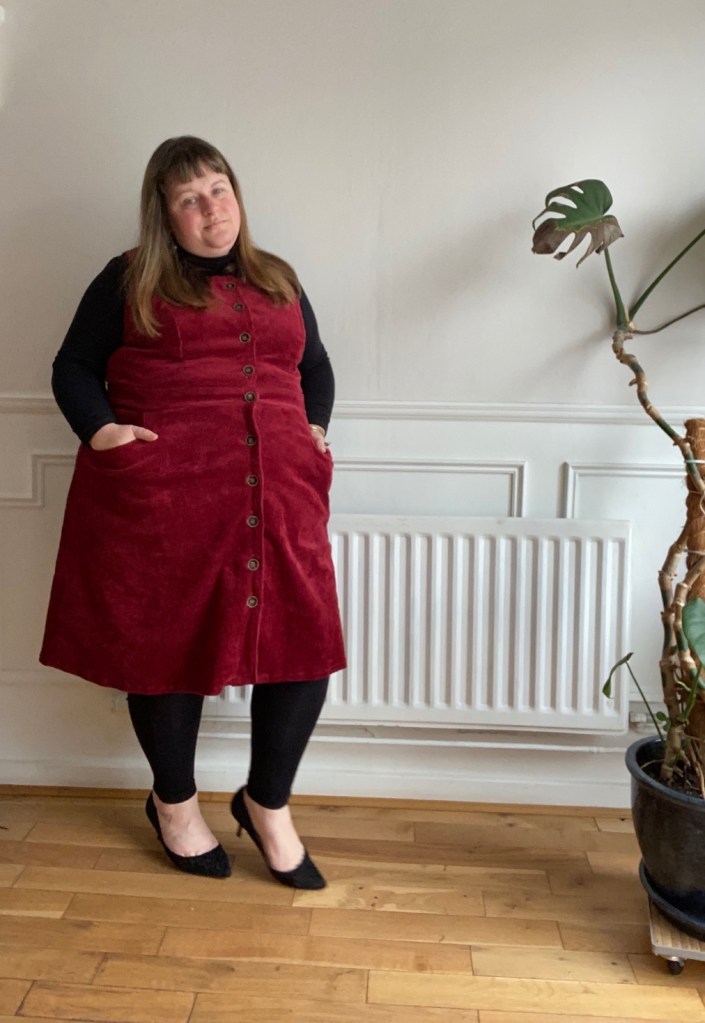
One of the design aspects of the pinafore that appealed to me was the square neckline as was the princess seams and the button details.
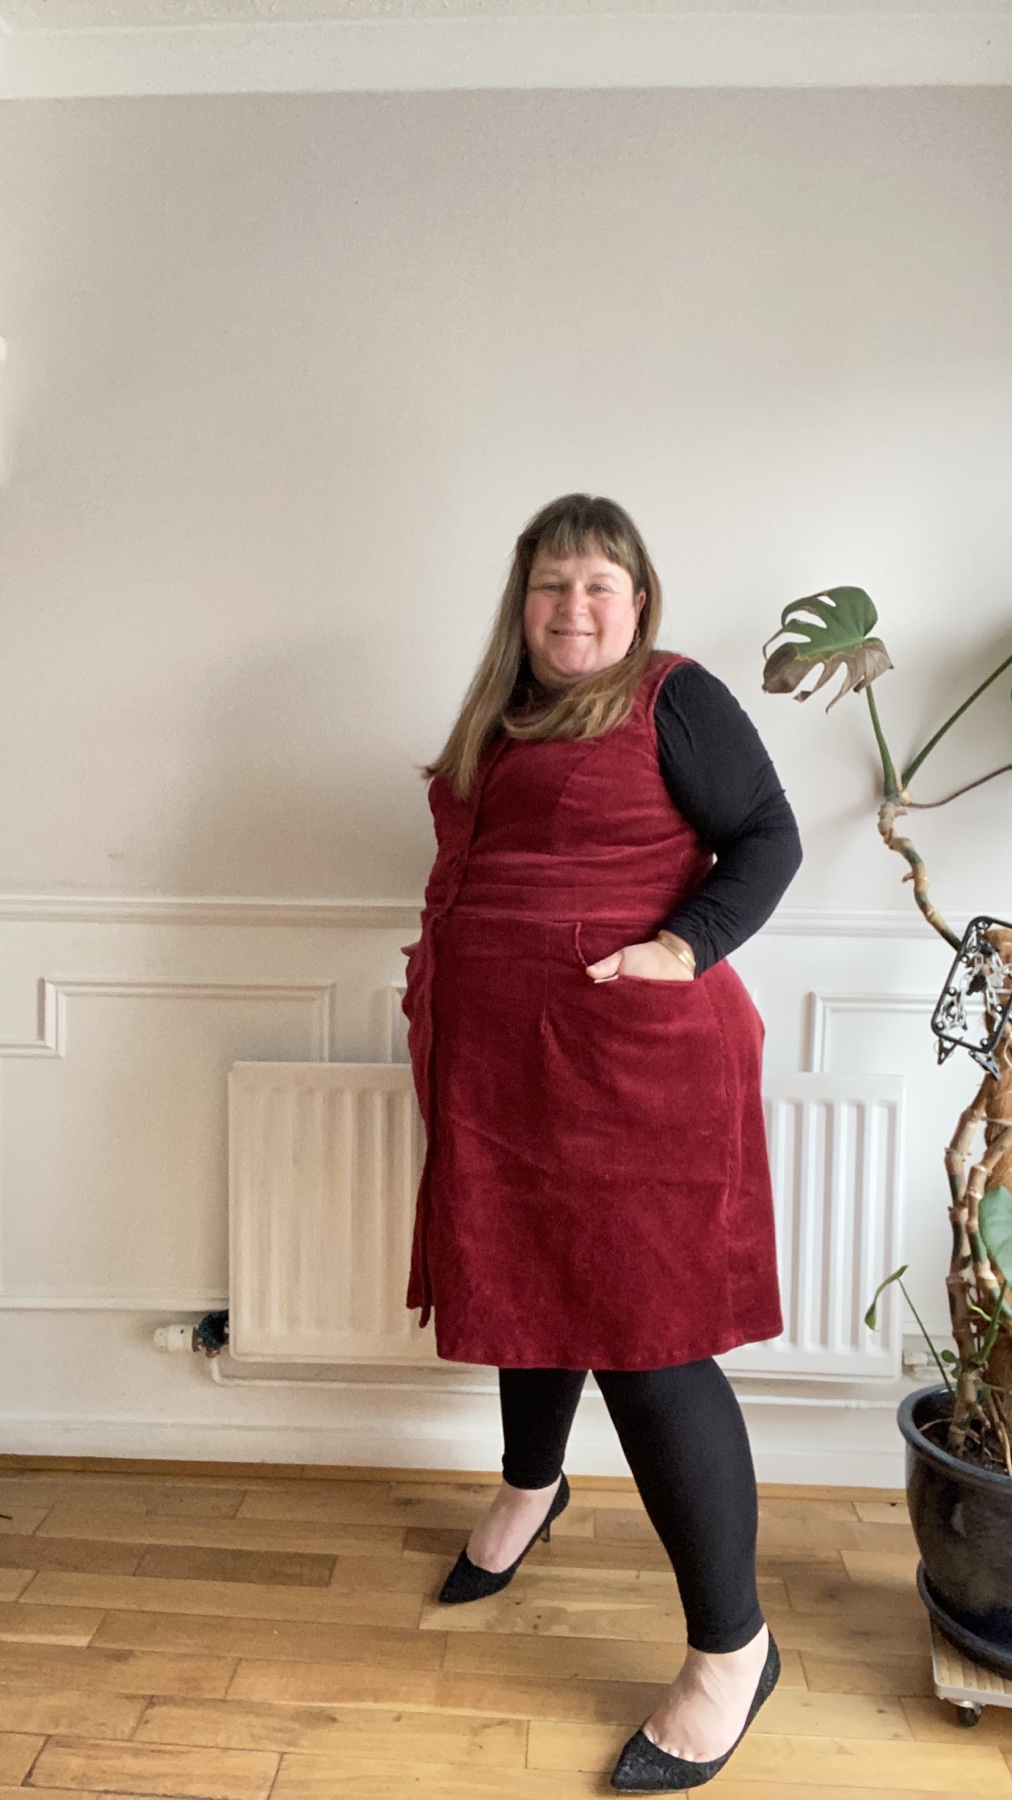
For sizing, I carefully followed Jennifer’s instructions and cut a 22 C-cup size in the new curve range for the bodice. And for the skirt I cut out the size 28. I used the back darts in the skirt to take out the excess that was left where I matched the bodice and waistband to the skirt piece. Ideally I think if I had realised how much excess there was before I added the side pockets I would put some of the extra fabric in the dart behind the pocket. Nevertheless it seemed to work out.
Talking of the pockets, they are a really good size and I like how theyare positioned. I had to add a label to one of them just to highlight them!
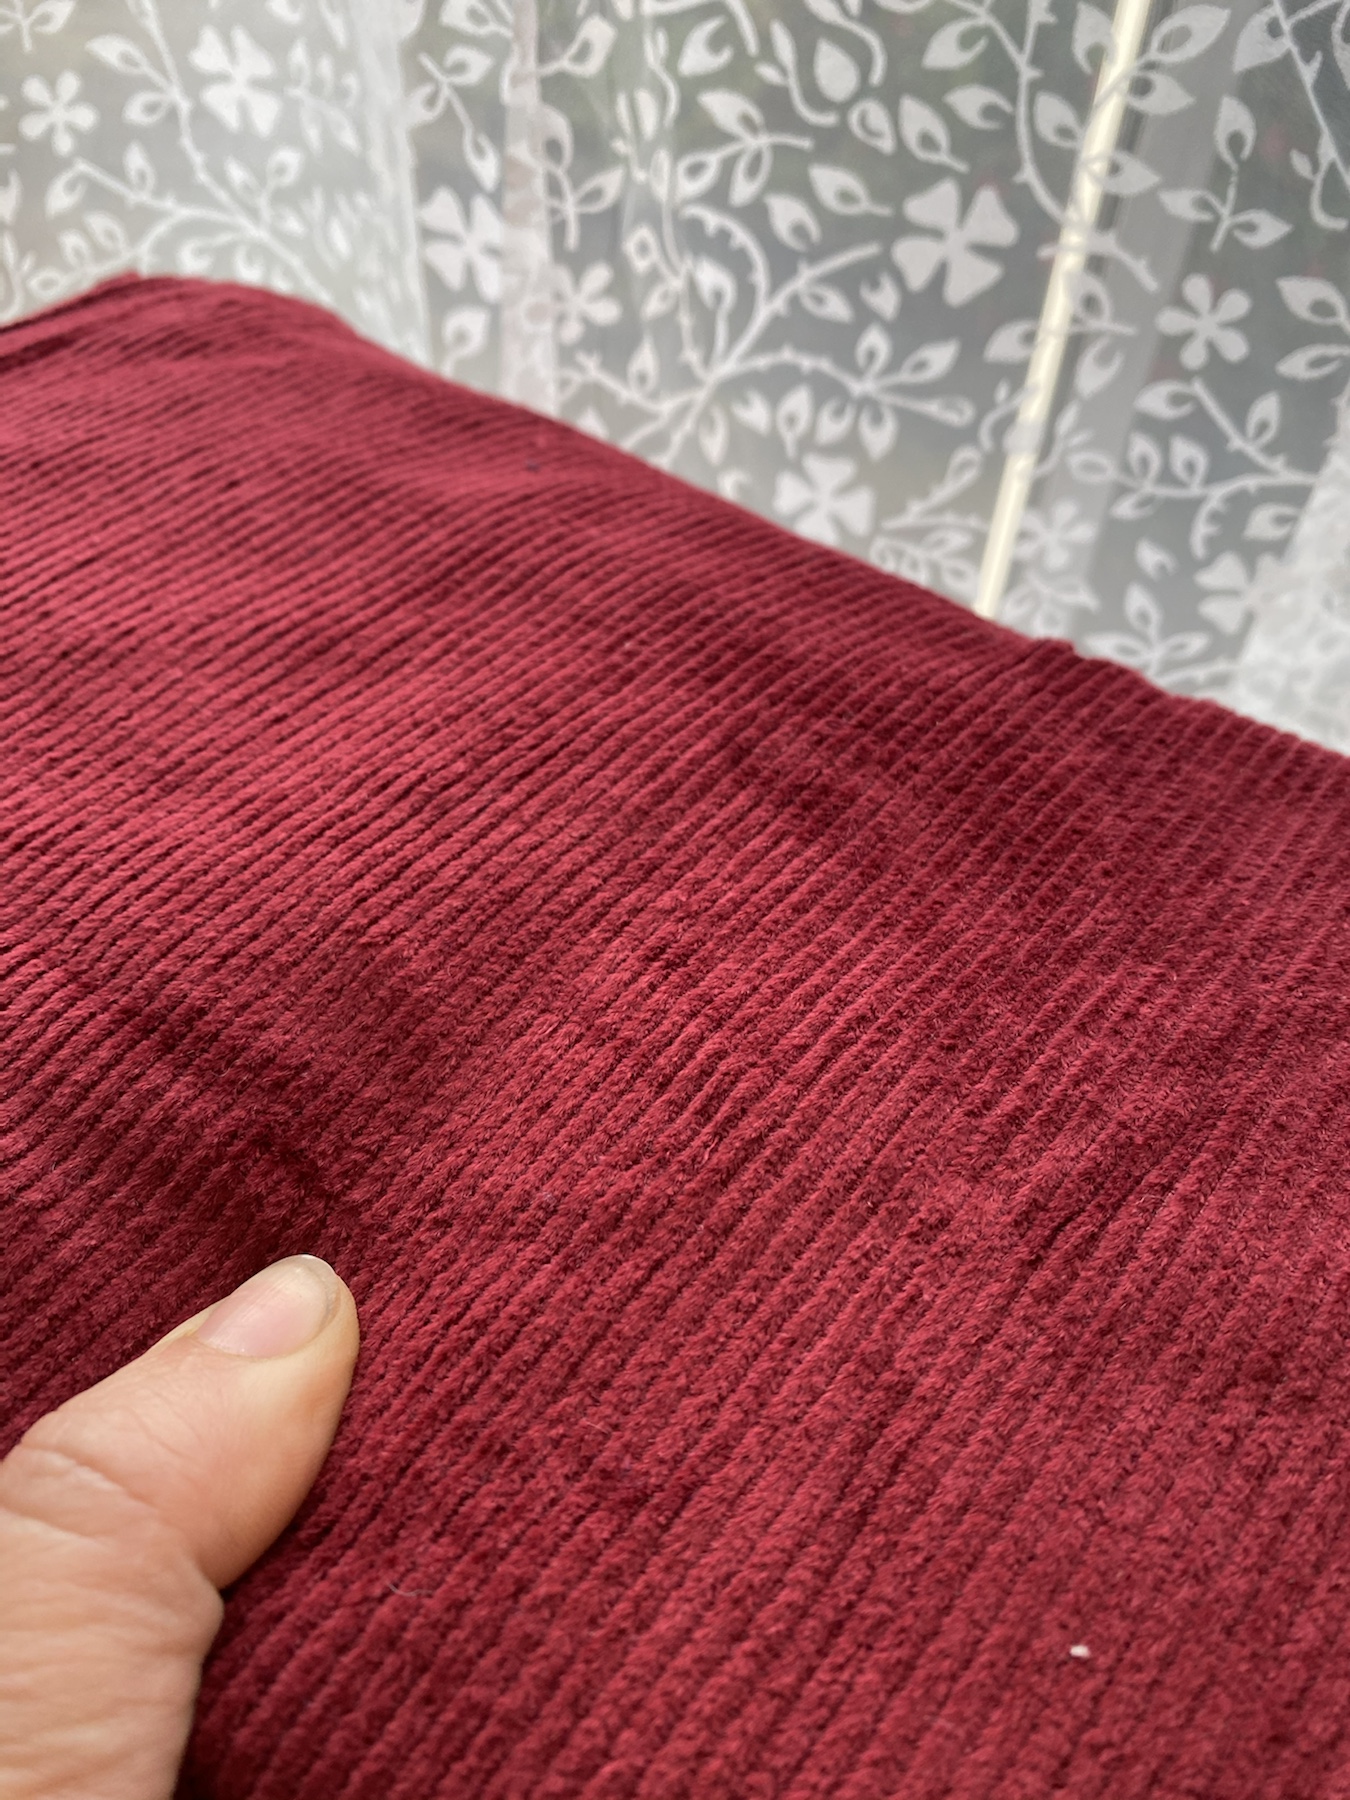
This red corduroy was from my stash, unfortunately I can’t remember where I bought it from but it’s a lovely jewel tone. I had 2.5 meters of the corduroy and it worked out well although I seemed to have got the nap upside down … you know the stroke direction. The corduroy has a slight stretch to it as well which isn’t a bad thing especially with a pinafore and lockdown weight!
Lovely stretch corduroy and perfect for the Dulcie Pinafore!
The 22mm buttons were from the Textile Garden. I wanted something that was going to compliment the red earthy tones and I think I did pretty well matching up via the internet. If I was stuck on buttons I would have normally went and checked out The Cloth Shop (Remnant Kings) but they closed just before the pandemic hit and if we are in lockdown and in tiers, it makes it more difficult to factor in travel and sourcing locally. Anyway, I think the Textile Garden buttons are just the match for this pinafore!
I love how the bodice is lined. It just finishes it well. I used some lining that was gifted to me by a friend and it lay in my stash waiting for the right project. I wonder, if I could line the skirt on and future Dulcies’? I probably could, I’d would just need to sit down and work it out.
Ok, the verdict – I really do love it. However, I know I need to make some knit tops that will work with it other than this black RTW top but that’s not a bad thing now is it?!
I might go up a size in the bodice, just for a little more wiggle room, cancel that – its fine. Stretch corduroy is a good friend!
Ok. I’m definitely loving this pinafore. Prepare for another one in the future!
Disclaimer: I was given this fabric in return for a review over on Minerva. This is a basic post, so please check out my blog post over on Minerva!
What is happening? After three years of not completing make nine and a year off, I am powering through this years make nines.
Could it be I’ve managed to get confidence with my sewing skills – who knows, but I like it.
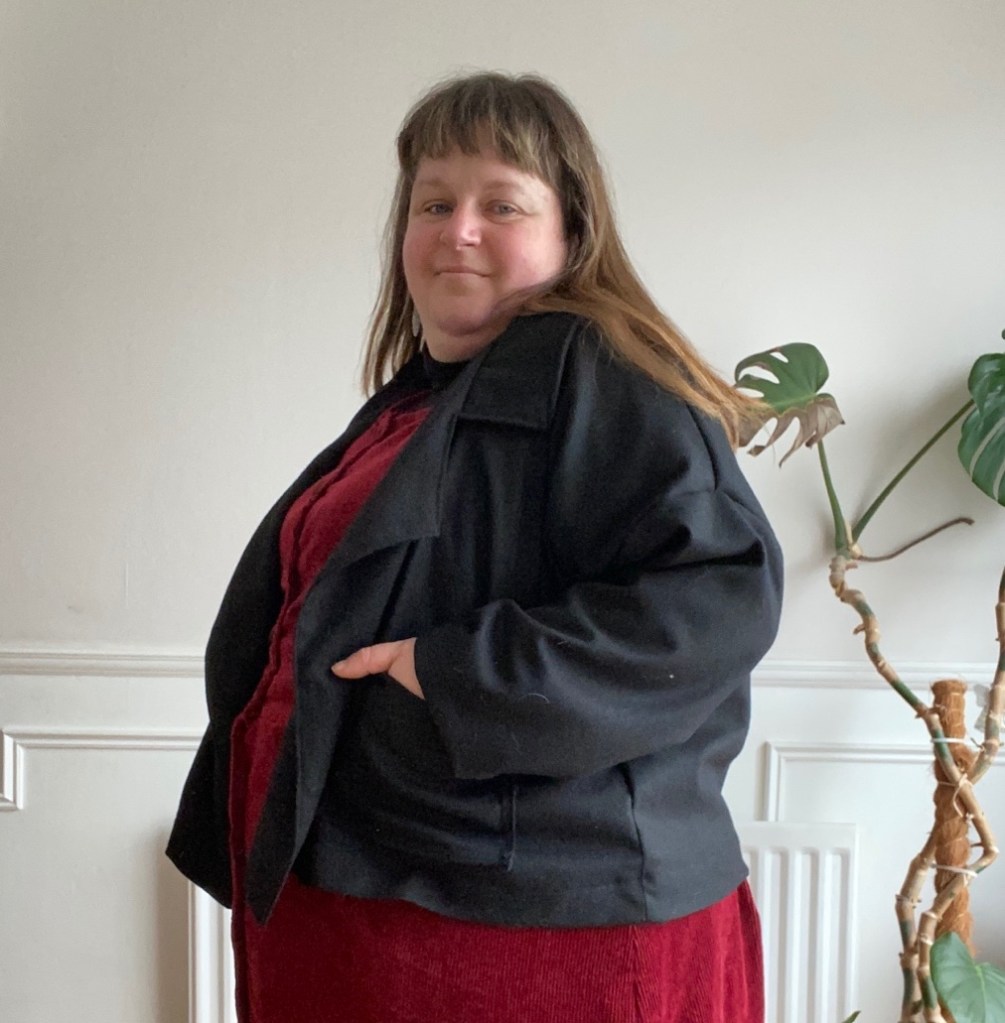
So, the Pona Jacket by Helen’s Closet Patterns kinda reminds me of similar RTW jackets that I’ve had in the past and will be a to go to pattern for the future.
I really enjoyed making the Pona Jacket. Helen’s instructions are second to none one of the best instructions around. I used the lining hack on her blog post on her website to insert the lining to this jacket.
Oh Bakerloo … ha ha (yes easily changed from ABBAs classic “Waterloo” Song.
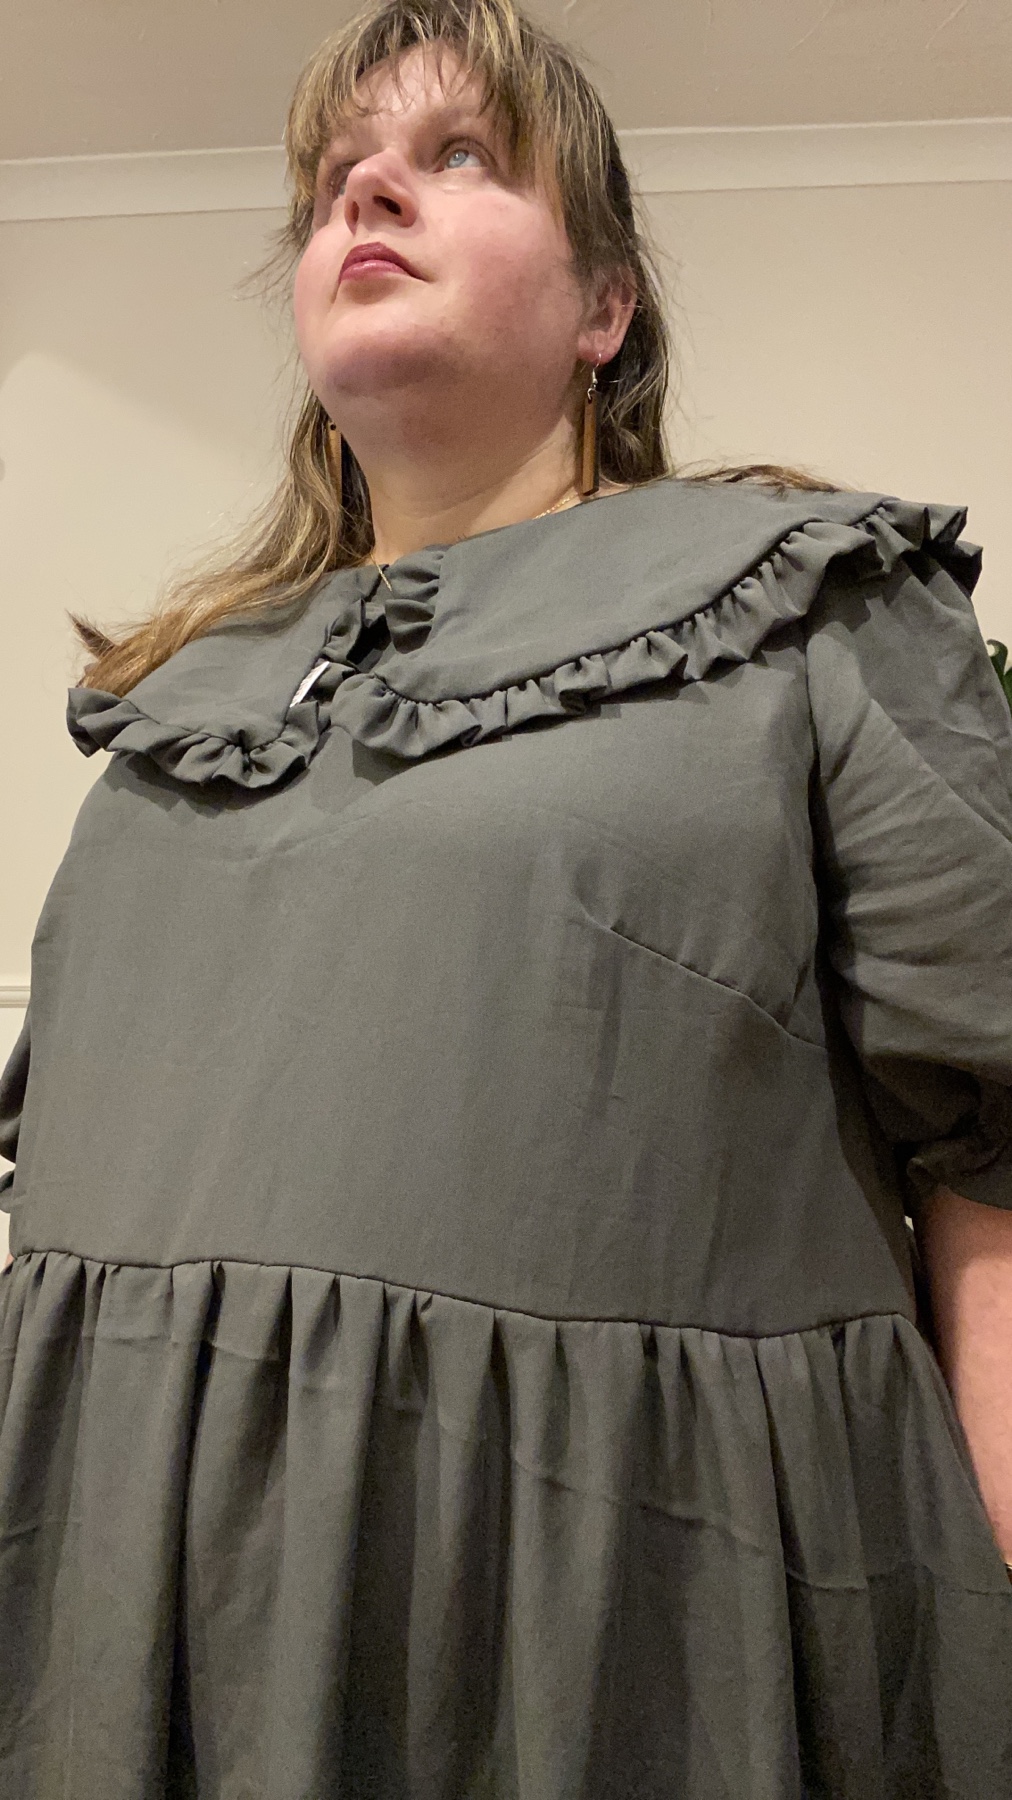
As part of the new inclusive sizing (18-28), I was part of the tester team for Nina Lee’s newest pattern, the Bakerloo Blouse and Dress.
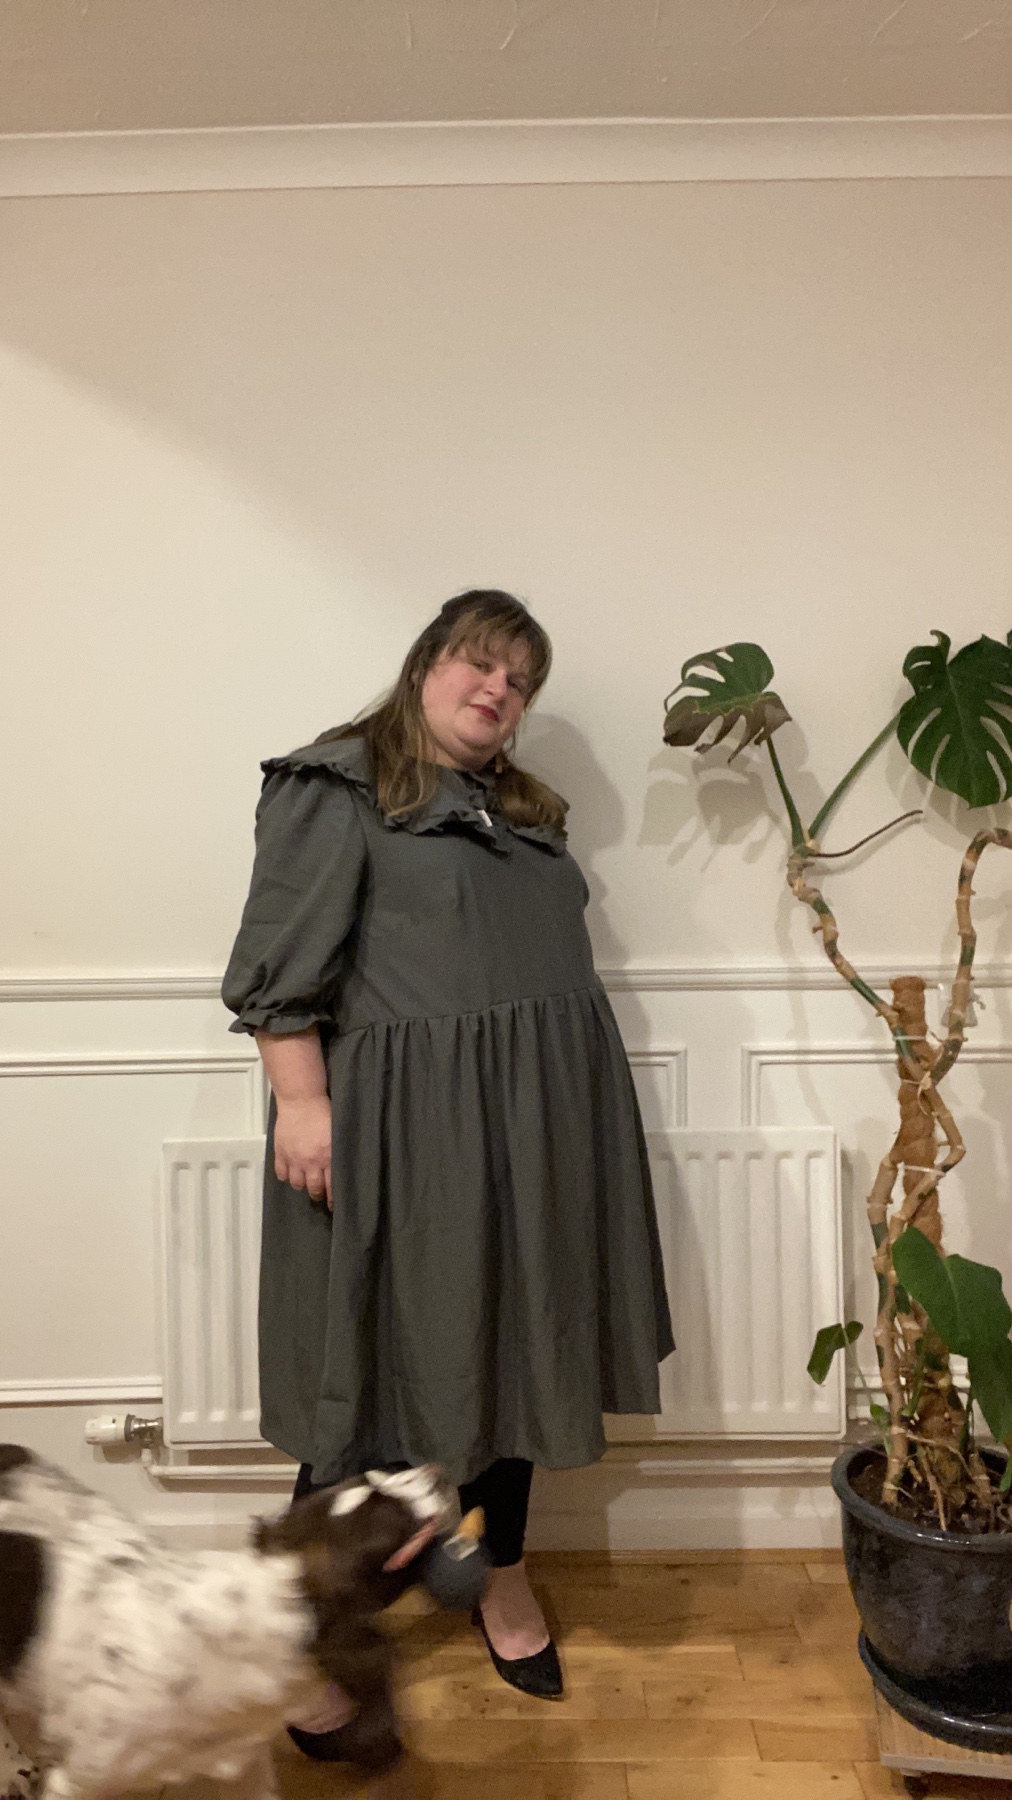
With it’s Statement collar with a frill and big voluminous sleeves, what more could you want?
You can either go for the blouse or you can add a skirt.
For the tester version I made the dress, yes … I am a sucker for a gathered skirt!
Before we get into the details. I want to say thank you to Nina who, after I reached out when the 6-20 range was released to say I was slightly disappointed to not seeing both of the size ranges being released at the same time, asked me to be a tester. So Thank You Nina!
Ok details … I’m sure you want them, yes?
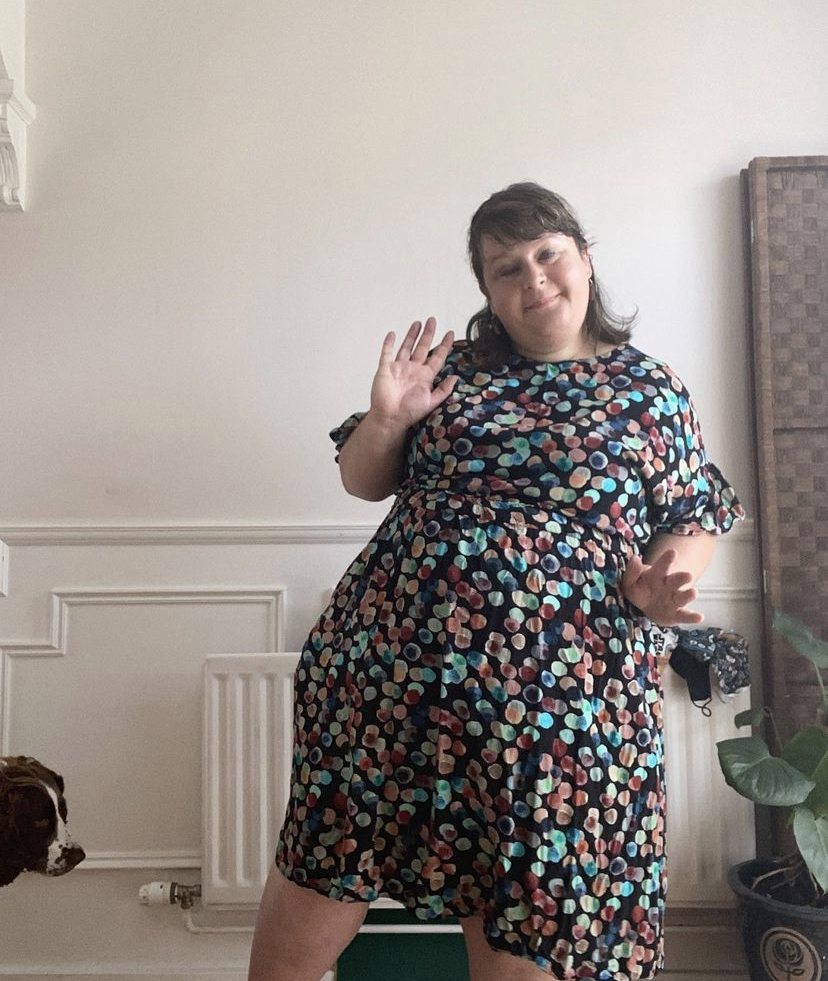
Practicing my dance moves!
Right. The instructions are pretty much really detailed. Lots of illustrations and descriptions with step by step details on how to get the statement collar and fabulous frill perfect.
Size wise, I went with a 22 with the bust and then graded out at the waist to a 28 but could probably go down a size as it is quite roomy. The skirt is a size 28. My measurements are: Bust 46, Waist 46 and hips 57/58.
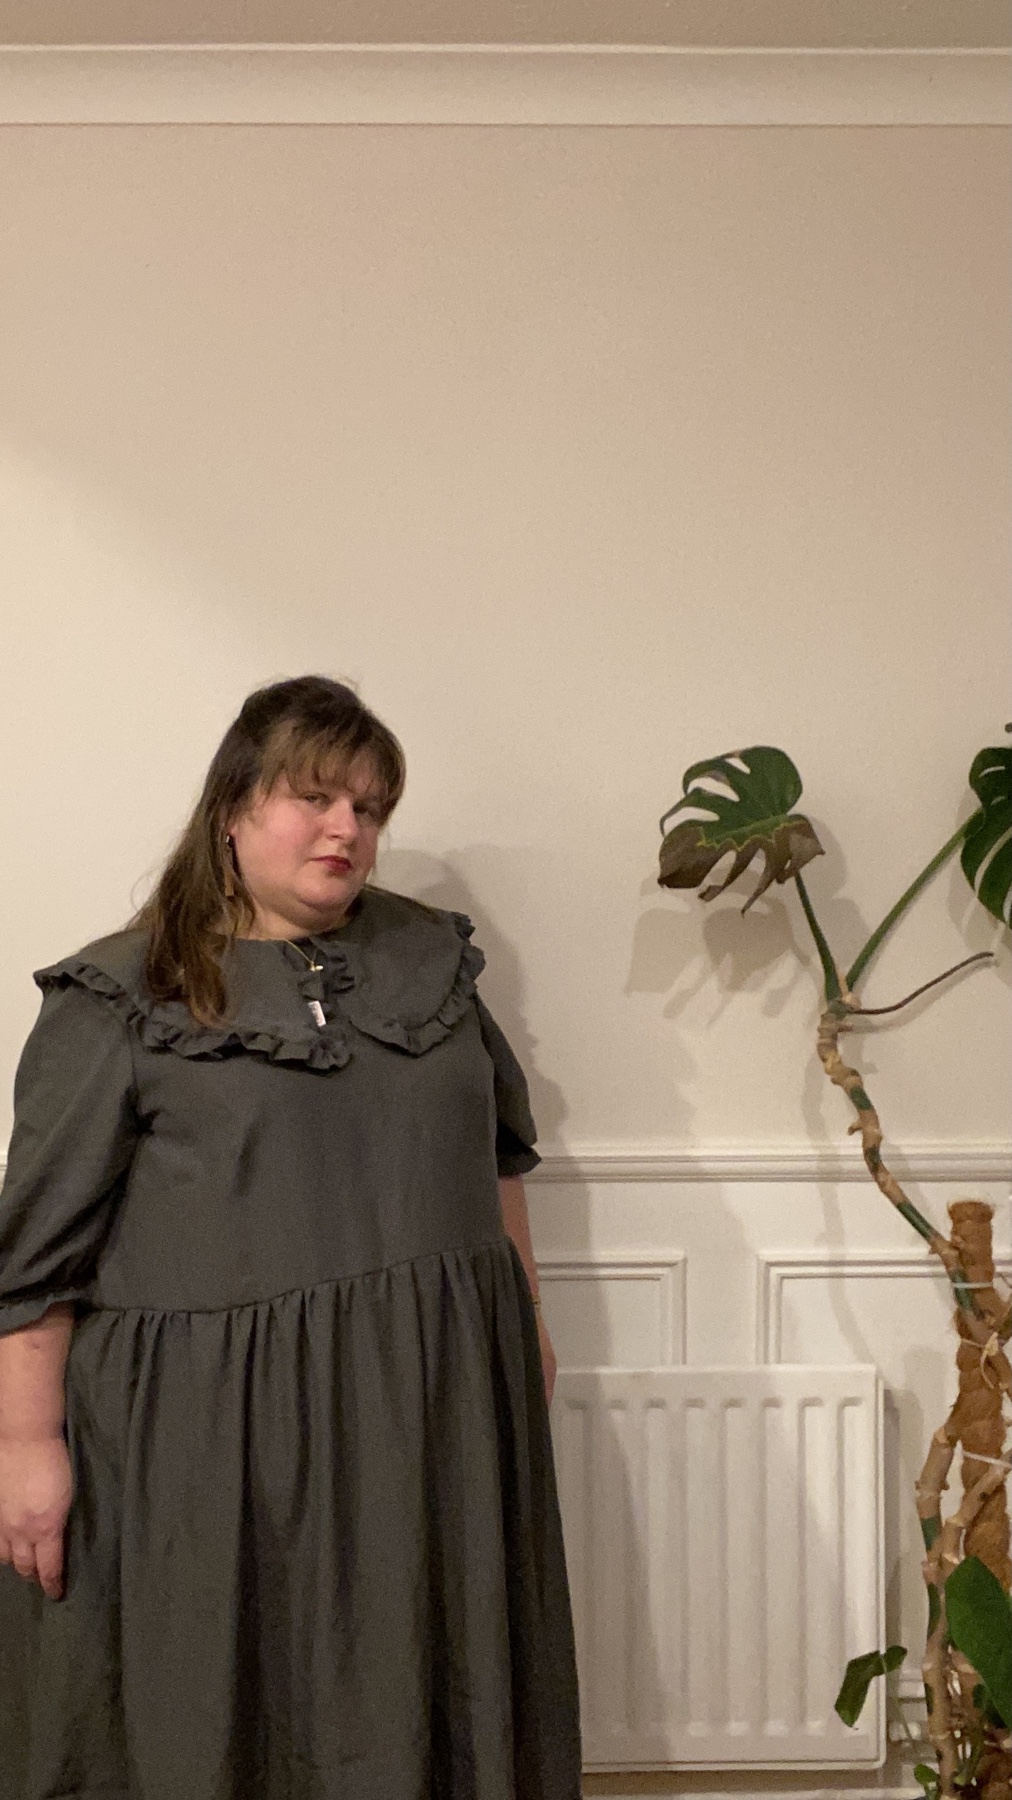
For my fabric, I chose a tencel twill from The Fabric Room, which I’ve had in my stash for a good while now. I think I heard about The Fabric Room’s Tencel Twill via my good friends in Sew Scottish. Minimum order is 3 metres and the colours are limited but it’s worth a look as it’s £4.50 a metre!!!
The Khaki Tencel Twill
Also, worth noting if you have a plain fabric you can really play around with the cross grain of the woven. For my size, it quoted 3.10metres but I managed to use 2.6metres out of the 3m of tencel, which is pretty good I’d say.
Maybe tencel twill wasn’t the best fabric choice as I think the collar pulls the neck down a little because once you’ve got the interfacing in the collar and added the frills, it’s quite a substantial weight. But it won’t stop me from wearing it – oh no!
Will I make this again?
Yes, but I’ll make the Blouse version with longer sleeves. I might raise the darts at the bust on any future versions. And when I do the dress I’ll shorten the bodice. I think that’s all. But yeah, I’ll make it again 😄
So I’ve added a few labels …
1) “One of a Kind” by Stitch Collective on the Frill.
2) Worth the Effort by Kylie and the Machine at the back closure.
3) “Handmade” by This is for Makers on the inside at the back
I think the most favourite thing about this make is the sleeves! It’s so simple, the elastic cuff but punches a statement as does the collar and the frills. Overall it’s a great dress, It delivers and it’s very now but I’m sure I’ll wear it to lots of occasions in the future.
I think I overlooked it as I didn’t realise it was within my sizes, particularly my hips but I was so so wrong!
So I’m hoping there’s a few of you who would like the juicy bits of how I found this pattern, Yes?
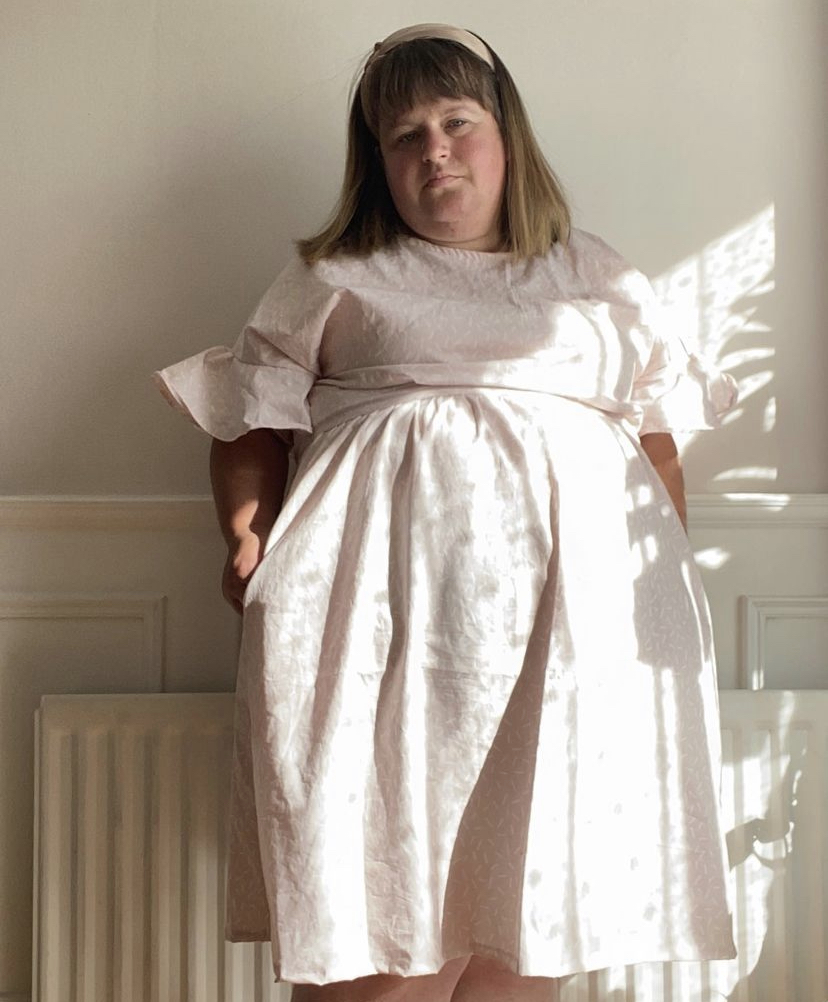
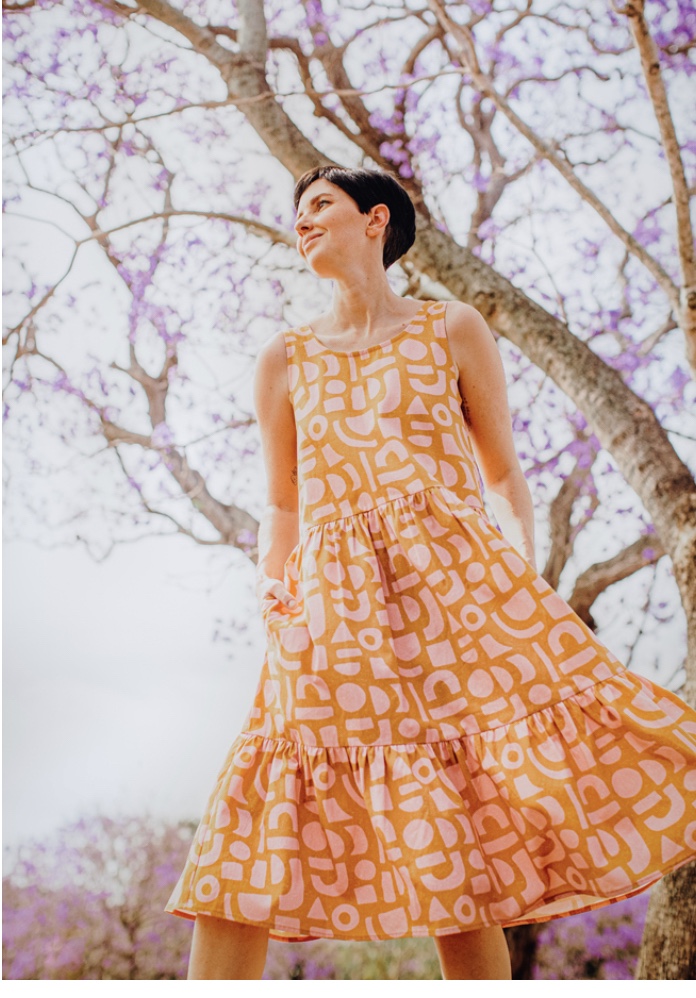
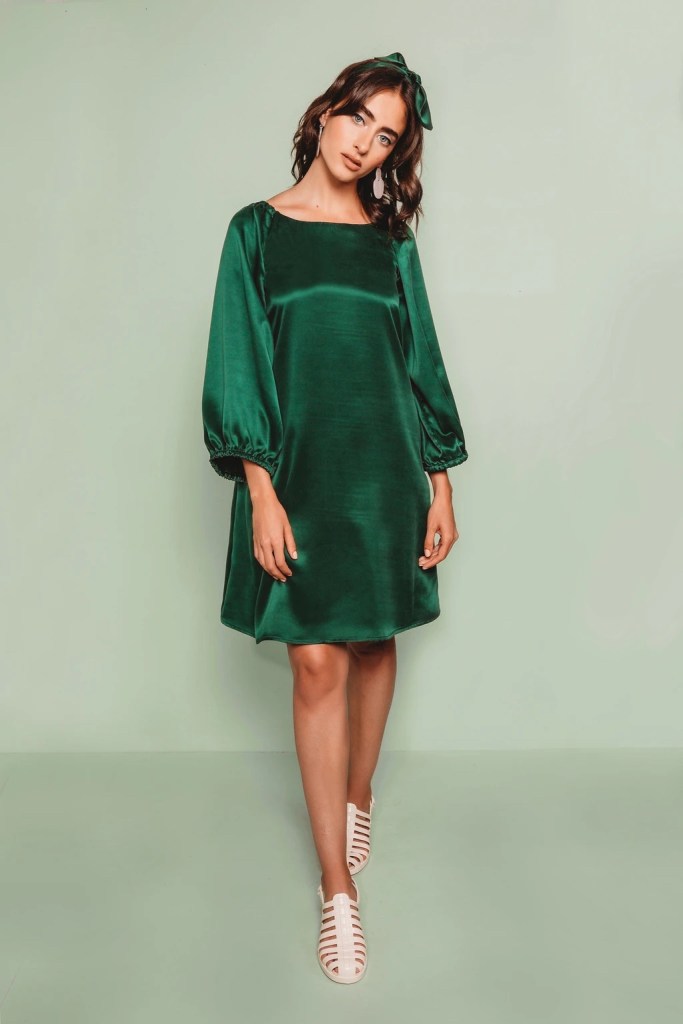
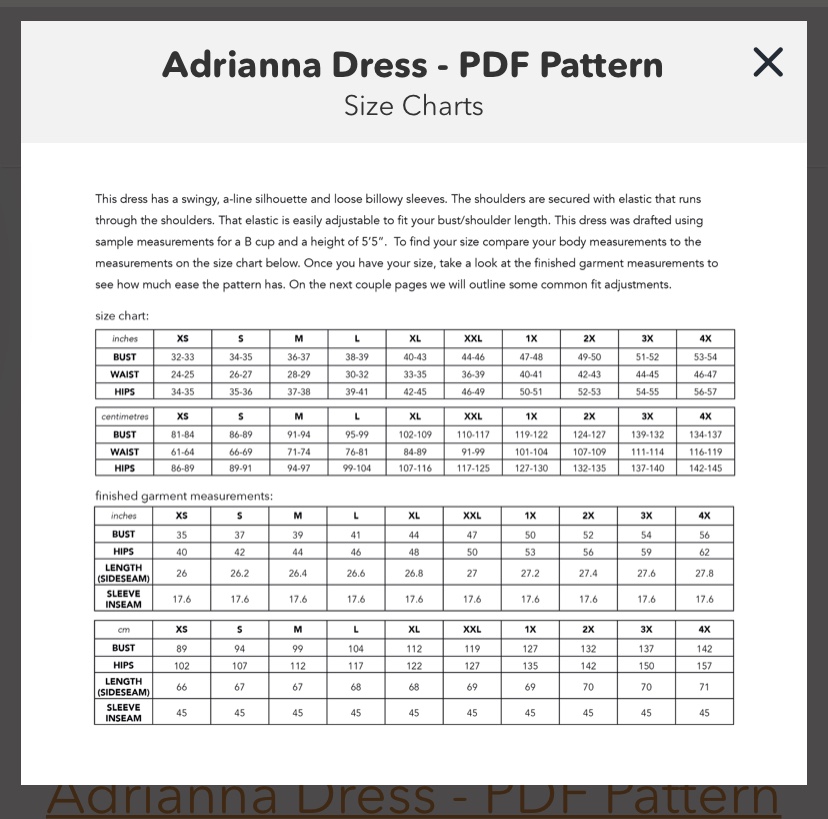
The Adrianna Dress by Friday Pattern Company is kinda like the woven sister of The Adrienne Blouse, whom is a jersey pattern. Adrianna comes in sizes XS-4X. The top sizes are: Bust: 54”/137cm, Waist: 47”/119cm and Hips: 57”/145cm.
This is my second Make Nine 2021 that I’ve completed before the end of January, which in itself a complete and utter shock to myself and probably a few of you as previous years I’ve just fallen by the road side!
On top of the Adrianna Dress being part of the make nine challenge, I also completed it for my birthday and as part of the lovely @SisterMintaka’s #FeelingSewMuchBetter annual challenge. It was really fun to photograph and document my progress through the week on Instagram.
Ok, the instructions were flawless – really easy to follow. There was one area where it wasn’t so clear and I was scouting the web for a sewalong and could find one (or any)! that would just glide me through that part. BUT I figured it out. Yay!!
Oh, now the area I was stuck on was step 11. But once it came relevant, it was plain sailing.
Top Tip: Because I was working with a viscose crepe I overlocked all of the edges and used a microtex needle on the sewing machine to sew it together.
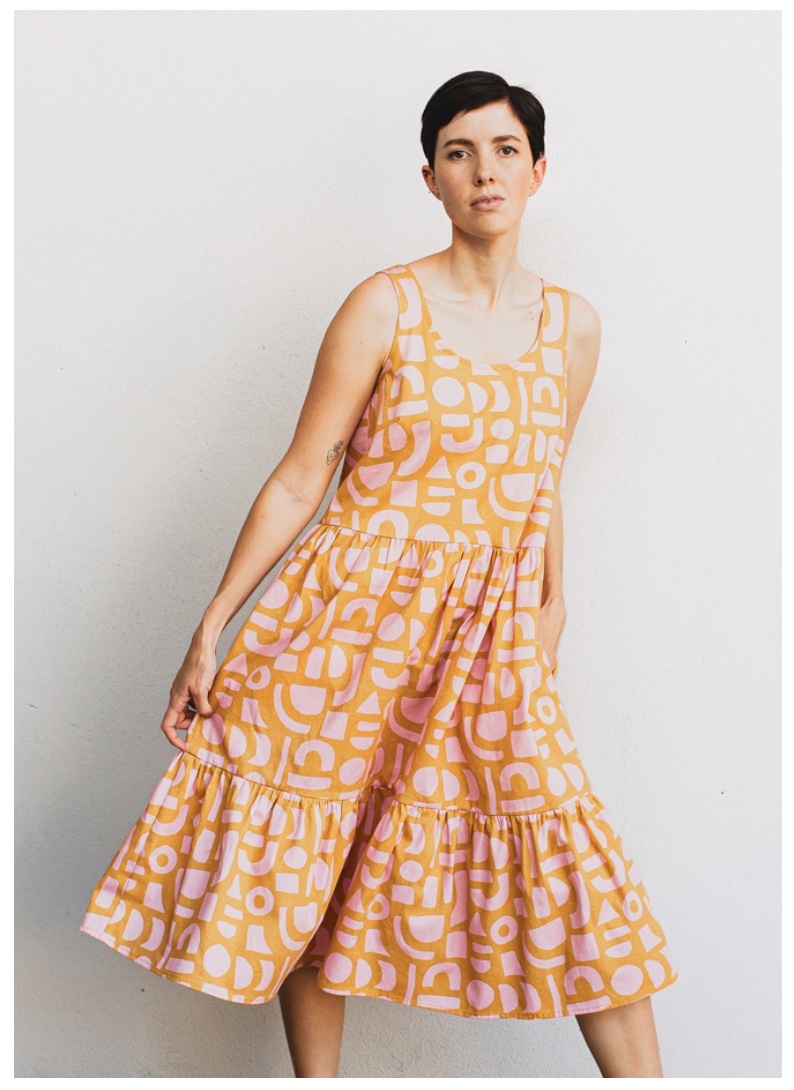
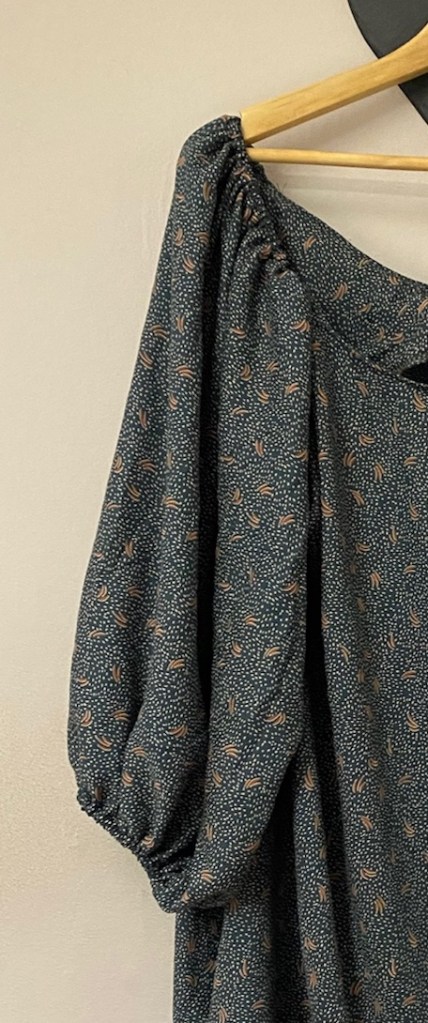
I love how the fabric behaves with the elastic in cased at the shoulders and the cuffs. It’s simple to do but the drama it gives is just lush! Chelsea is a genius.
There’s one thing I really shouldn’t have overlooked though. In the instructions booklet on page 5 is a but/hip adjustment guide. Now I usually just grade from my bust-waist-hip but I think I should’ve just went and did this adjustment as I wouldn’t have got this excess (see photo below).
But apart from that, I really enjoyed reading the instructions and sewing this pattern up. On top of that the Viscose Crepe was a dream to work with, yes I’m surprised as it’s Atelier Brunette and sometimes (I have heard of mixed reviews!) notoriously difficult to work with. But it sewed up like a dream!
You can bet on your cotton socks that I will be sewing more Adrianna Dresses in the future. But I’ll be adding a little more length on future Adriannas’ as I’m a little scared I’ll reveal too much if I bend over!
For This Adrianna Dress – I used Atelier Brunette Viscose Crepe “Dune Smokey”, purchased from @ohsewshop with a voucher that I won a while ago. It was a decent remnant and I was completely impressed with myself that I got all the pattern pieces cut out of 2.40cm when the pattern call for between 2.88 and 3.88!
Although I didn’t have to pattern match, I managed to wow myself … and on top of that used the crossed grain to fit all the pieces in. This was really down to the print not being directional and I think I got away with it by the skin of my teeth!!
The Pattern for Adrianna can be found here. I mean, what are you waiting for? Yes, I am a enabler but come on!!
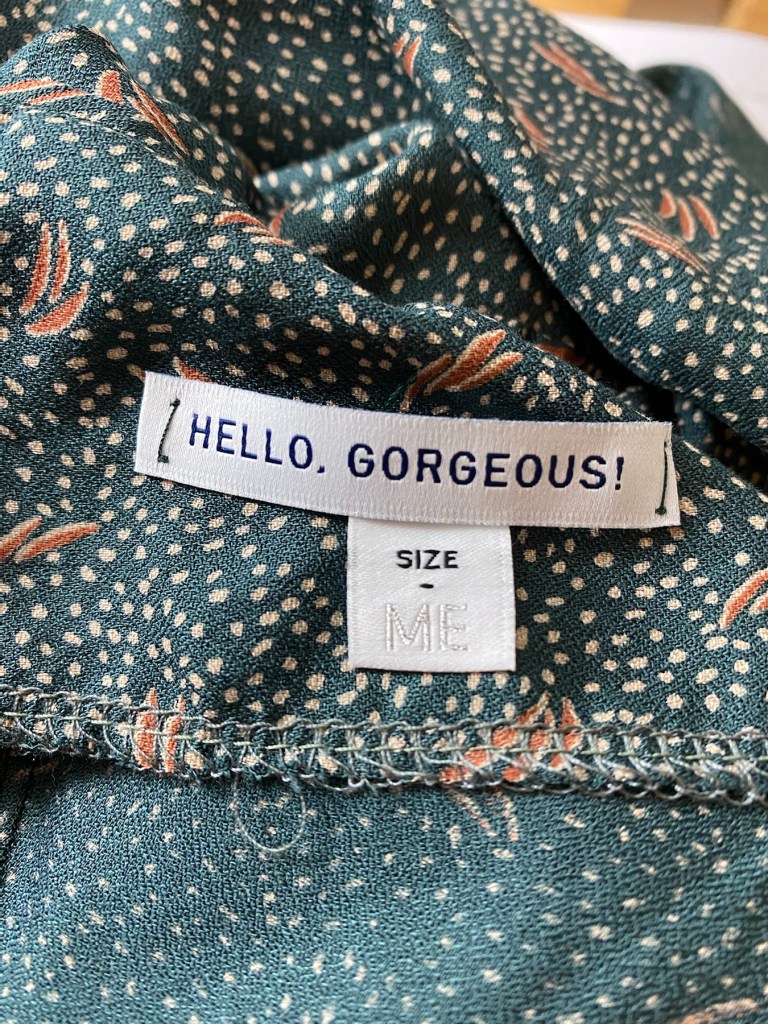
I used #SizeMe label from Stitch Collective, if you are in the Uk and don’t want to wait ages due to the pandemic postage delays then you can buy some of stitch collectives labels at a brilliant online shop run by the lovely Amy, which is Craft and Thrift.
But I just don’t use one label … I mean come on, I am a label fanatic! The #HelloGeorgeous label, I think just finished the insides nicely … don’t you? This is a Kylie and the Machine label, which are stocked in quite a few places now (worldwide) – yes I’ve had them shipped from KATM HQ a couple of times too and it didn’t cost that much extra to be sent over. But that was pre-Brexit and pre-Covid!
Oh! That necklace was a generous gift to myself. I saw it on wolf and moon’s Instagram and was like instantly magpied – it’s such a statement piece and yet flawlessly goes with the Adrianna perfectly! I’ve got a few me mades planned and the fabric will match this beauty very nicely.
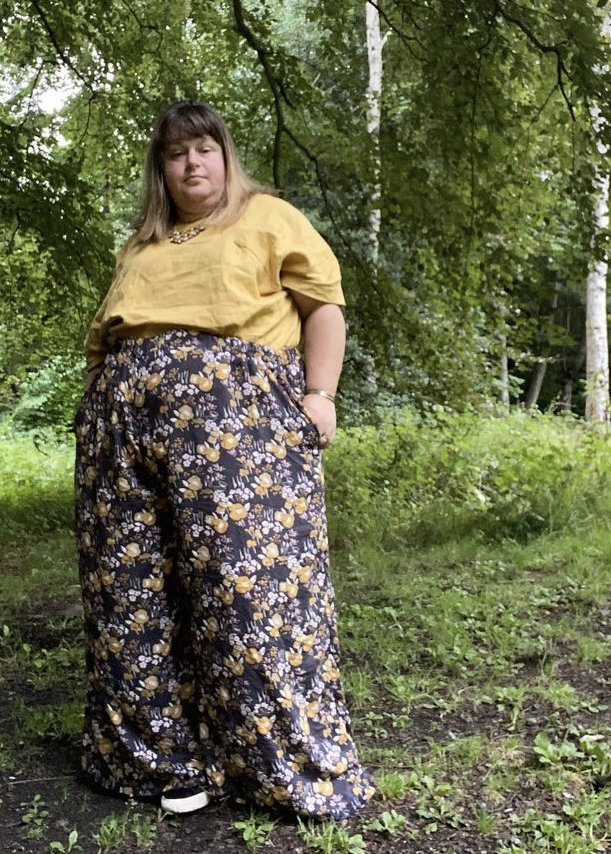
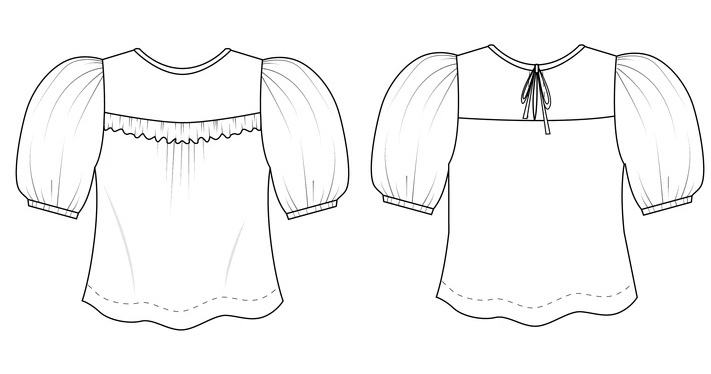
Ever since I did my tester on Friday Pattern Company‘s Sagebrush Top, I’ve been hooked!
The brilliant Sagebrush Top – definitely a TNT pattern with me!My Sagebrush Tester
Hooked in the sense that recently I did a batch cut and I’ve already sewn one of the up – yes already I’m churning Sagebrush Tops out!
I really love this pattern and the details of it. From the frill at the front to the gathering at the sleeves it just makes me happy.
This Sagebrush is slightly different to the others and I’ll explain why, in a moment.
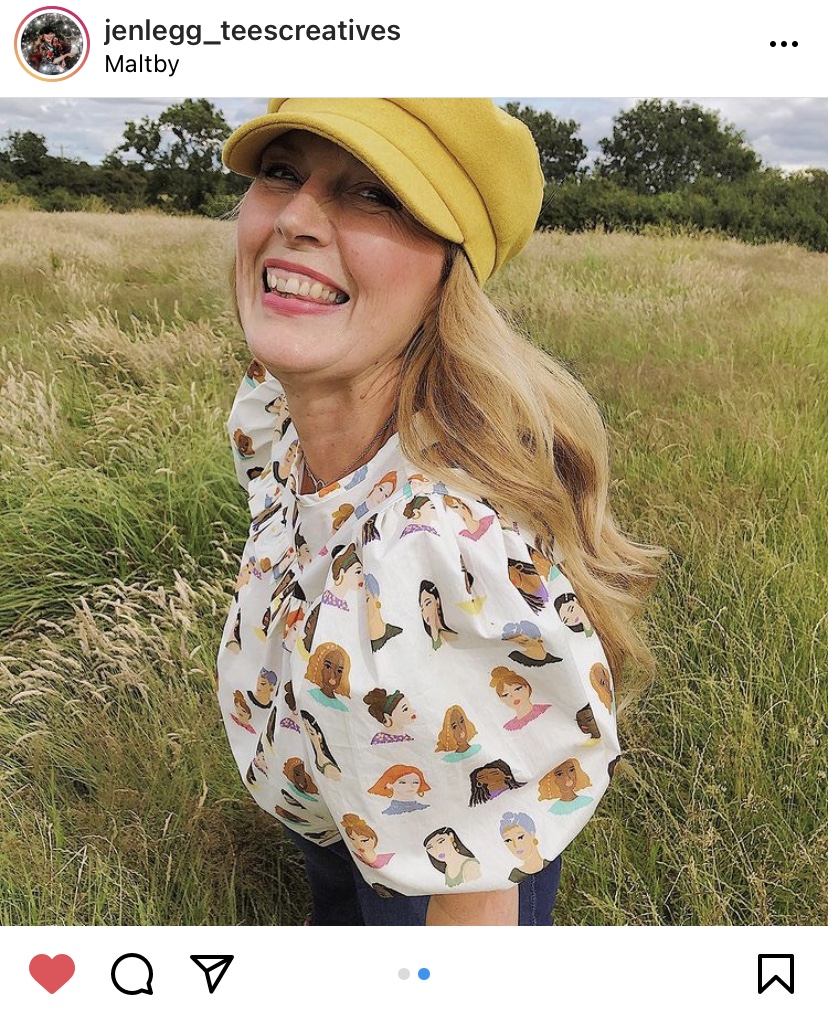
You see it lies with the fabric choice. Previously I’ve went with a viscoses and a viscose-linen blend but I decided to take inspiration from the lovely Jen (@jenlegg_teescreatives) (I’ve met her in real life, as she came up to Edinburgh Frocktails, October 2019 and she is really lovely) who has already sewn the Sagebrush in the very same fabric.
The fabulous Jen in her “Ladies” Sagebrush Top
The fabric is a Lady McElroy Chantilly Single Ladies Cotton Lawn from Sister Mintaka which I bought a wee while ago after seeing Jen’s version and looks like there is some in stock. It’s a lovely quality and has sewn up a treat. I love the colours of the print, it will be so diverse! I’ve already thought of a few outfits featuring this top, including pairing it with Jeans, as shown in the photos.
And apparently I’m not the only one who was inspired by Jen, Louisa was too!
@LouisaLovesToSew in her Chantilly single Ladies SagebrushTop.
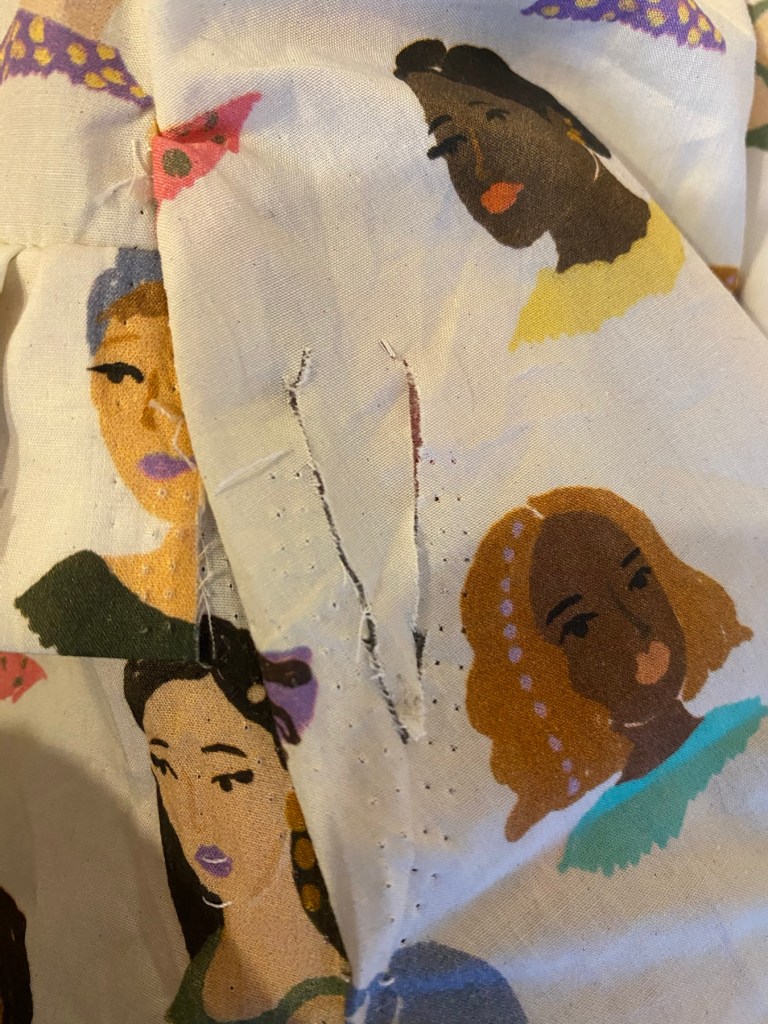
Ok, my top was going so well until I decided to use my overlocker to finish the seams on the sleeve and front and back pieces …
I was seriously lost for words!
At that point of seeing the blade chop into the shoulder what like watching a horror movie. Urgh. I had to step away. It didn’t stop me from sharing my disaster on Instagram stories that night – but it also helped me come up with a plan to save this make.
I had two options, one seeing if I had enough fabric to cut out a new sleeve altogether but I couldn’t really justify using it as I was going to try and make a scrunchie and hair band plus other things from it. The other option was two interface the wrong side and the right side and hope that I wouldn’t need to do a patch work … my needlework is erm shockingly bad 😂
This is a close up of the repair after being interfaced. Not bad and if I don’t point it out I doubt people will notice.
So once I got that bit out the way I could move on and get it finished – yes that’s what we like – a happy ending!
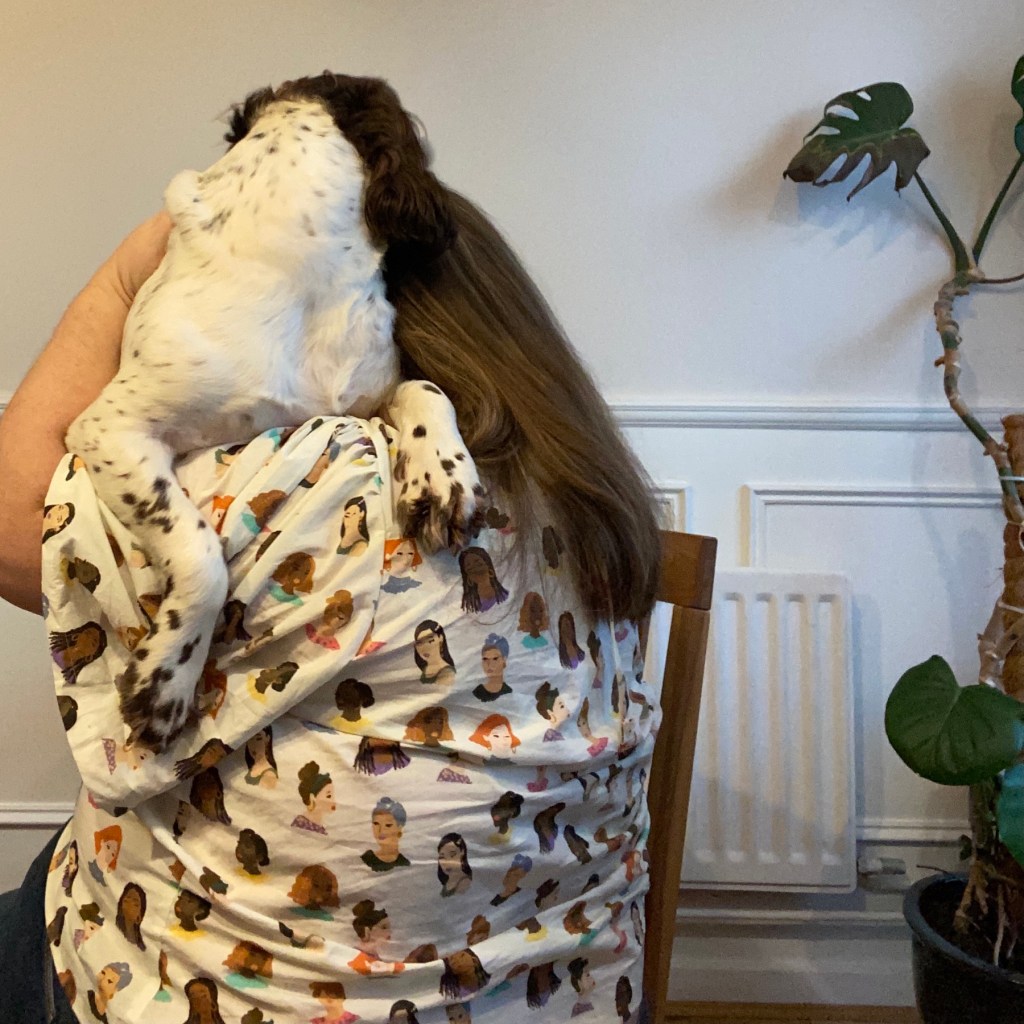
On this Sagebrush I took a bit off the length off and made the hem deep And I actually really like it. So I think I’ll do the next couple this new length.
All smiles!
As you can see, using the cotton lawn gives the frill real structure and the sleeves extra va va voom! I do really like the effect that this cotton lawn has on the pattern.
I love the new length!
Well, that’s the 4th Sagebrush of many more to come … I’m excited to do more!