My #FrugalFrocks2021 Dress

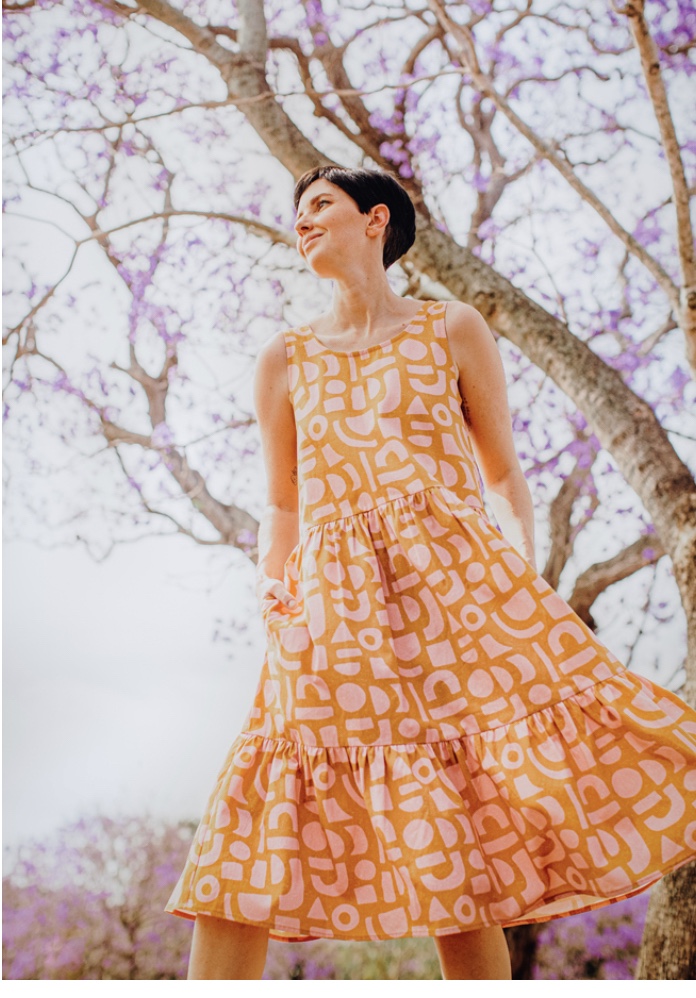
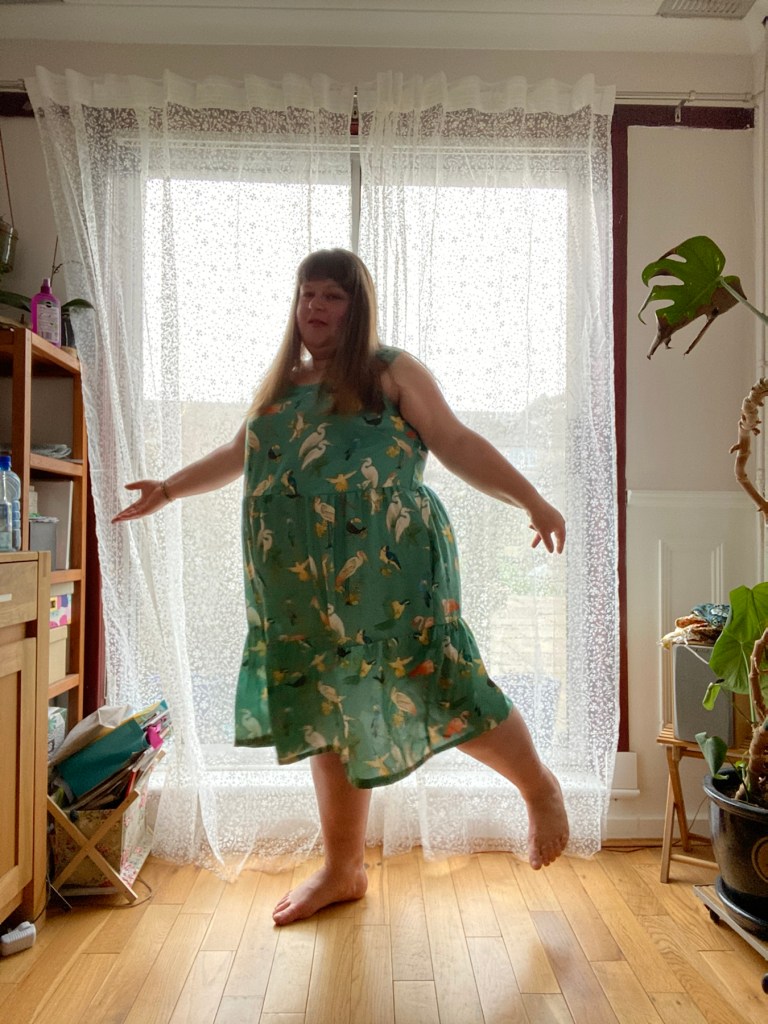
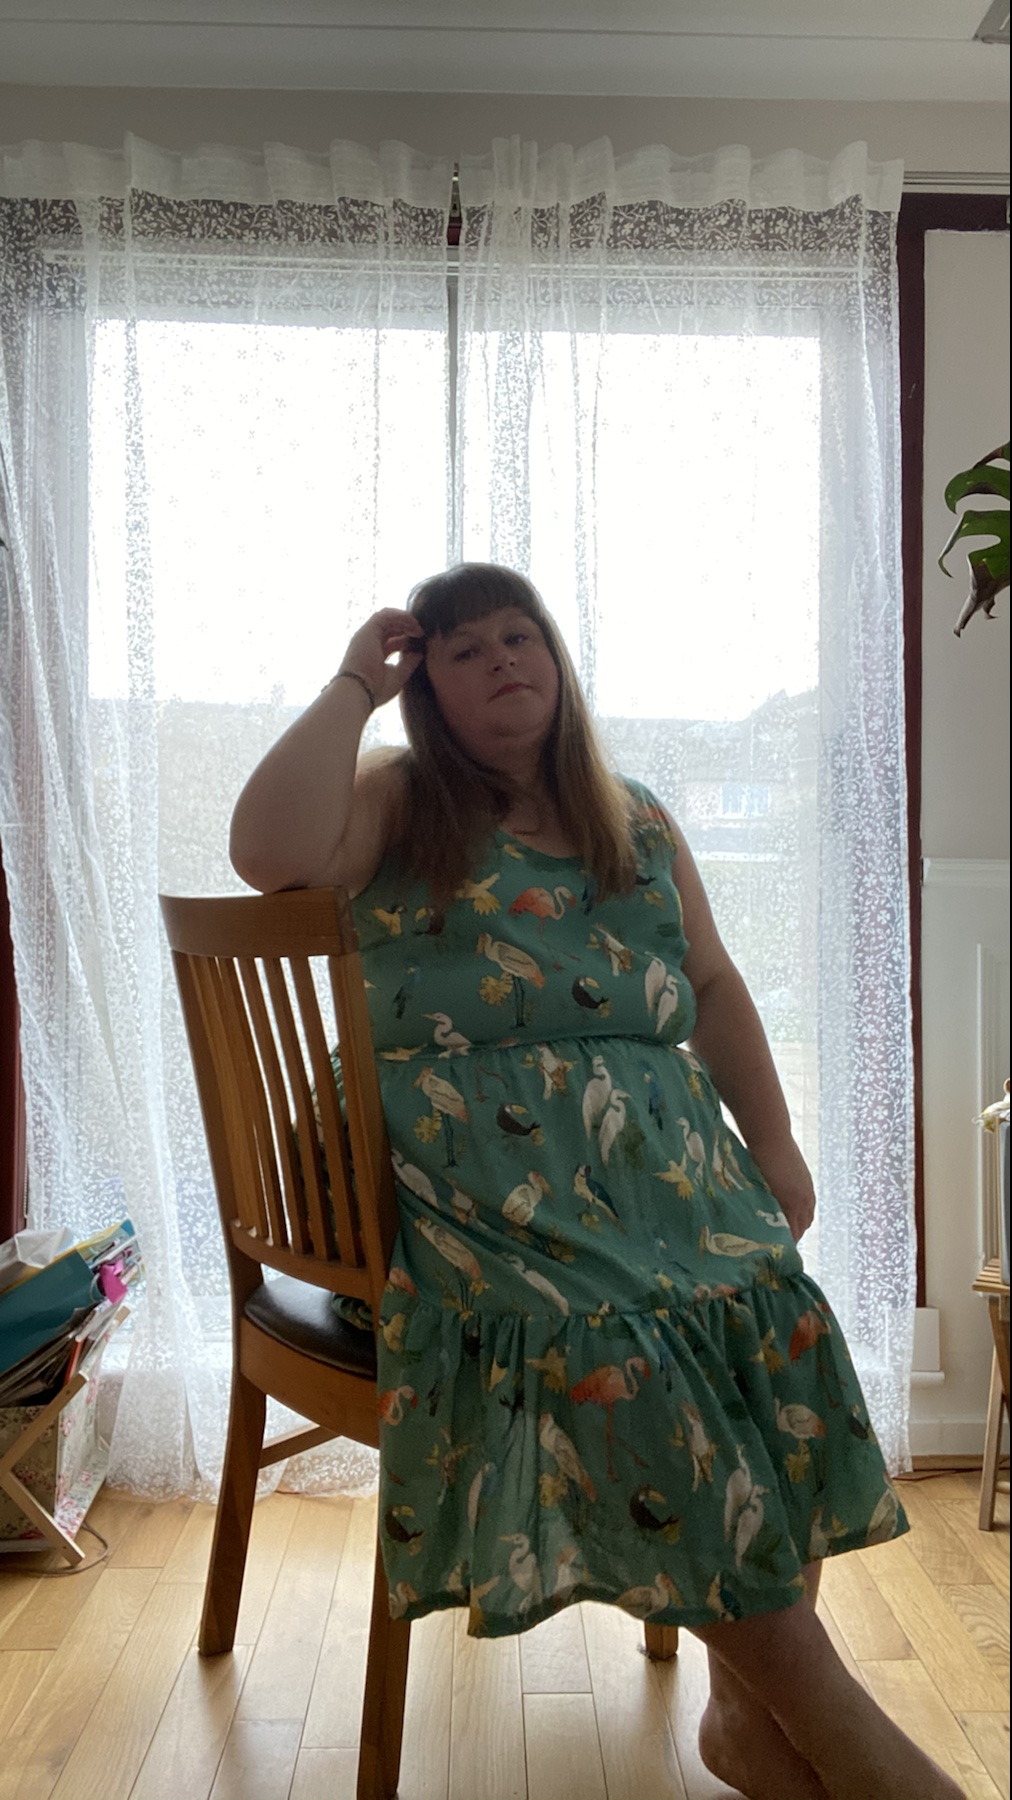
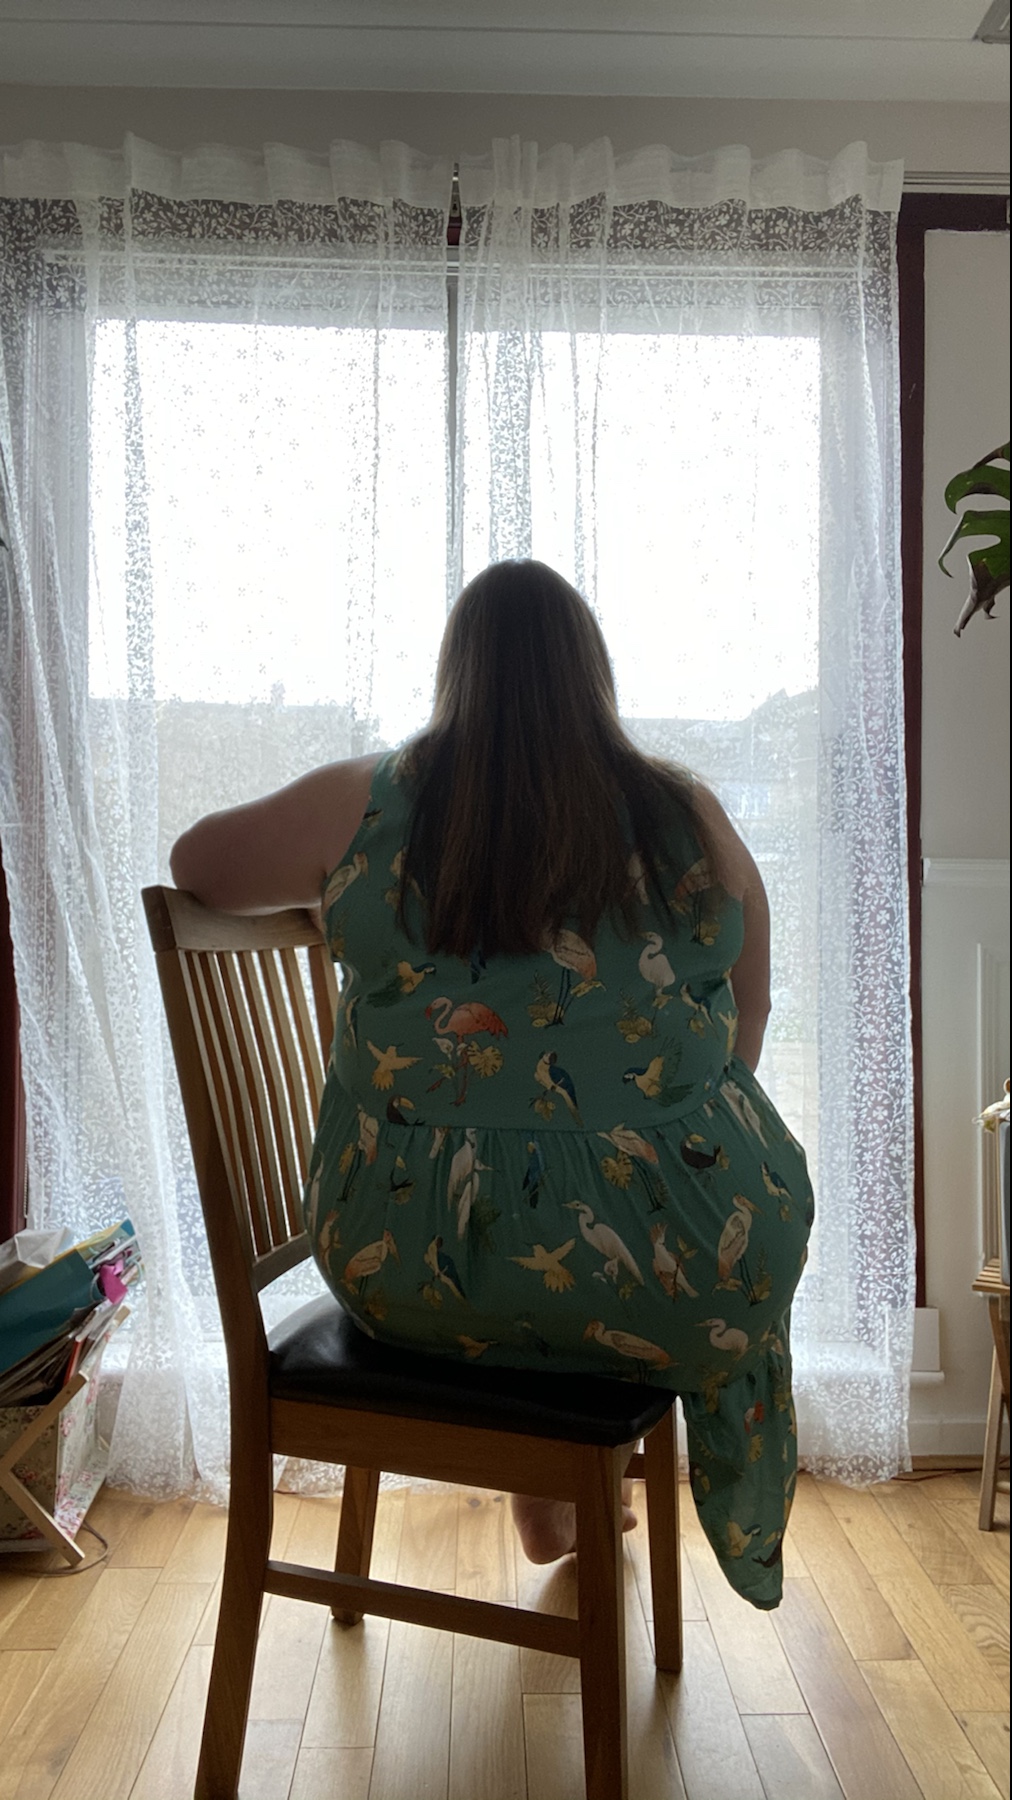
Wow. I can’t believe I completed the dress 👗 as it it was touch and go, but I did.

For the challenge, which was created by the fabulous Ruan @TheYorkshireSewGirl and the lovely Sam @Frugalisama over on Instagram, I picked the Bardot Dress which was designed in collaboration with Lauren from @Elbe_Textiles and @PeppermintMagazine.

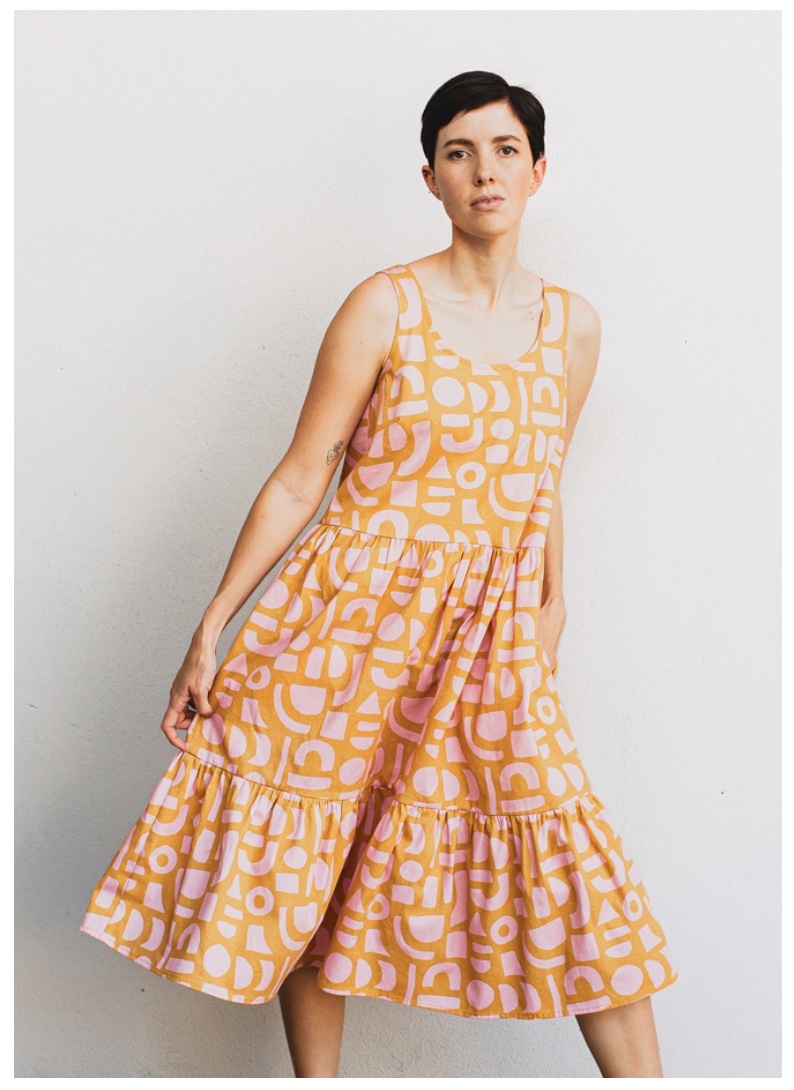
The Bardot Dress has a decent size range and a good amount of ease. The body measurements start from high bust 28, full bust 31, waist 24.4 and hips 34.6 inches to high bust 51, full bust 53, waist 46, hips 56.3 inches.

Because of the ease and the amount of fabric I had I choose size H for the bodice and I.

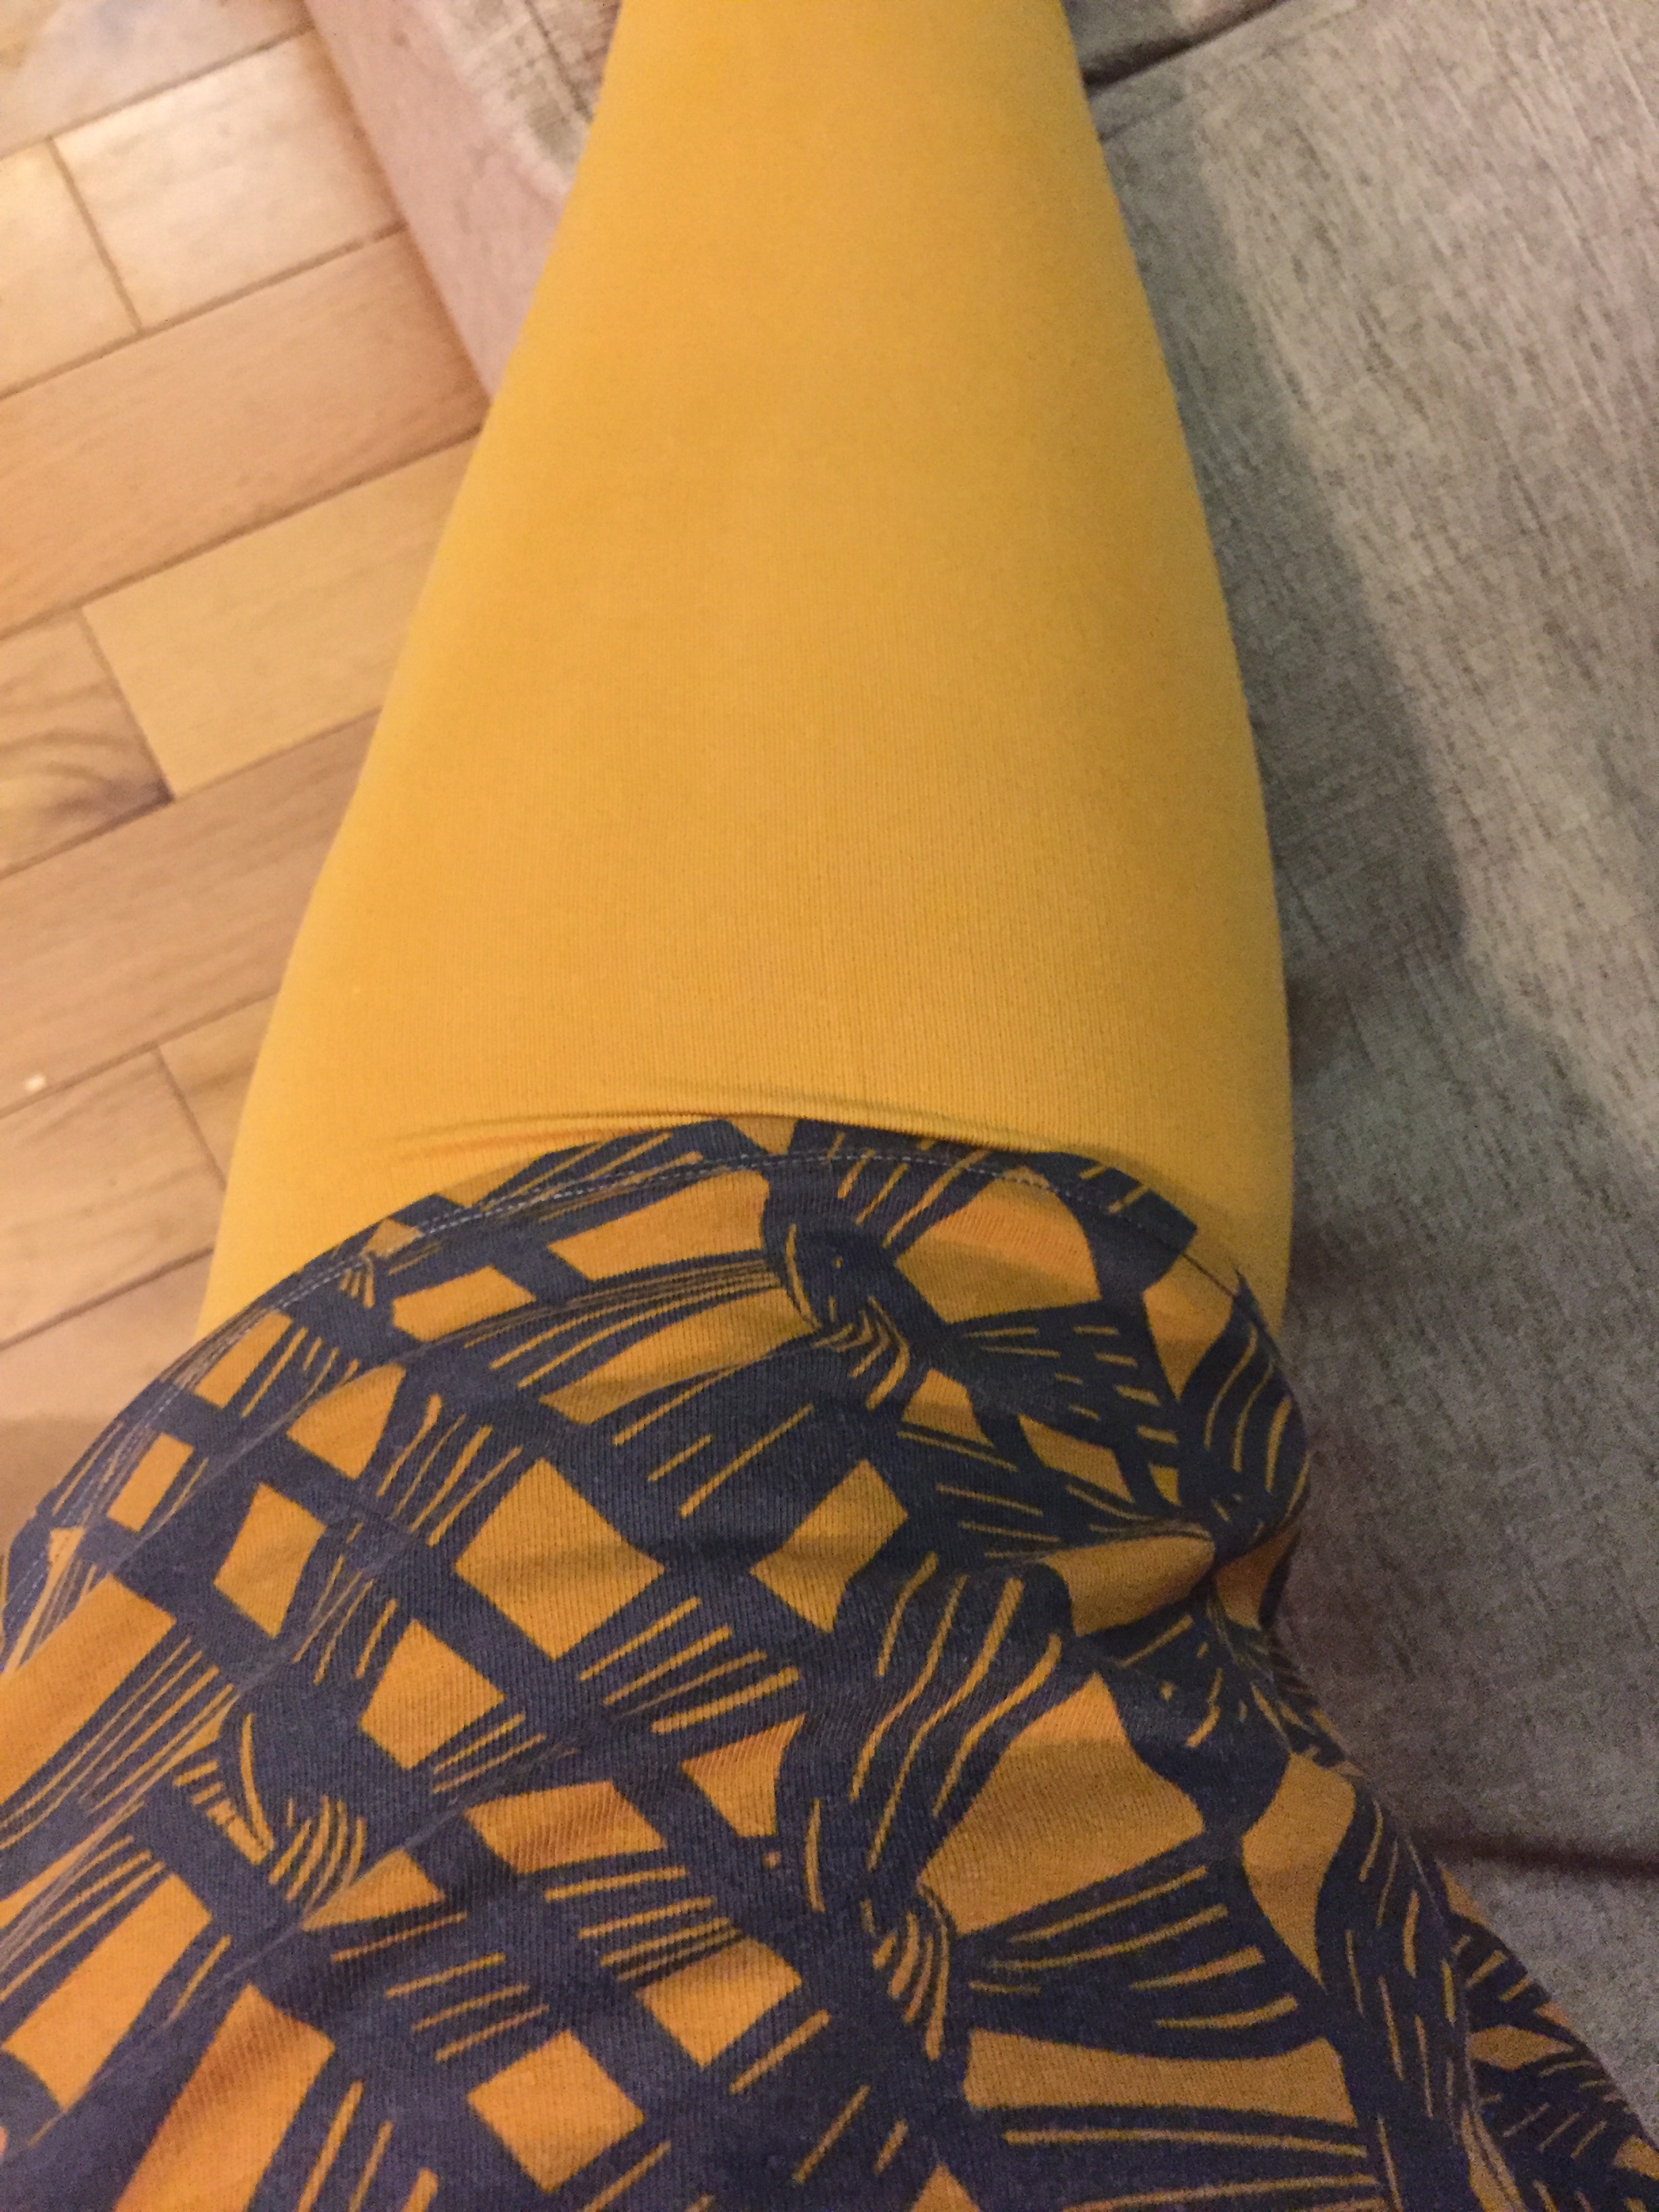
The fabric that I choose was “Bird Parade” viscose twill from @FabricGodmother … which I think suits this dress so well, especially for a spring summer print and dress!

I used 3 metres of this viscose twill and that’s all I had. I didn’t use the fabric layout … recently I’ve been playing pattern Tetris and loving the challenge!

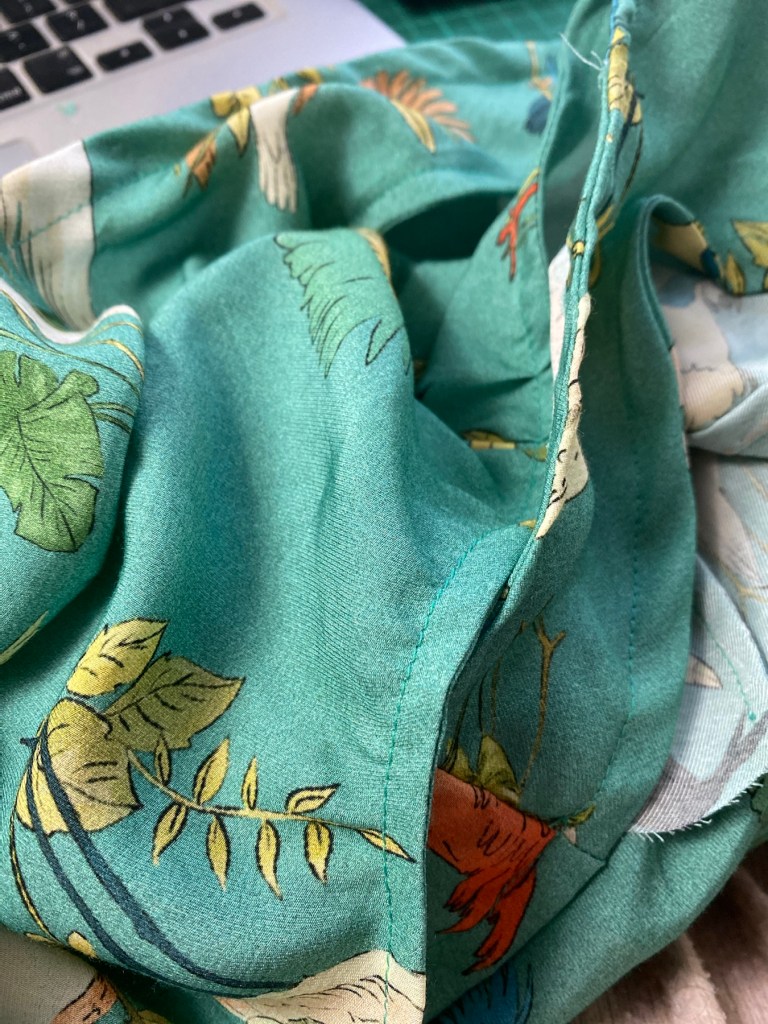
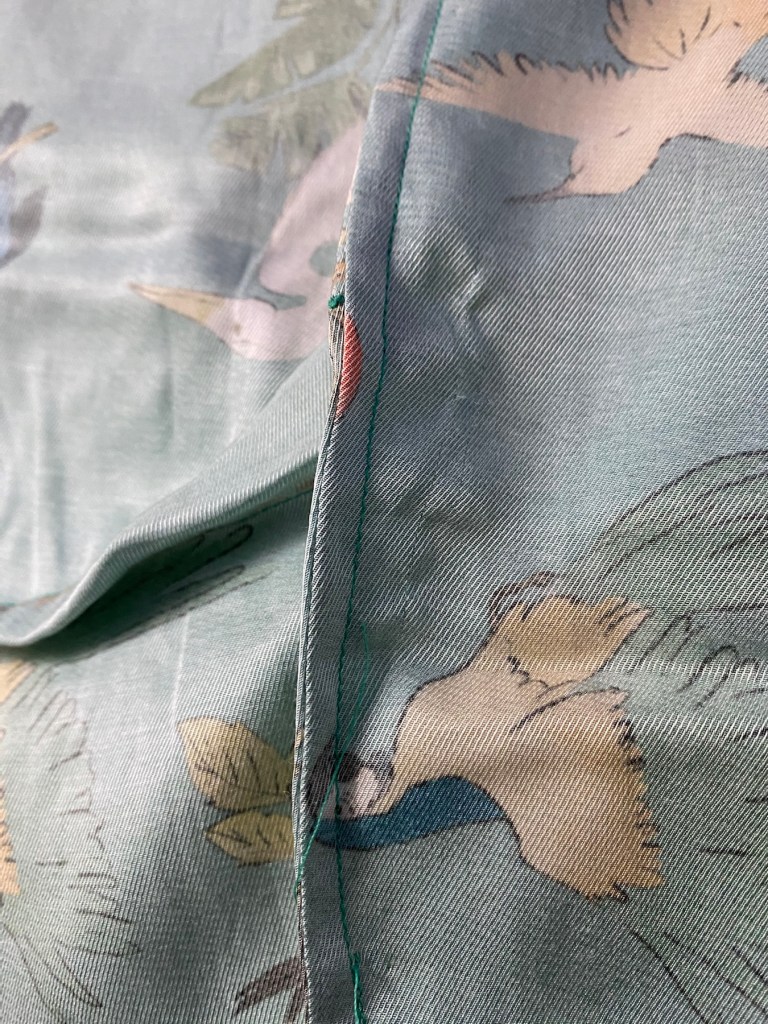
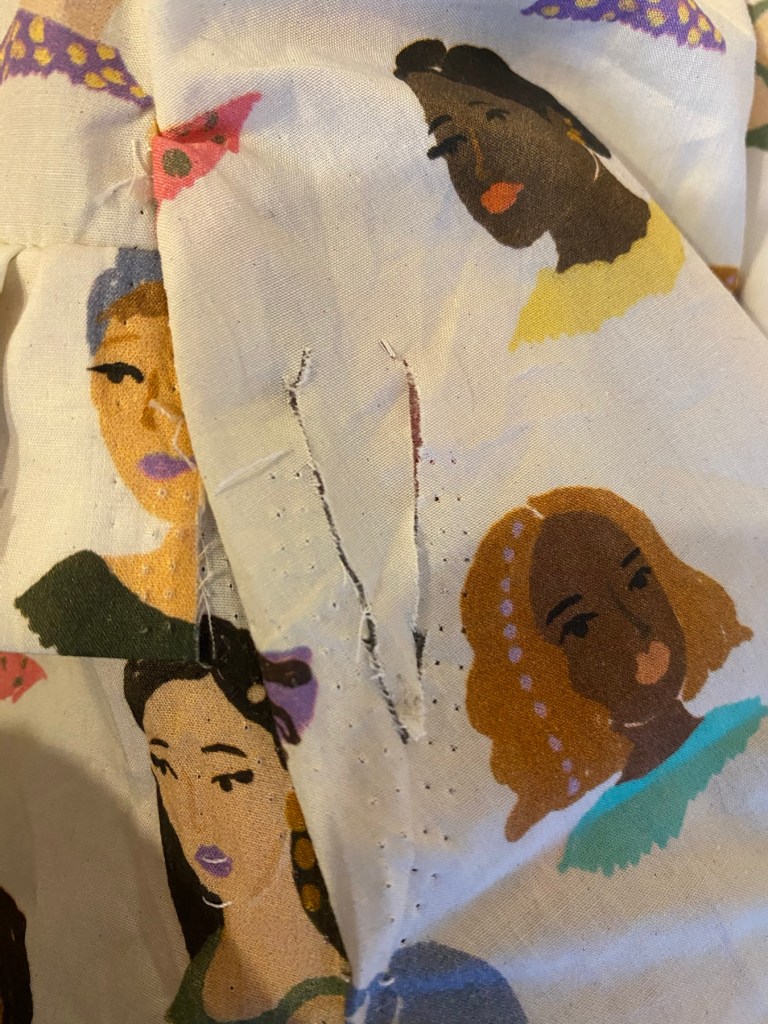
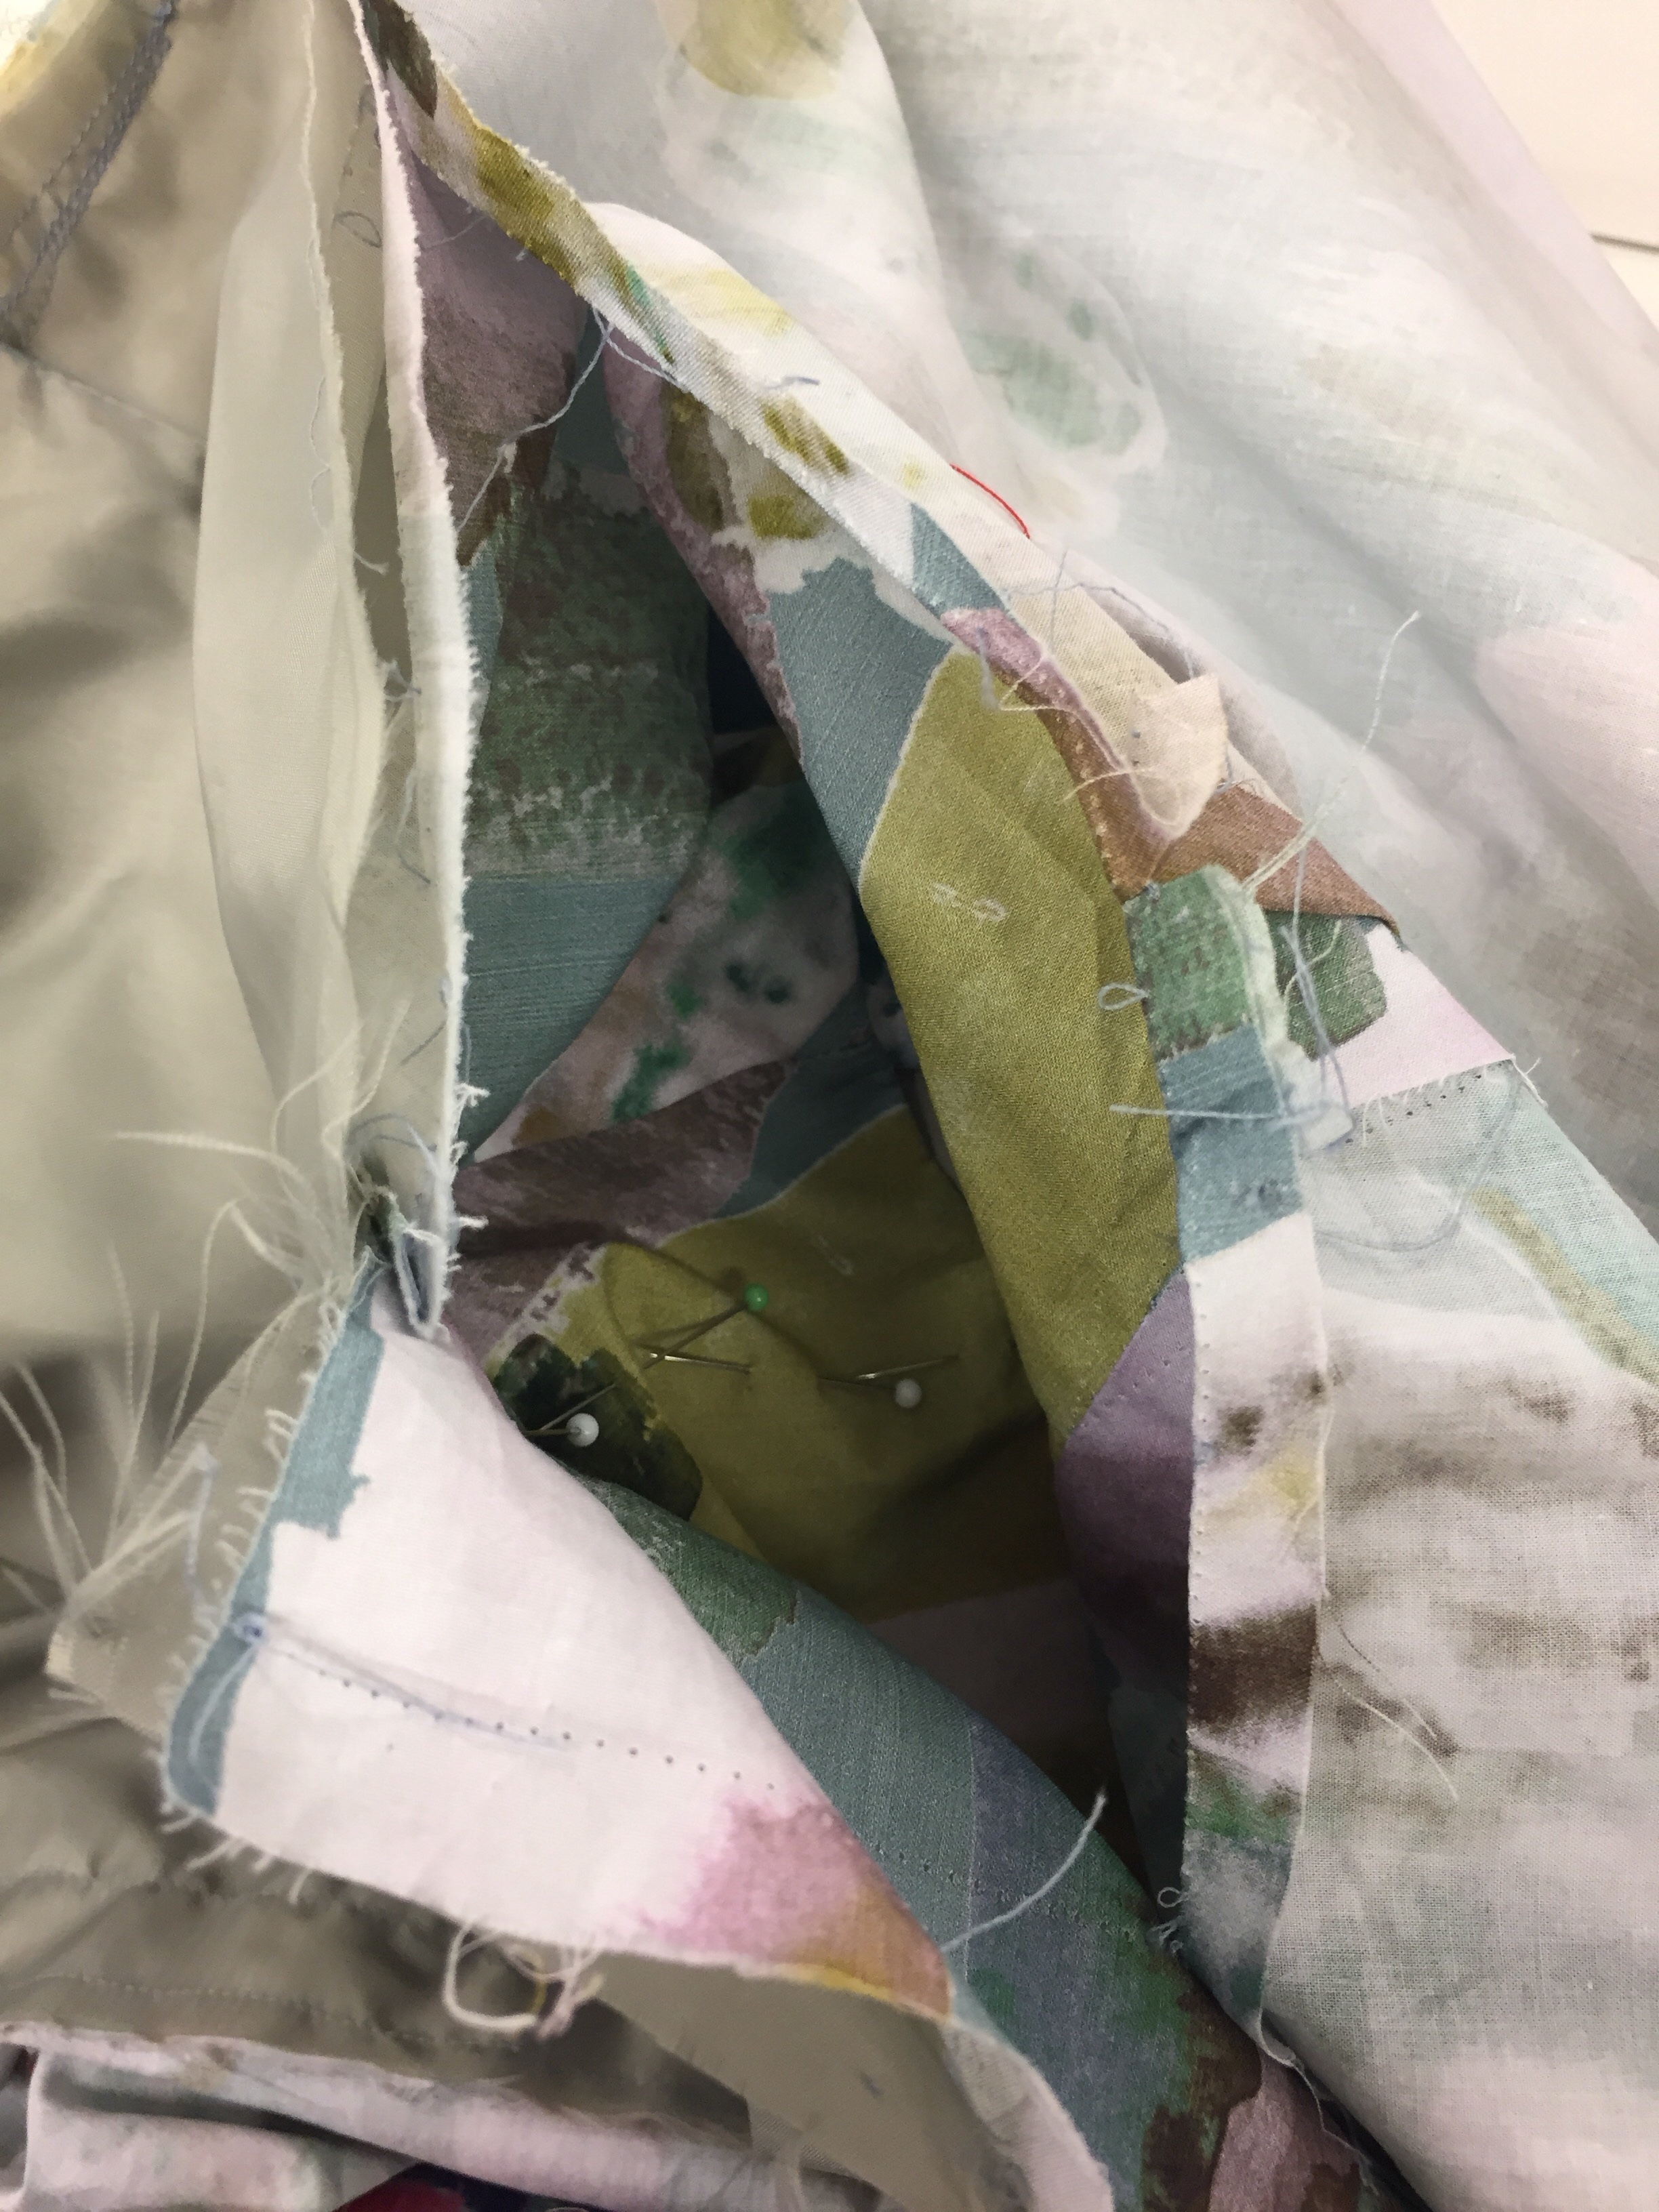
Sewing this up I noticed the fabric was fraying ever so slightly but it was as bad as other viscoses but I did try out French seams and they are on the majority of seams including the pockets and the bodice! This was my first time trying out such skills and I’m gobsmacked that it worked out so well.

French Seams!

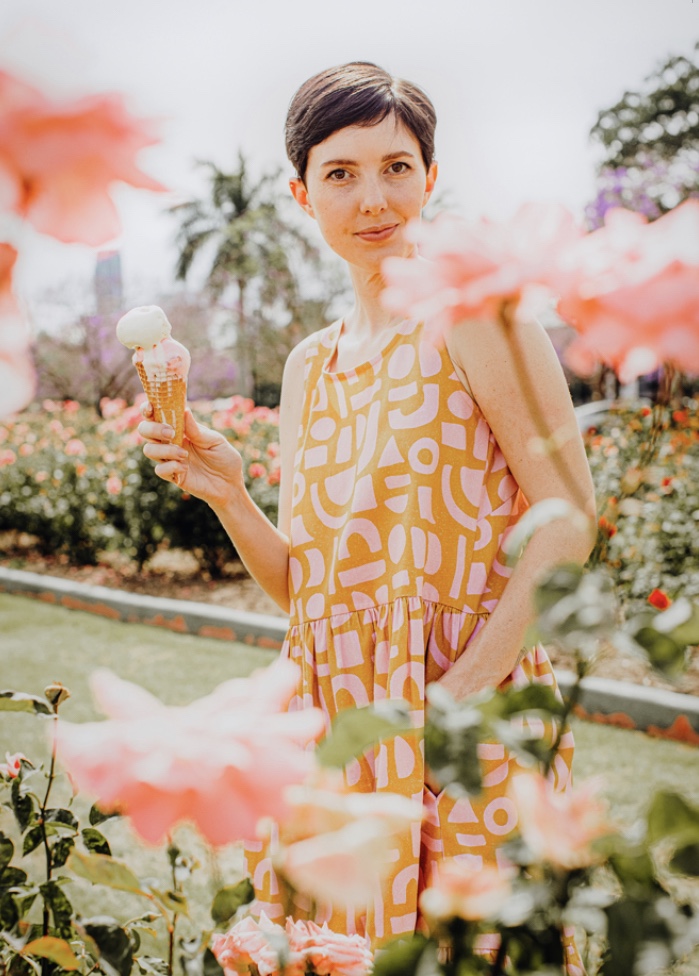
I made my own bias to add to the edges just by cutting out strips of 2cm wide on the bias on a s small piece of left over fabric. It wasn’t straight or neat but it does the job and you can’t see the wobbly edges as they are on the inside.

This dress took a lot of gathering and I mean a lot! Lots of patience, even more pins and delicate precision were required to get even gathers.

I’d definitely recommend this dress for summer holidays or lounging about at home on a hot day. The instructions are really good but I really didn’t use them that much. I kinda just went for it!

When I do this dress again and I will do it again, I’ll size down further on the bodice and shorten the shoulder straps and I’ll probably shorten the bodice. I’ll still swan about in this dress though as it’s got swoosh appeal!

I just want to thank both Ruan and Sam for this amazing challenge. It’s been so nice to see so many lovely makes from the community and find some more free patterns that are size inclusive. On that note, I think I’ll be trying the Peppermint Maxi Dress and the Lucia from Mood fabrics, very soon.

Happy Sewing!

New Make: Sagebrush Top

Ever since I did my tester on Friday Pattern Company‘s Sagebrush Top, I’ve been hooked!

The brilliant Sagebrush Top – definitely a TNT pattern with me!
My Sagebrush Tester

Hooked in the sense that recently I did a batch cut and I’ve already sewn one of the up – yes already I’m churning Sagebrush Tops out!

I really love this pattern and the details of it. From the frill at the front to the gathering at the sleeves it just makes me happy.

This Sagebrush is slightly different to the others and I’ll explain why, in a moment.

You see it lies with the fabric choice. Previously I’ve went with a viscoses and a viscose-linen blend but I decided to take inspiration from the lovely Jen (@jenlegg_teescreatives) (I’ve met her in real life, as she came up to Edinburgh Frocktails, October 2019 and she is really lovely) who has already sewn the Sagebrush in the very same fabric.

The fabulous Jen in her “Ladies” Sagebrush Top

The fabric is a Lady McElroy Chantilly Single Ladies Cotton Lawn from Sister Mintaka which I bought a wee while ago after seeing Jen’s version and looks like there is some in stock. It’s a lovely quality and has sewn up a treat. I love the colours of the print, it will be so diverse! I’ve already thought of a few outfits featuring this top, including pairing it with Jeans, as shown in the photos.

And apparently I’m not the only one who was inspired by Jen, Louisa was too!

@LouisaLovesToSew in her Chantilly single Ladies Sagebrush Top.

Ok, my top was going so well until I decided to use my overlocker to finish the seams on the sleeve and front and back pieces …

I was seriously lost for words!

At that point of seeing the blade chop into the shoulder what like watching a horror movie. Urgh. I had to step away. It didn’t stop me from sharing my disaster on Instagram stories that night – but it also helped me come up with a plan to save this make.

I had two options, one seeing if I had enough fabric to cut out a new sleeve altogether but I couldn’t really justify using it as I was going to try and make a scrunchie and hair band plus other things from it. The other option was two interface the wrong side and the right side and hope that I wouldn’t need to do a patch work … my needlework is erm shockingly bad 😂

This is a close up of the repair after being interfaced. Not bad and if I don’t point it out I doubt people will notice.

So once I got that bit out the way I could move on and get it finished – yes that’s what we like – a happy ending!

On this Sagebrush I took a bit off the length off and made the hem deep And I actually really like it. So I think I’ll do the next couple this new length.

All smiles!

As you can see, using the cotton lawn gives the frill real structure and the sleeves extra va va voom! I do really like the effect that this cotton lawn has on the pattern.

I love the new length!

Well, that’s the 4th Sagebrush of many more to come … I’m excited to do more!

Fiamma wanted in on the action 😂

Again, thank you for reading and happy sewing!

Myosotis Dress by Deer & Doe

Although I’ve published my photos on Instagram, I thought it would be good just to have my thoughts on the pattern and fit here for my first myosotis dress.

So before I started I check my back measurements according to the pattern piece and shortened the bodice. I think it’s a tad too short in this version but hey ho I’ll still wear it. For my next version I’ll definitely used the for bodice piece and original length. I cut the largest size and instead of 1.5cm/5/8” seam allowance I went for 1cm. The bodice fits really well.

The skirt has no real issues and was fairly straight forward although I only cut one of the lower ruffle and had to do a last minute panic of “ok where’s the remaining pieces of fabric” – which was fine. I pattern match this piece because there’s an extra seam at the back of the dress now because of this rookie mistake!

I think my favourite part of the dress is the sleeves. I’m just loving the ruffles and to me that’s something that’s surprising to me!

The fabric is a Lady McElroy Cotton “Marlie” lawn. The print is digitally printed onto the fabric. The print itself is called “Shades of Autumn – Midnight”. I bought this from The Cloth Shop by Remnant Kings, Edinburgh a good year ago for a myosotis dress and who knew it would turn out so well! I’m pleased it didn’t have too much time in the stash.

I found the collar to be a bit of a nightmare though. The instructions aren’t clear to be frank and if you follow them it leads you into a fiddle. So conferring with my sewing buddies, I’m advised to go and have a look at Professor pincushion on youtube and hey presto, the dress lives!

So there you go – my first and not last Myosotis Dress by Deer & Doe patterns. Thanks for reading and see you back here soon!

Making Kalle

Hey all!

It’s been an age since I wrote anything on here but now that we are in lockdown for this Convid-19 I have a bit more time to make and blog!

I’m currently making a few things, one of which is the Kalle Shirt by Closet Case.

I’m doing version A, the cropped shirt in a liberty cotton lawn. This is the first time I’ve tackled a shirt!

I’ll add more pictures and information as I go but in the meantime I’ll get going and hopefully soon I can model it!

But it’s not Moneta, it’s …

Myrtle Dress by Colette Patterns!

Yes I finally cracked my Moneta obsession, don’t worry there’s plenty more of them coming with hacks but for the moment I’m trying out different patterns and I have a few exciting things that are happening but I can’t tell quite yet!

Ok, lets talk Myrtle:

Do I like and will I use the pattern again, if so will I make any changes?

I love it, especially the cowl neck feature.  I’d definitely use the pattern again but I would shorten the shoulders to avoid the embarrassment of showing of my assets too much!

Where did I get the fabric from?

I bought the lovely viscose jersey from fabric focus this winter, unfortunately for you I took the last 3.5 meters (sorry but not sorry) in fact, originally i bought 2,5 meters realised I didn’t have enough and the luckily there was 1 metre left when i went back to the shop – phew!

Myrtle needs quite a drapey jersey and lightweight I’d say and for me it was a good skill builder. This was the first time I did a cowl neck and used the main fabric for a lining on the front and encased elastic in the skirt.

For a quick make, once you’ve done it once it makes sense.

Ok here’s the fun part – PHOTOS … Hooray!

Now, where I’m I going to fit in time to do a woven version in this pattern? I love how this pattern is versatile like this!


The Moneta Obsession

Currently I’m sewing up a line of Colette’s Moneta Dress … you could say I’m obsessed (the title gives that one away!).

It all started with seeing the Moneta Party on IG way back when I first got the itch to stitch. It’s only take me a couple of years to summon up the courage to thread up the overlocker and have a go of this Jersey malarkey.

Here’s a Summery of my dresses so far!

Moneta 1

Fabric: John Lewis – dark green and black

Sleeves – short length

First trip out was at Tantallon Castle!

Moneta 2

Fabric: Fabric Focus, Mustard and grey knots

Sleeves – 3/4 length

Shortened bodice length and slightly shorter skirt

Made it up for #OWOP18

My mustard snag tights match up perfectly with this version!

Moneta 3

Fabric: Fabric Focus

Hack – scoop back

Sleeves: 3/4 length

Wore to a friends exhibit opening night!

Moneta 4

Fabric: Fabric Focus, Sage green with floral design.

Hack – scoop back

Have to re do front bodice due to overlocker punching a hole in it 🤬

Sleeves– 3/4 sleeves

Date night with the bestie for this one!

Well that’s four so far and there’s at least another four to be sewn including a Christmas one, so watch this space and IG for more to come with other hacks (I love the scoop back hack!).

Also I am going to put a couple of other stretch/Jersey pieces in between now and the rest of the Moneta’s so you don’t think I’m a one-trick Moneta! I’ll be talking about my next few projects in my make nine 2019 post soon!

Oooopsa lacy!

Since the 5th May I’ve been on a fabric ban but this Friday past I broke it and I broke it hard!

You see when you see something RTW and the stock is low in your size but you have the sewing skills (this does not include boning or lace!!) you go what the heck and go all in, pretty much head first.

So this is the RTW dress I’ve fallen IN LOVE with and just wanna swosh about in.

The RTW dress is a beautiful Monsoon one but as said a second ago, the size I was looking for had gone out of stock. I would definitely pay £139 for it but that’s if they had it. But I’m not going to buy that dress, I’m going to make it eeek!

Fabric:

After ordering several different swatches and doing a ridiculous amount of searches for “mint guipure lace” online I wasn’t anywhere forward. Locally I was starting to loose my confidence in getting what I really wanted. It was on the final straw that I took the tip from a previous co-worker to visit Fabric Focus. It should’ve been first choice – doh!Above the linings, there lay the beautiful lace guipure in exactly the colours and shade I was looking for and too even make my July better the lining was there to make it pop! 
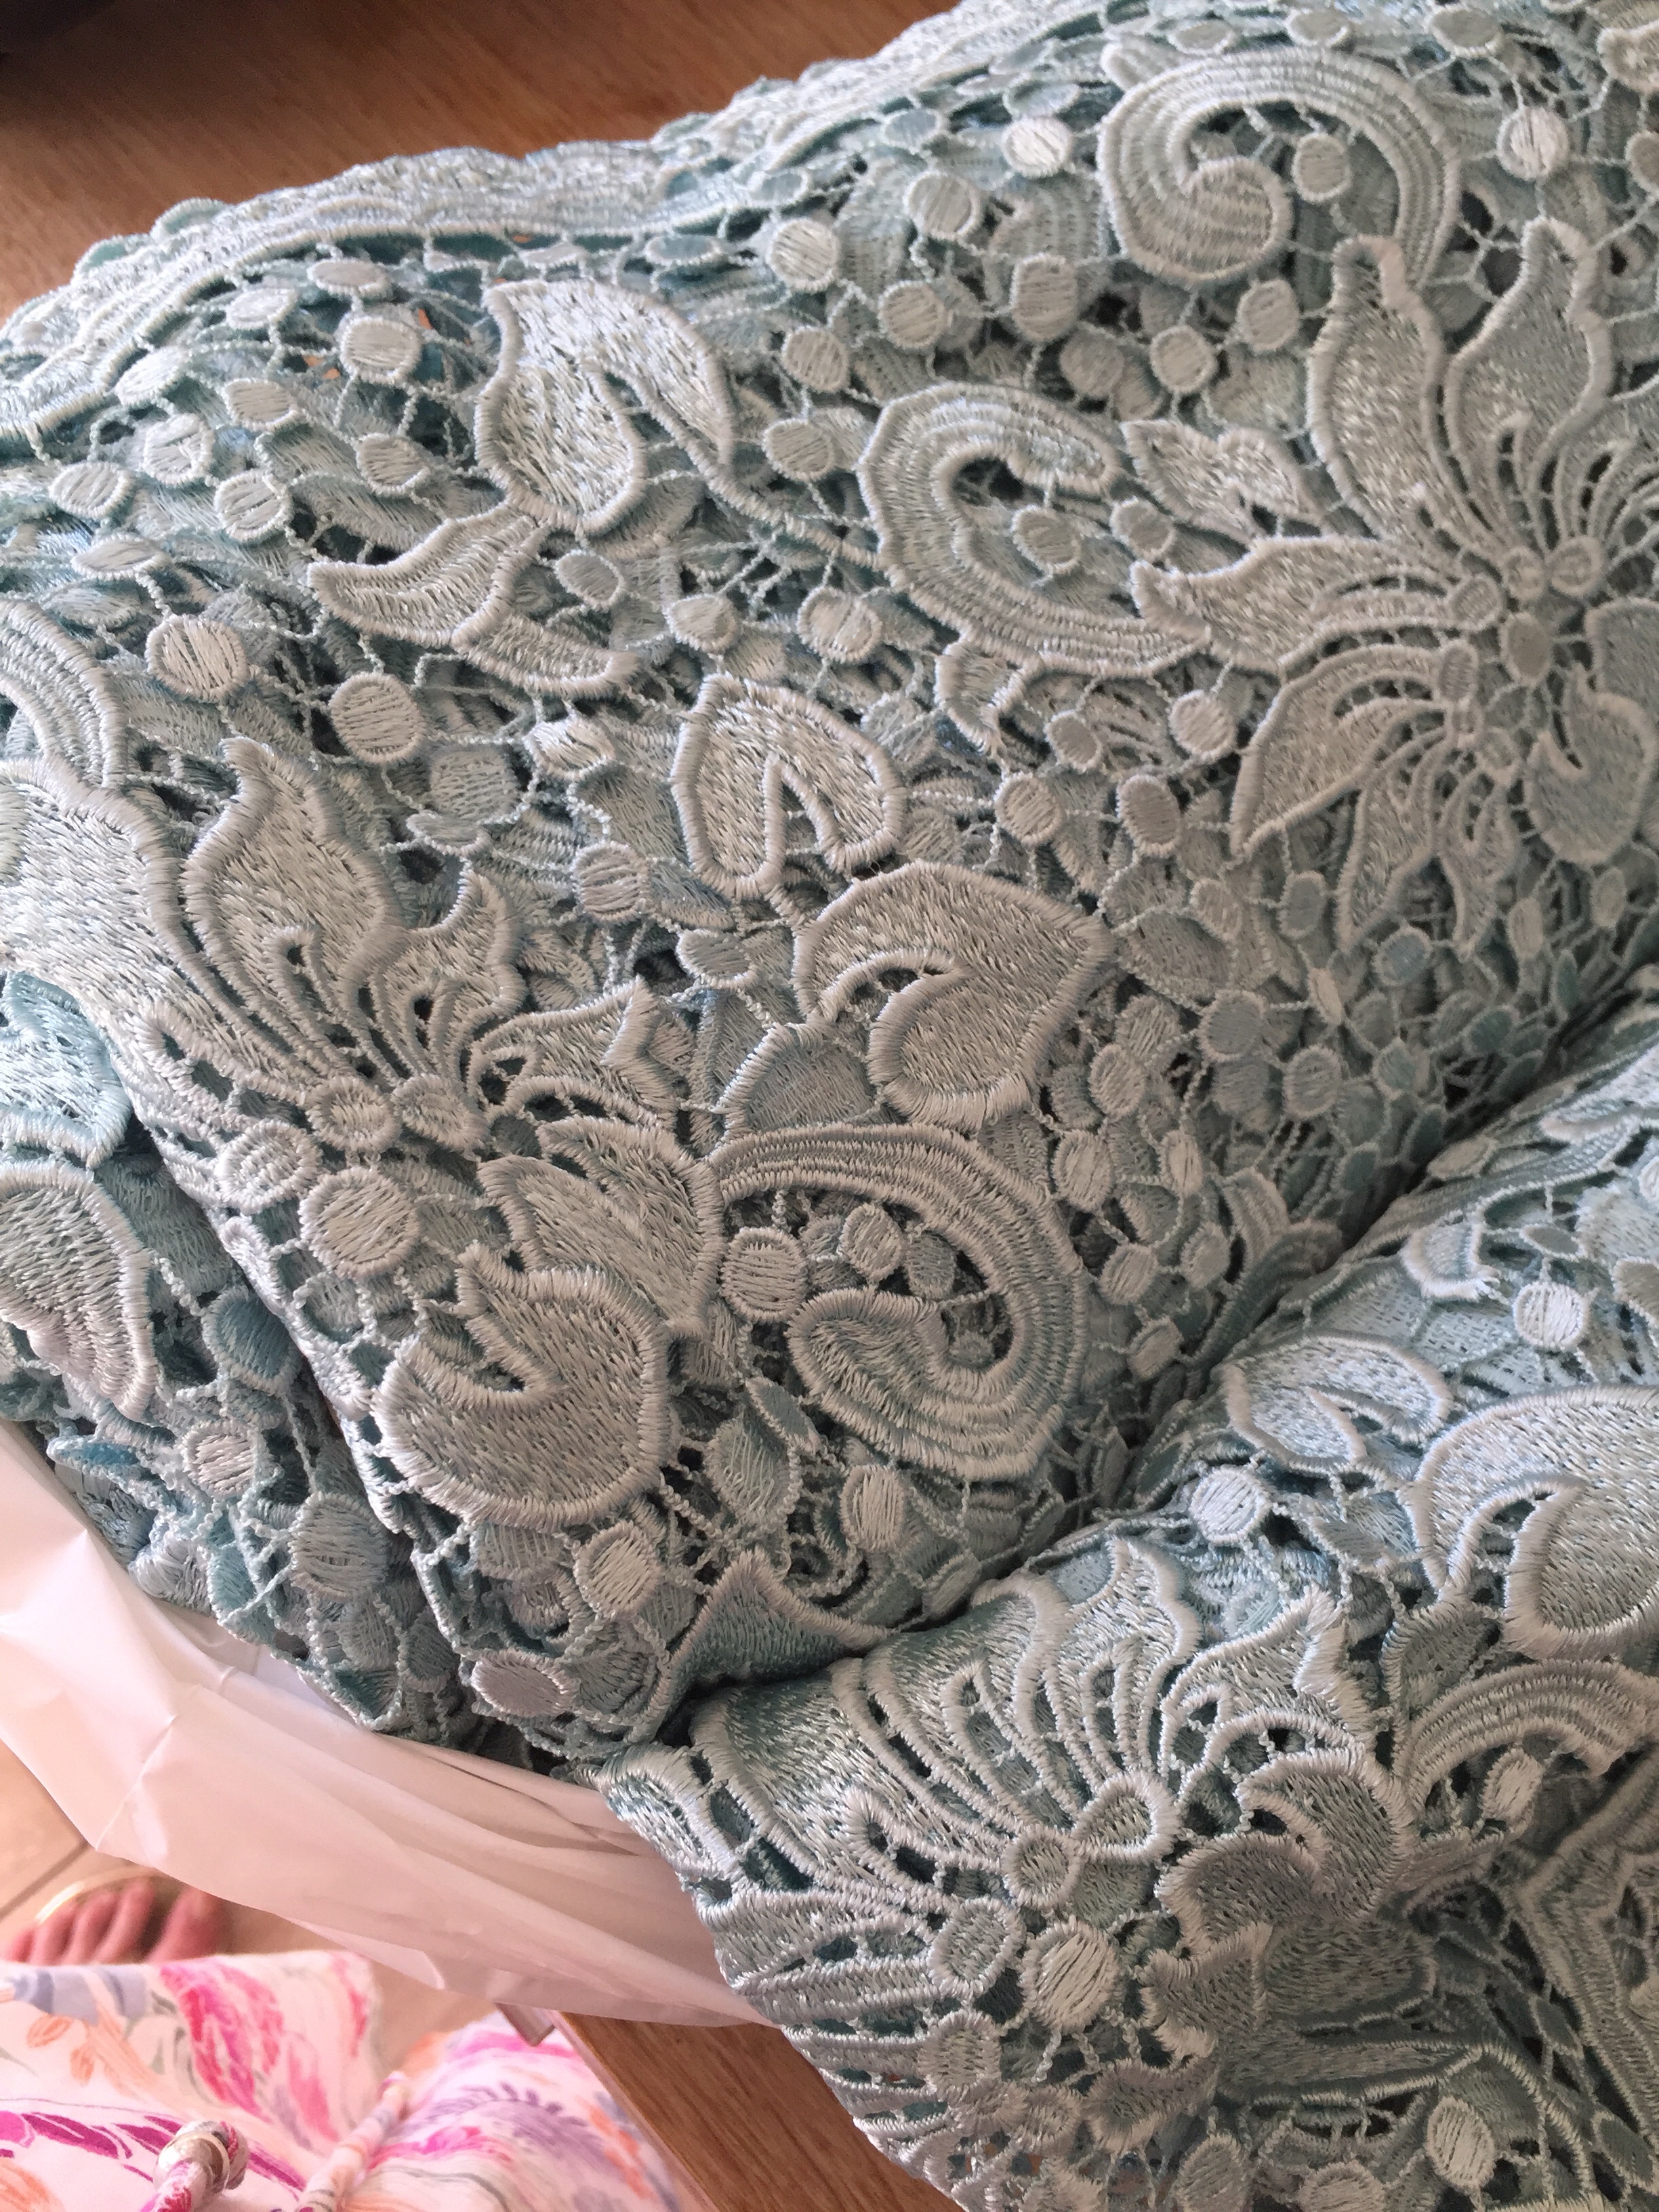
It’s a-lot more minty than the photo suggests. The lining is a skin tone. But I may have to double it up with a cotton because of the boning!

The Pattern:The pattern was a lot easier to find and in the end the McCalls 7720 was a very close fit.

I’ll get the boning, hook & eye, threads and zip organised at a later date. I might make a toile and see how that goes before I start back at my evening classes in August if I get other projects finished! I can’t thank Kevin at Fabric Focus and his lovely Mum (who actually served me) enough for stocking this lace. You made a very happy lady. This is just a perfect example why we should support local shops like this!

Disclaimer: all opinions are my own!

Sewing: McCalls 7381

So with little over a week I decided to start the dress that I planned to not only have finished but moved on to the the project.

As you know life doesn’t always allow you plans to go swimmingly well and time can just drown with you realising how little you have left!

I bought the Lady McElroy Cotton lawn “Brushstrokes” from StitchyBee a while back.

When I saw the McCalls 7381 pattern that I received free with Love Sewing Magazine a while back, I knew it would be a simple quick make providing I followed the instructions correctly.

Building the whole thing went brilliantly well until it came to me wearing it. It was huge, it was a tent on me. Where did I go wrong?

I had one resort, take it to class! So I did! Thankfully Abi saved the day but it meant me taking in at the waist (a lot!!). But I did it, It only took a few hours and a few swear words.

So where did I go wrong? I only went by the measurements on the back of the pattern envelope and not the ones on the tissue. I can definitely go down one size on the bodice (woop woop) next time. Also for next time I’m considering sleeves and the next version in viscose. So no I’m not put off – yeah! It’s so comfortable to wear as well, especially when it comes to eating a lovely German buffet and cheesecake because of the ease and the elastic!

A big thumbs up to M7381!

Sew Shop Local: The Sewing Studio, Dunfermline And The Fife Sewists Meet Up!

A week on after the #SewScottish Afternoon Tea another group of lovely ladies held a smaller but equally nice meet up in Dunfermline.

We all met at the Heaven Scent Cafe, which is set in the new building beside the abbey. The cafe has a lovely selection of cakes and hot drinks on offer but as the weather was so warm I opted for a cool fizzy elderflower juice.

We sat round a couple of tables for about an hour exchanging information about patterns, materials, fabric shops, discount codes and a little bit about our wonderful selves. It was a lovely chilled out affair and “suited me down to a t” as I had been up at 3:30am that morning for a 4:45am start at work!

After some much needed refreshments we headed up to the newly opened Sewing Studio. The Sewing Studio is a fantastic extension of Sew Yarn Crafty after locals were giving feedback back to owner, that there was a massive dressmaking following and they wanted more fabric choice and classes. It all came together pretty simply as there was a property available to extend into and that’s how it all happened.

It’s been a little over a year since I’ve been up to Dunfermline and checked out Sew Yarn Crafty. The last time I’d took a trip up was with my mum and my aunt. Mum was not that great at that point but wanted to get out the house and always supported me in my hobbies. That woman was always pushing herself, where she got the strength from was unbelievable.

Anyway before I go to a dark place … (everything connects!!)

Aileen, the owner of Sew Yarn Crafty and The Sewing Studio and myself!

The sewing Studio has a great range of fabrics and independent patterns (TATB’s, papercut, cashmerette, Sew over it and a couple of others.

I actually saw quite a few fabrics that I really wanted but I had to refrain as I’m only a week in from making that (damn) pact with @Sew_Sleep_Deprived so I wouldn’t buy anymore fabric – urghhhh!

I was stroking them and crying 😭. It was tough. I did refrain from fabrics but I bought two cashmerette patterns and a book about drafting dress and skirts.

The weather was on it’s truly best behaviour as it was gorgeous. I really need to come up and check out the Abbey.

So all in all, it was a lovely afternoon out and I’m looking forward to catching up with the girls again. Hopefully I’ll have made a few me makes by then and I can show them off!

5 things I wish I knew before I started sewing.

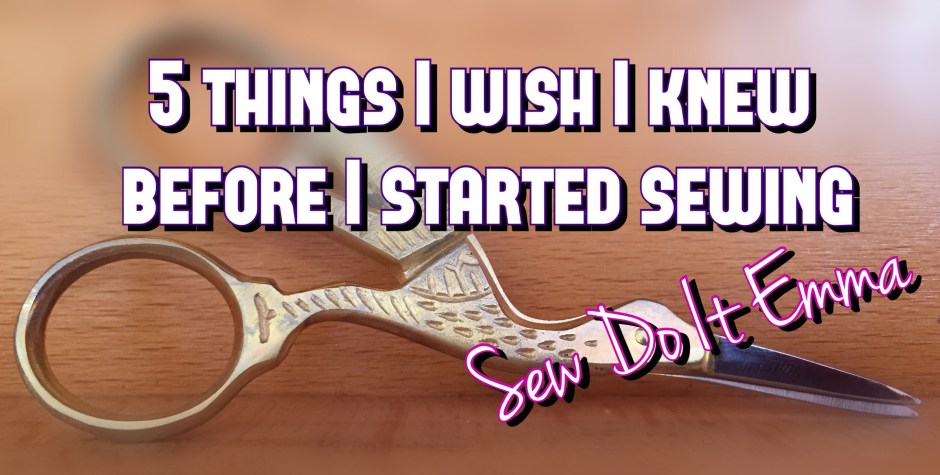
1. It’s ok to mess up.

We’ve all do it.  We’ve all piled so much pressure on ourselves and when something went wrong we left the unfinished garment in a crumpled mess on the floor in a corner.  I’ve admitted defeat on one or more handmade garments.  I’ve still got to pick them up and see what I can do to rectify the mistakes but for now, they sit it a small pile away from my view!

At the moment I’m amending a shoulder sleeve due to them being lopsided – don’t know how I managed but this is going to be worthwhile in the long run as it’s one of my favourite makes so far despite the sleeve issue. Making mistakes is also learning from them, how else are you going to learn and stretch that skill base?

2. Ask for help.

I’m very lucky to have such a good teacher at the sewing class that I go to.  I also have a couple of very good sewing buddies I can bounce off ideas and problems with alongside a fantastic community on Instagram too.

3. Measure yourself.

Pattern sizes are completely differencing to ready to wear sizes (RTW).  Please don’t buy a pattern and go on you RTW as you’ll have a garment that won’t fit once you put all that time, effort and lovely material (and dosh!) into it.

Measure yourself. Take that tape measure (grab a friend if you need help!) and jot down your measurements.  Pattern companies can differ in finishing measurements, so check each new pattern before you start the project!

Remember this: Don’t beat yourself because it may seem you are going up a few sizes from the RTW to the pattern sizes and also your finished garment will fit you better if you take your time to measure yourself correctly 😘

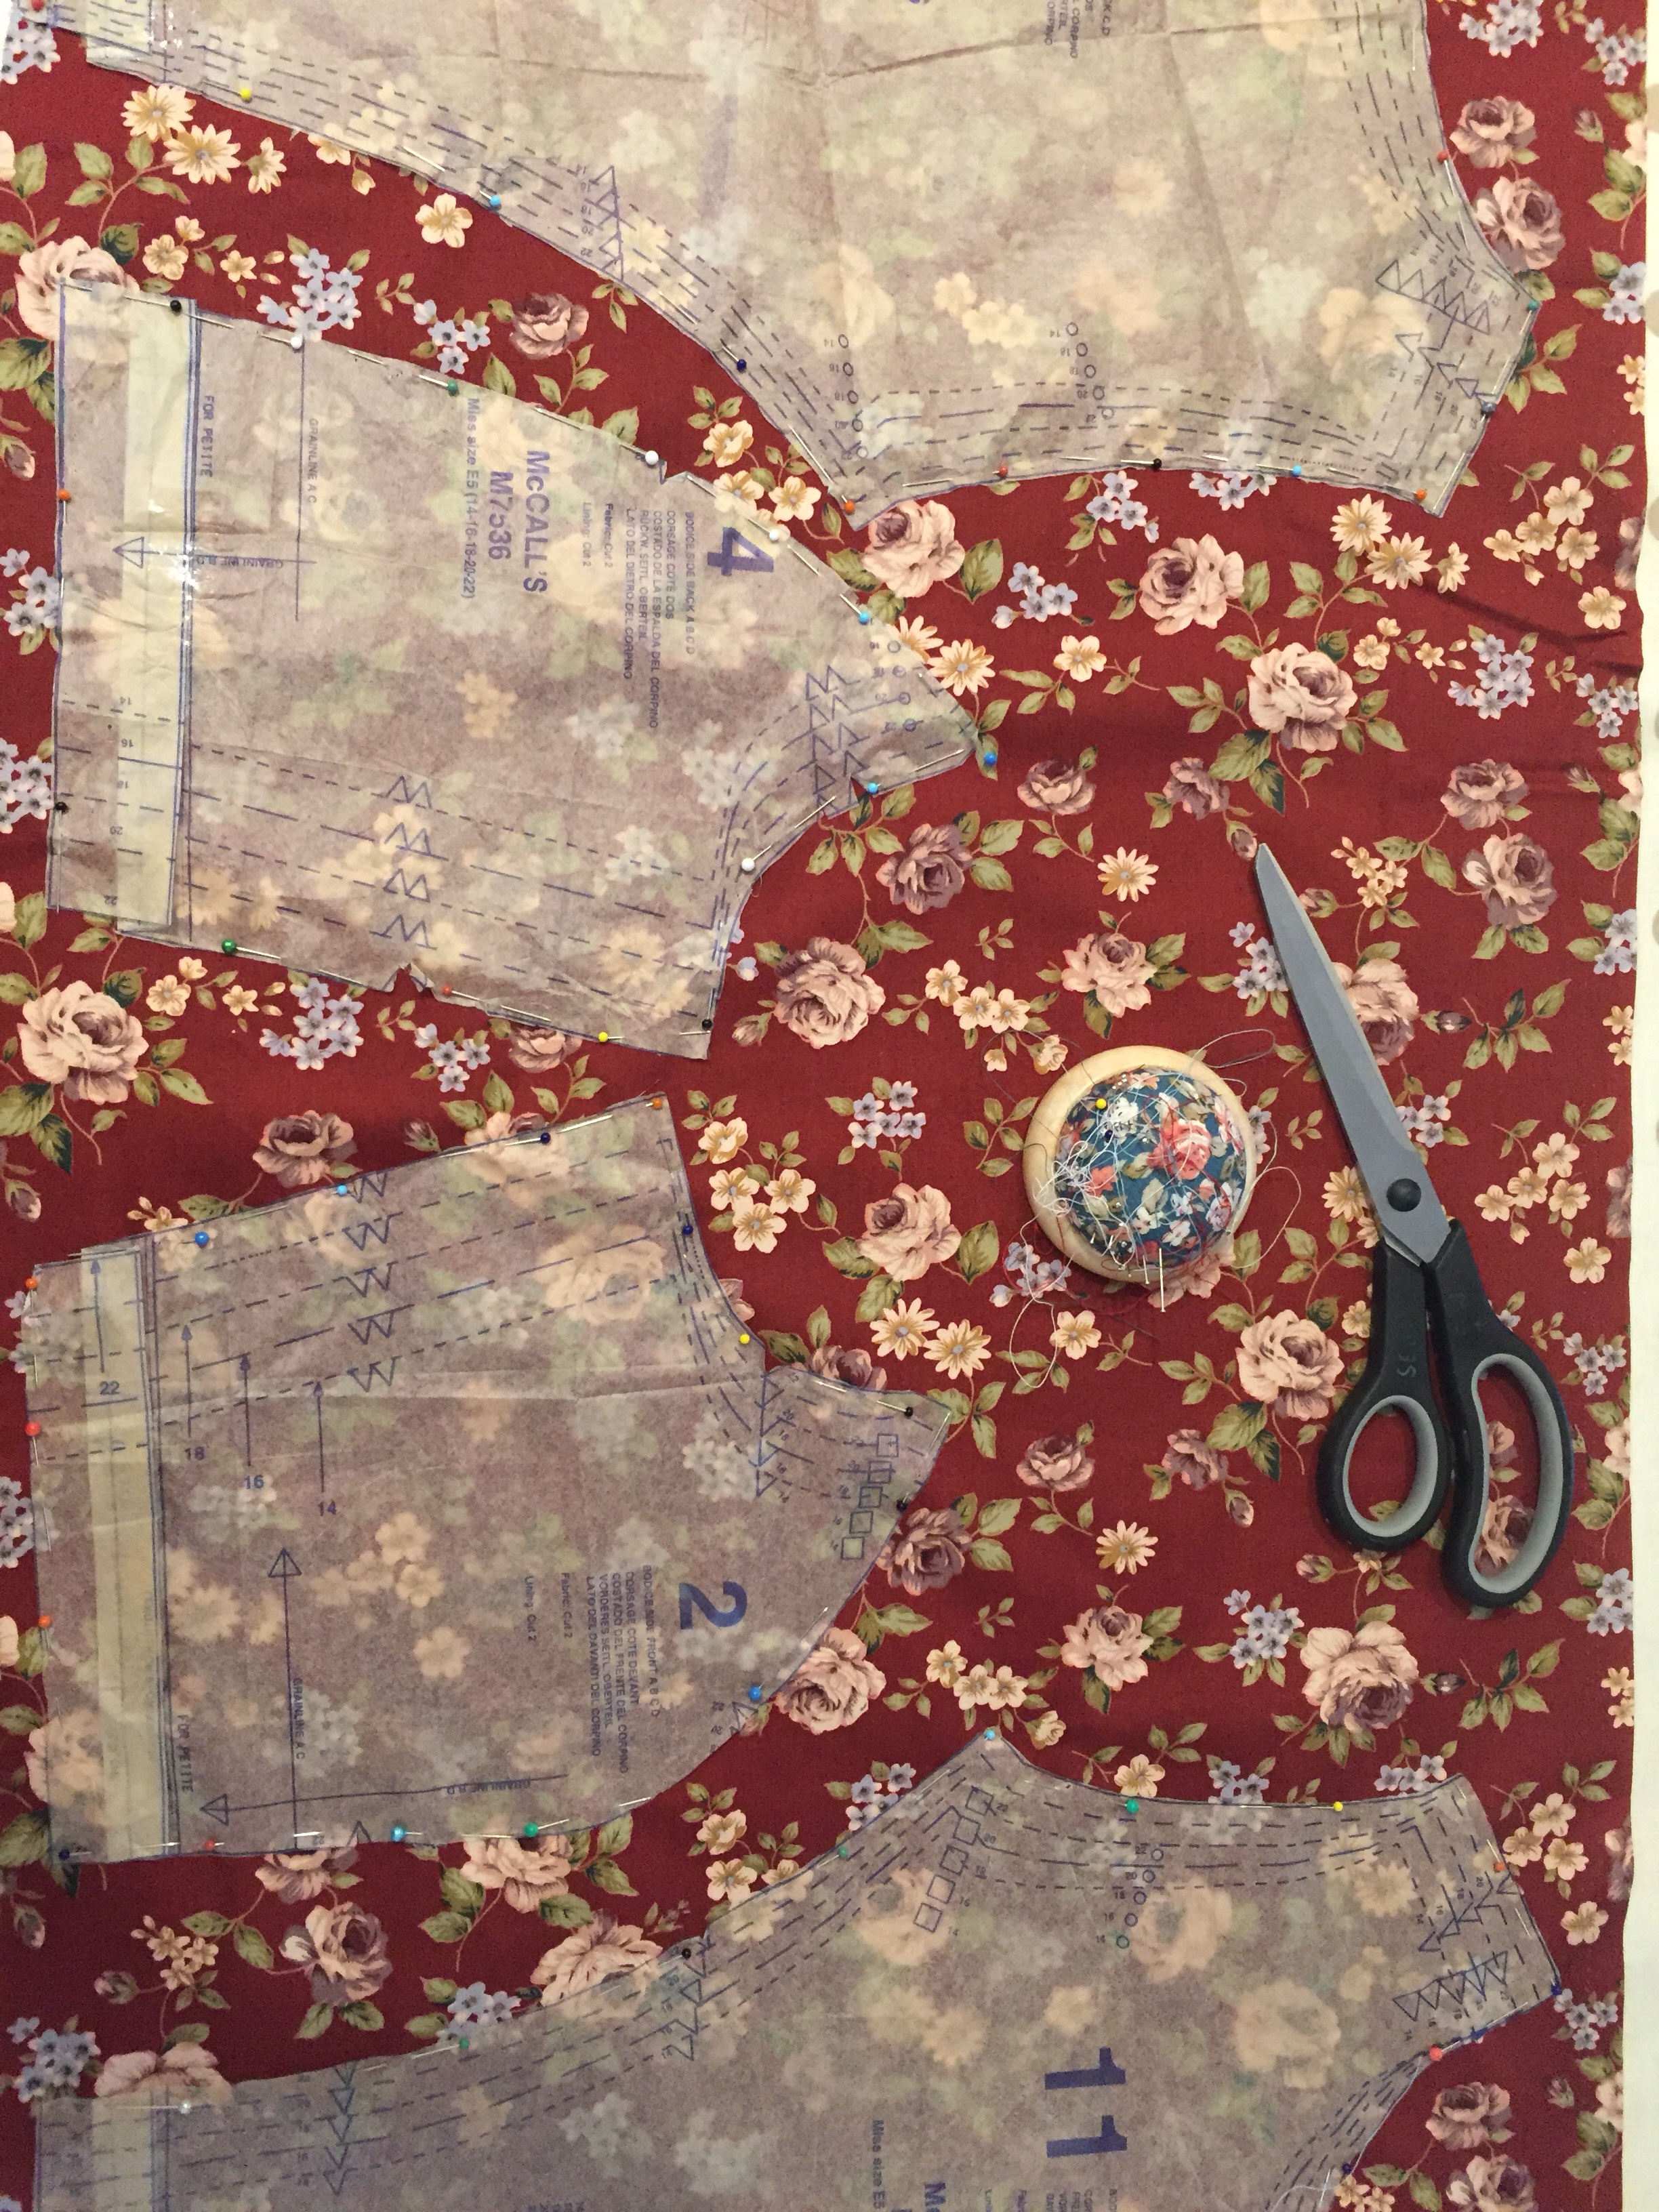
4. Seam allowances matter,

Again. Check, check, check!  Read your instructions a couple of times before you even start the process of cutting out. Highlight the seam allowances on each step.

Get yourself a seam guide and test to see if your seam allowance is really 1/4”.  Same with 1/2″ and so on.

When you find the spot on your machine that is 1/4” mark it with washi or masking tape that way you won’t forget where it is.

5. Invest in a basic sewing kit.

Scissors (Straight, pinking, little snippers for cutting little threads and ones for paper), Measuring Tape, chalk, pins and a seam ripper is all a good start and then you can add more, such as hand sewing needles, extra bobbins (make sure you get the right ones for your machine as there are not universal where as are machine needles are), pin cushion (homemade or bought). This list could go on for miles (trust me!) but get the basics and add from that, which should keep you right!