I know 2021 isn’t quite over yet, and this isn’t my final thoughts but I just wanted to reflect on the positives of my sewing journey so far.

I know 2021 isn’t quite over yet, and this isn’t my final thoughts but I just wanted to reflect on the positives of my sewing journey so far.

My sewing adventures in trousers.

I’ve updated a very old post and brought you a bumper addition of my favourite online fabric shops !
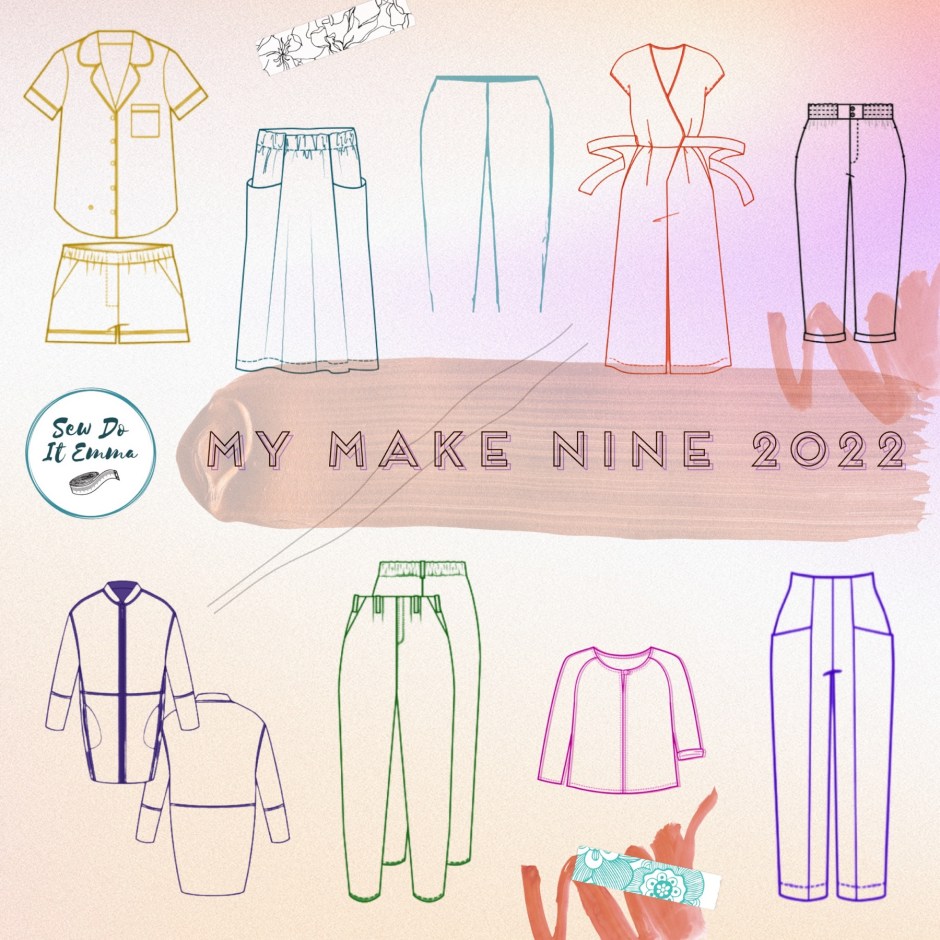
As I start to write this, it’s 3 days into this brand spanking new year and for the month of December 2021, I’ve been really narrowing down what I want to sew for the Make Nine Challenge 2022.
A lot of people don’t like set goals and although I started off well in 2021 (I completed 4 out of nine garments before April) but then all the patterns were like “make me Emma”! For some reason, for once this didn’t overwhelm me into a loss of sewjo, in fact I made over 70 items, most of which was clothing for myself apart from one or two presents including a Jude Beanie and a Jackson Pullover for Paolo, my husband.
I’m trying to make this years goals more realistic using mostly fabrics and patterns from my stash, which seems way too sensible for me.
But anyway here’s my make nine 2022 plans …


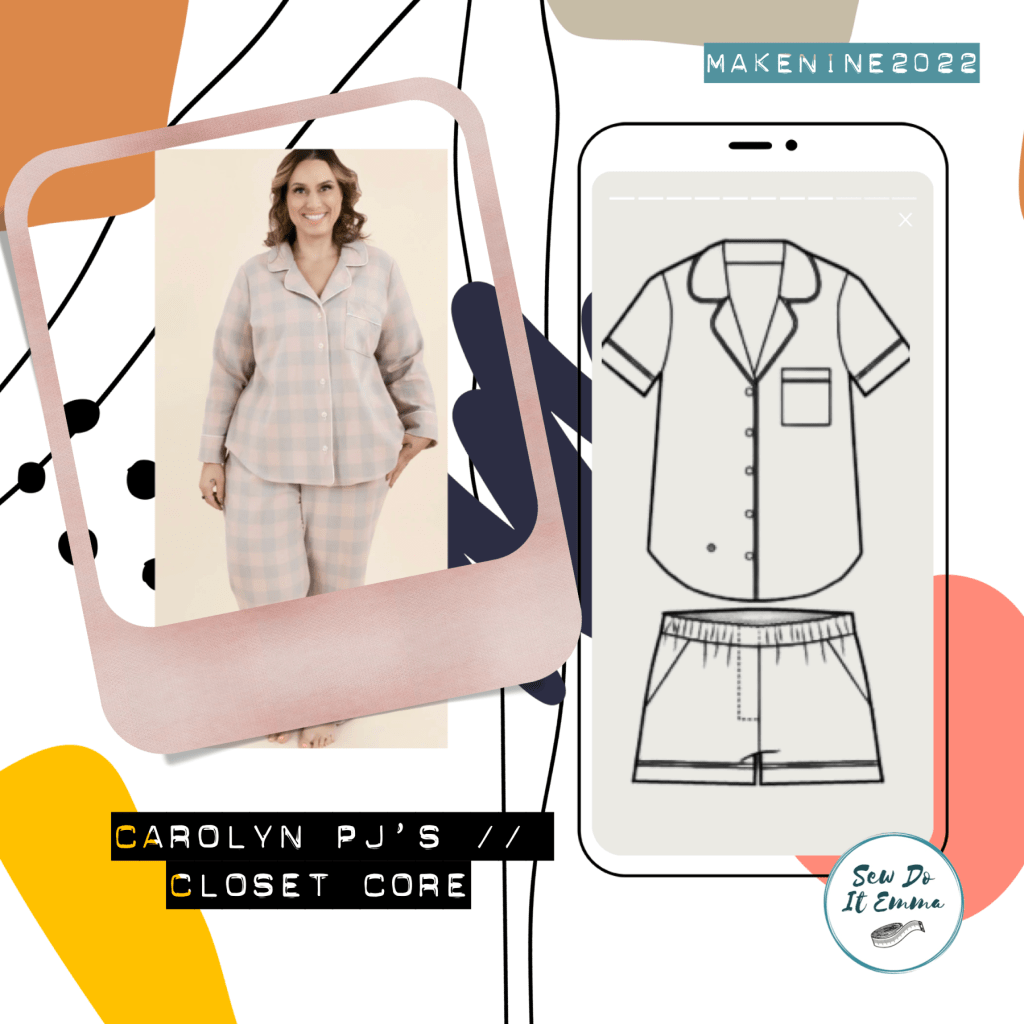


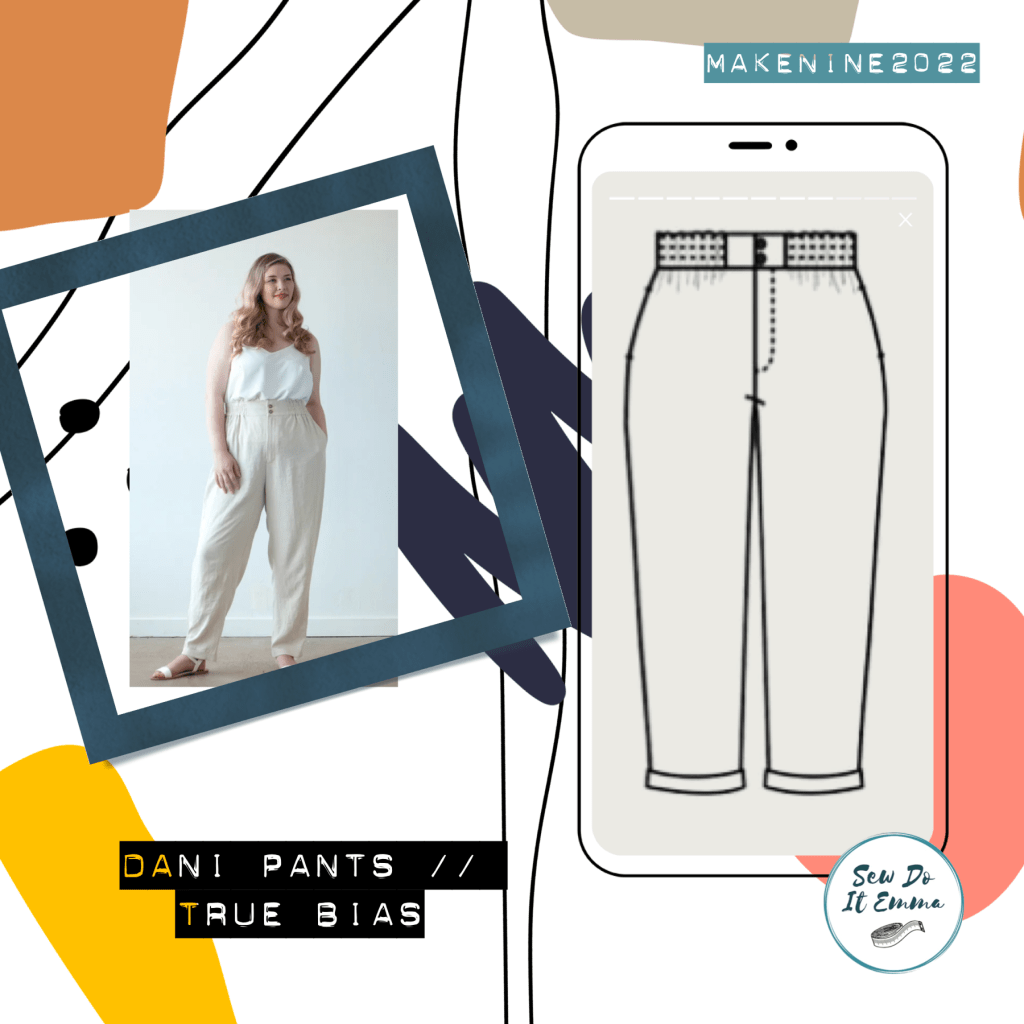

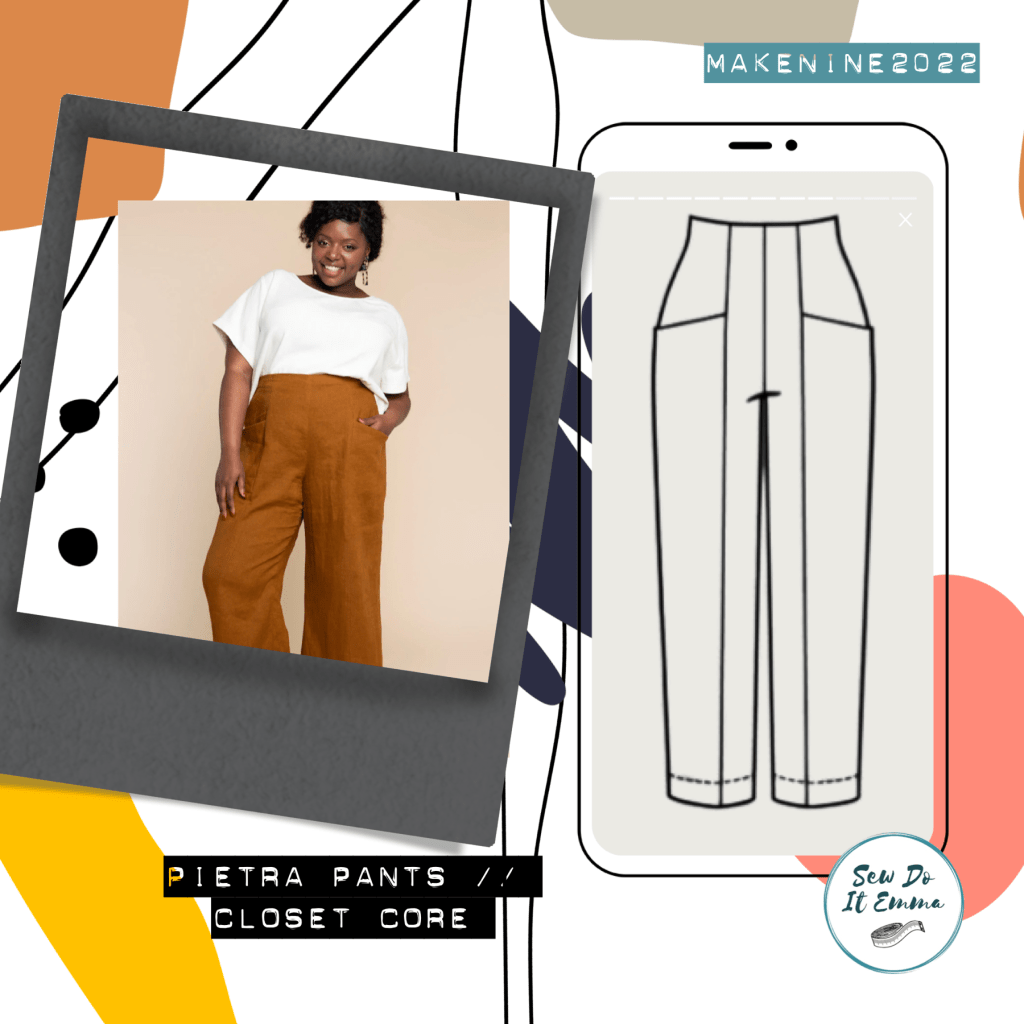

So that’s my choices of patterns for my Make Nine 2022 and I’m planning to write a blog post with the choices of fabrics to go with each project, which I’m finalising at the moment.
I hope however you celebrated your holidays, it was a good period and regardless how it was I really hope 2022 is bigger and better for you.
Sending love and happy sewing wishes …


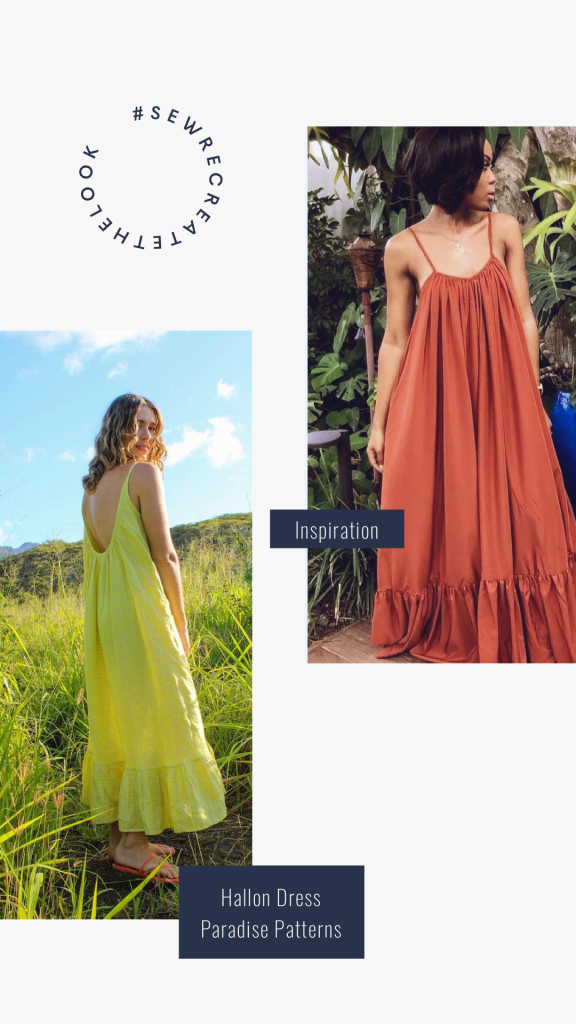
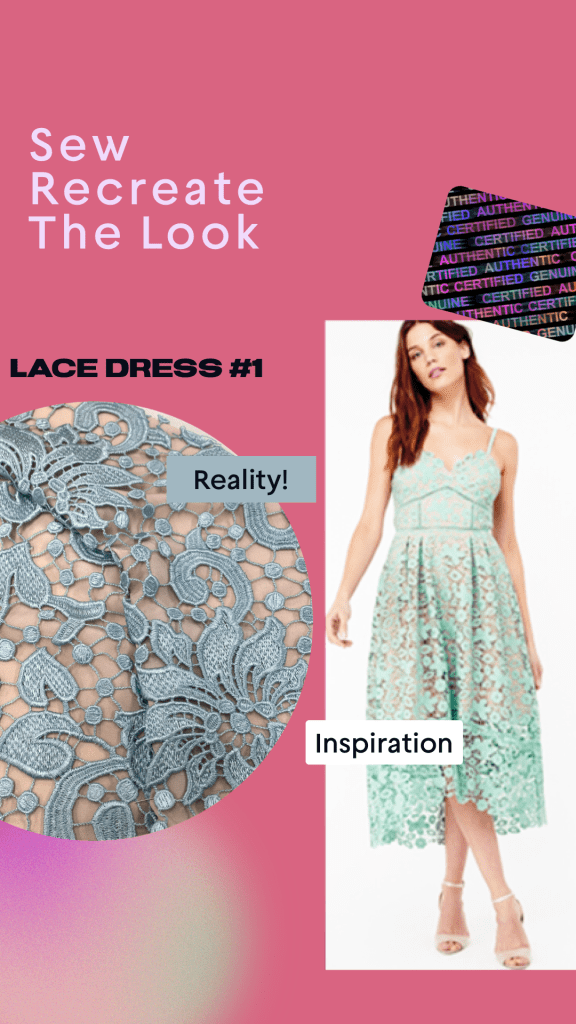
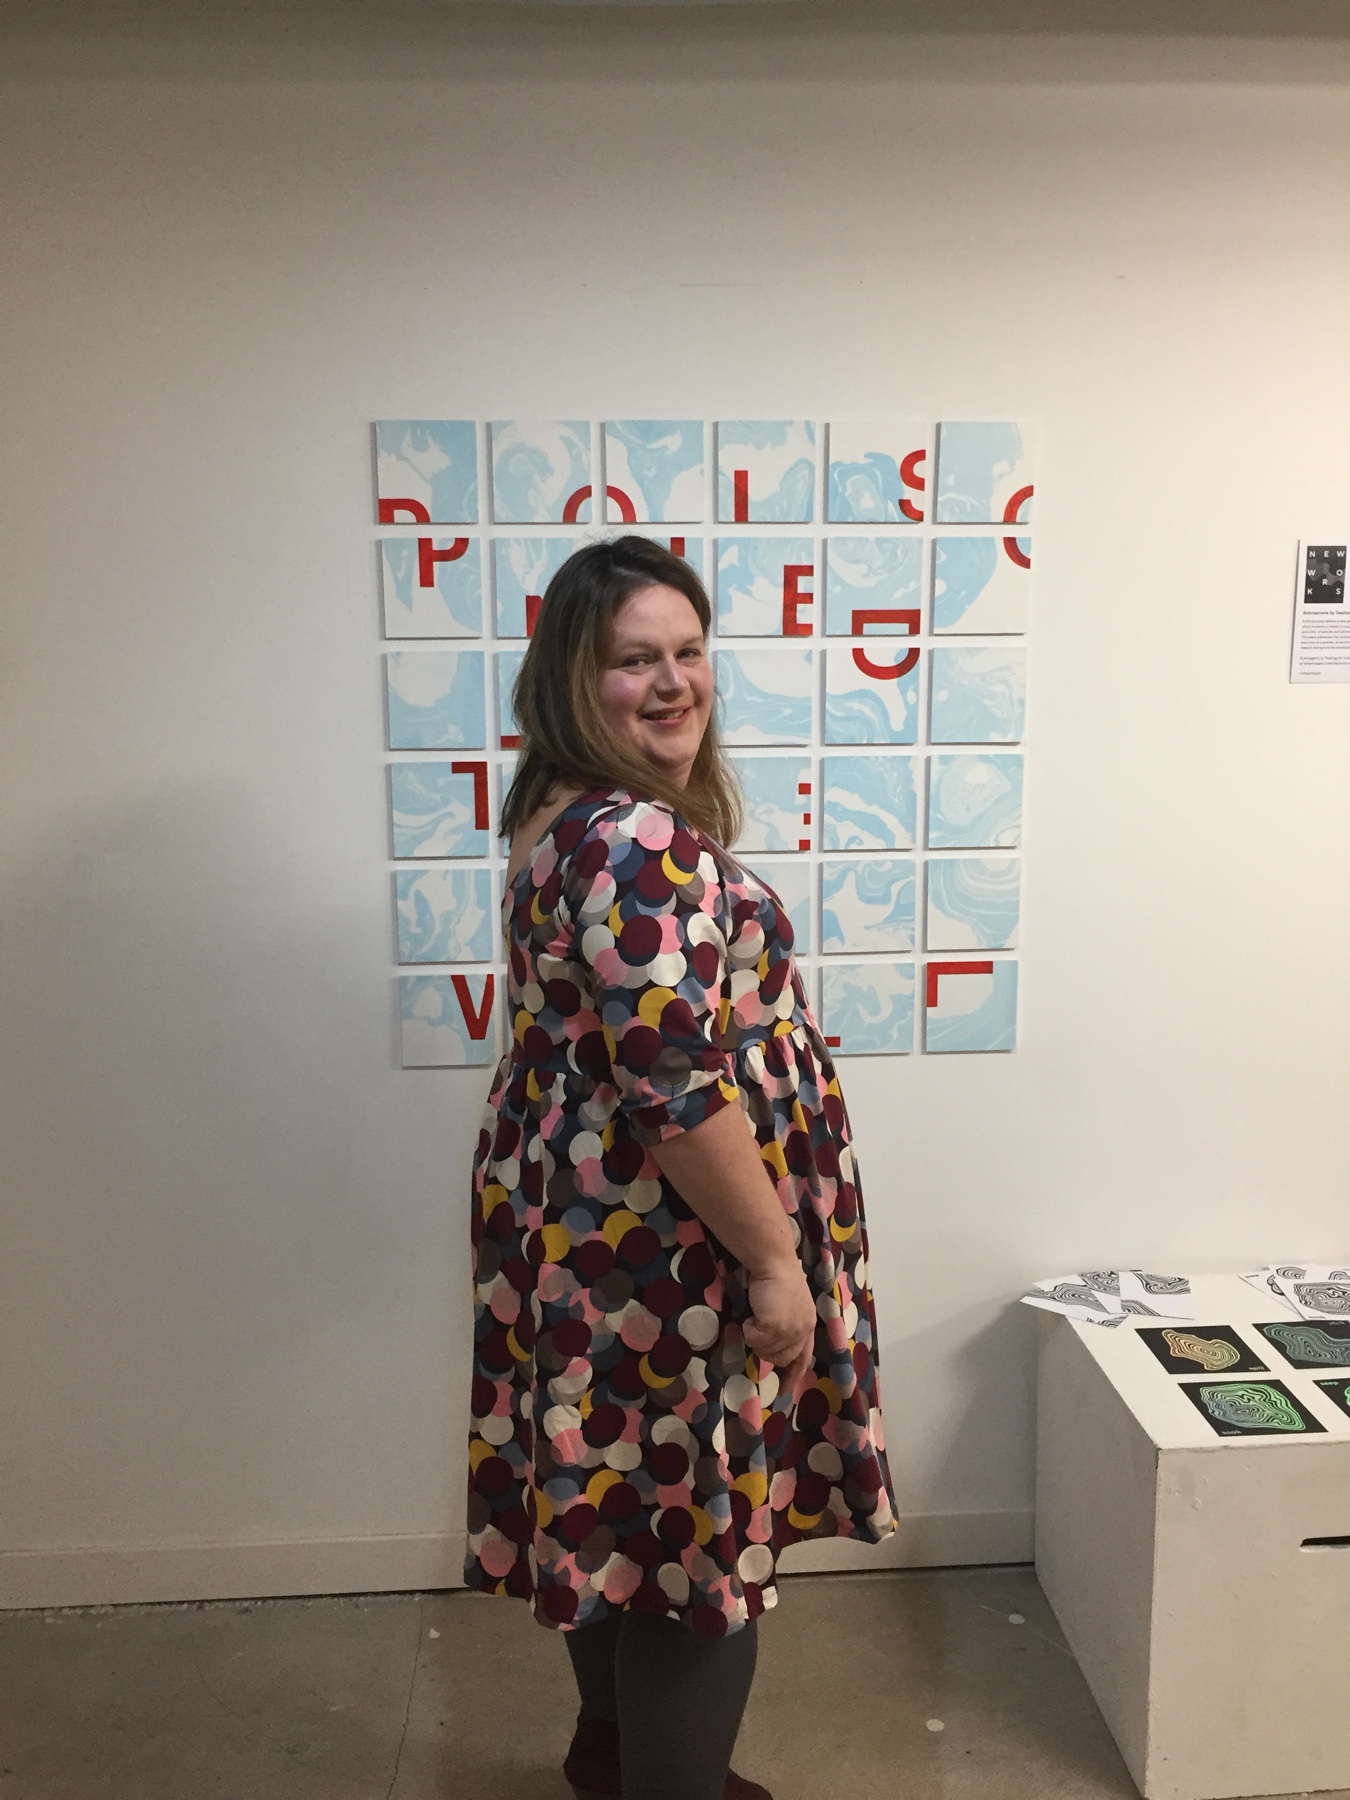
So at the beginnging of July I saw Sharlene @SoSewDressmaking and Jen @Jen_Tesscreatives were launching a new instagram challenge, #SewRecreateTheLook and naturally I just gravitated towards it!
I found a few pictures over on Pinterest – which, as you know is like a giant tardis or takes you down a rabbit hole of inspiration. Below the image isn’t all the ideas that i pinned and it isn’t my final favourite, because lets face it, I had loads, no surprises there!

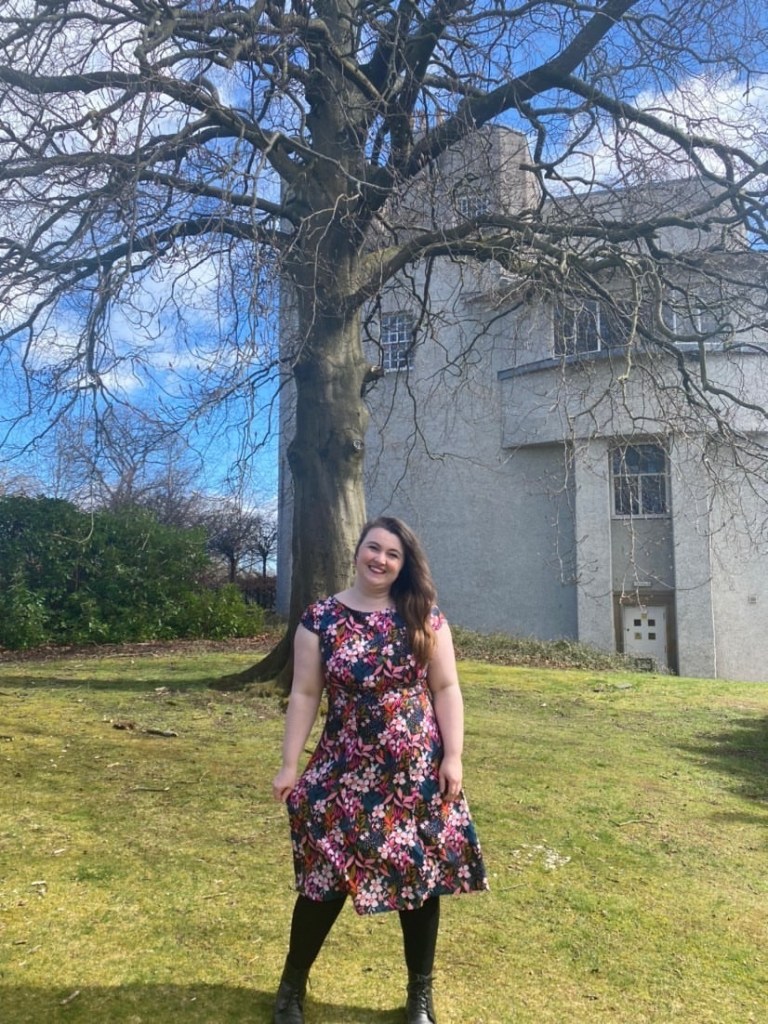
I knew i had to pick one so and this kept coming back to me because it reminded me of the Nina Lee Kew Dress. I had already seen fabric that would match the pattern and the Inspiration perfectly. There was no question of not using the pigeon wishes buttons either, so I was all set.

It’s great when you’ve already seen the fabric and you know how it will behave. I’ve been sewing up a few dresses using viscose challis and I am absolutley loving the drape and lightness of this fabric. It has to be said that Stephanie at The Rag Shop has made it very difficult recently not to check the rag shop website as I just know she has a good eye.
Although I had seen a fabric that was closer to the Pinterest image, I just fell in love with the monstera viscose challis. I just couldn’t say no to the playful print.

From the moment I clocked the inspo picture and pinned it, I knew which pattern I was going to use … The Nina Lee Kew Dress. The Kew Dress is now available in 16-28 uk sizes (pdf & paper) and it has the expansion pack (pdf only). I had tested the Kew Dress late 2020 and really enjoyed the construction but as always in true Emma style doesn’t get back to making another for ages because of the constant new things that one gets inspired by, until now!
So I decided to use the version 2 from the original pattern and leave off the cold shoulder straps as there’s no need for them on this occasion. I had rememered that the expansion pack has a gathered skirt and guys, if you don’t know yet, I am a sucker for a gathered skirt! I know a few people that actually hate doing gathers but i’ve grown to love it. Anyways, I was lierally dancing cutting out this pattern and material.
For the bodice, I went with size 20 D-cup and graded out after the bust dart to a size 28 for the waist. i then kept the size 28 for the hips. I am really happy with the fit overall, although I might bring it in at the waist slightly but I’m sitting on the fence for that one at the moment.
The finishing touches were adding those beautiful pigeon wishes buttons, which are called chai latte and come in either shirting size or 25mm, I just love them and think they just pop on the dress. I also added to woven labels, one of which is from Little Rosy Cheeks and the other is from Kylie and The Machine (links are not affiliated but will take you to where i bought them).
To make sure that the raw edges don’t fray, I’ve overlocked all of the edges at the start. Yes, i could’ve sewn french seamed but for this project I left it way too short on time to factor french seams in! Instead of using a creamy white thread i thread matched the green on the monstera leaves. I’ve also used fray check on the button holes as that will preserve my garment around these areas over time.
Here are some of my other plans from the board that I really want sew up.
I hope you enjoyed the finer details of this blog post, please let me know if you have.
Happy Sewing!
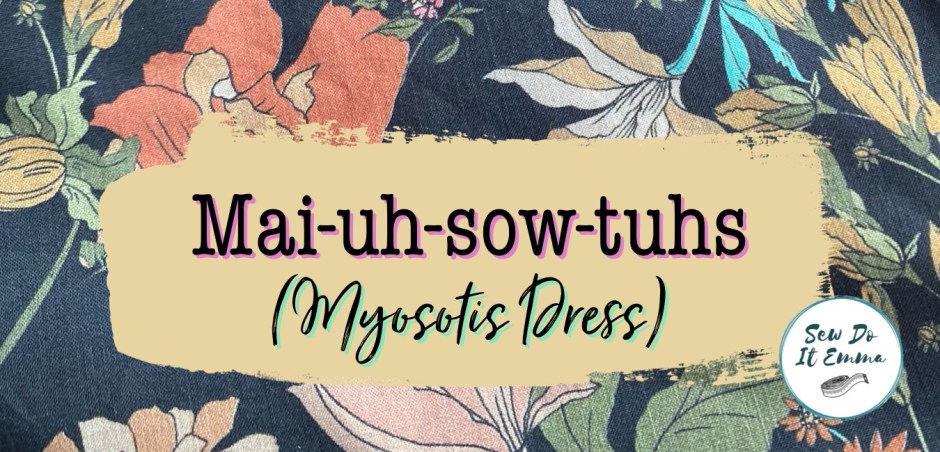
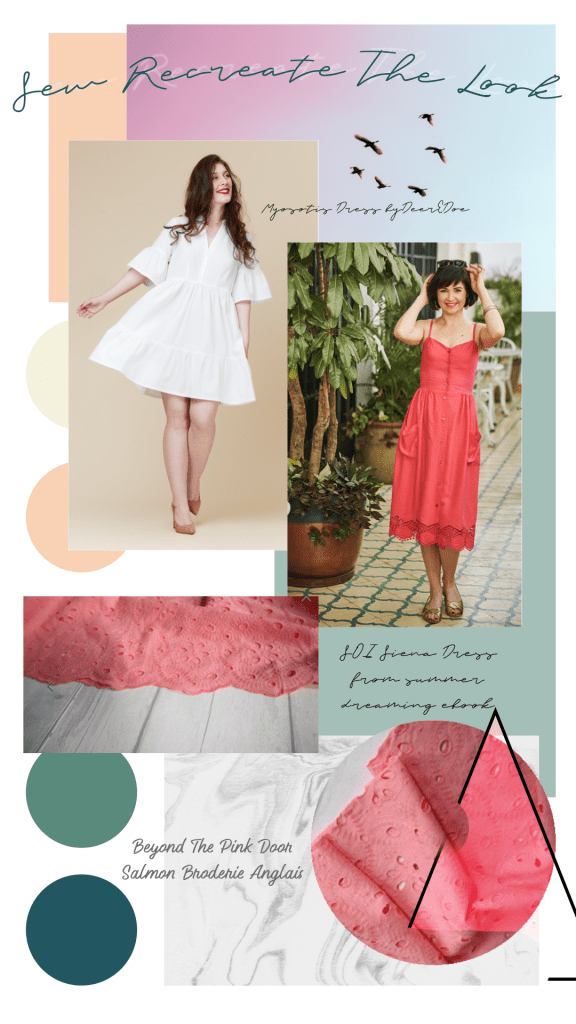
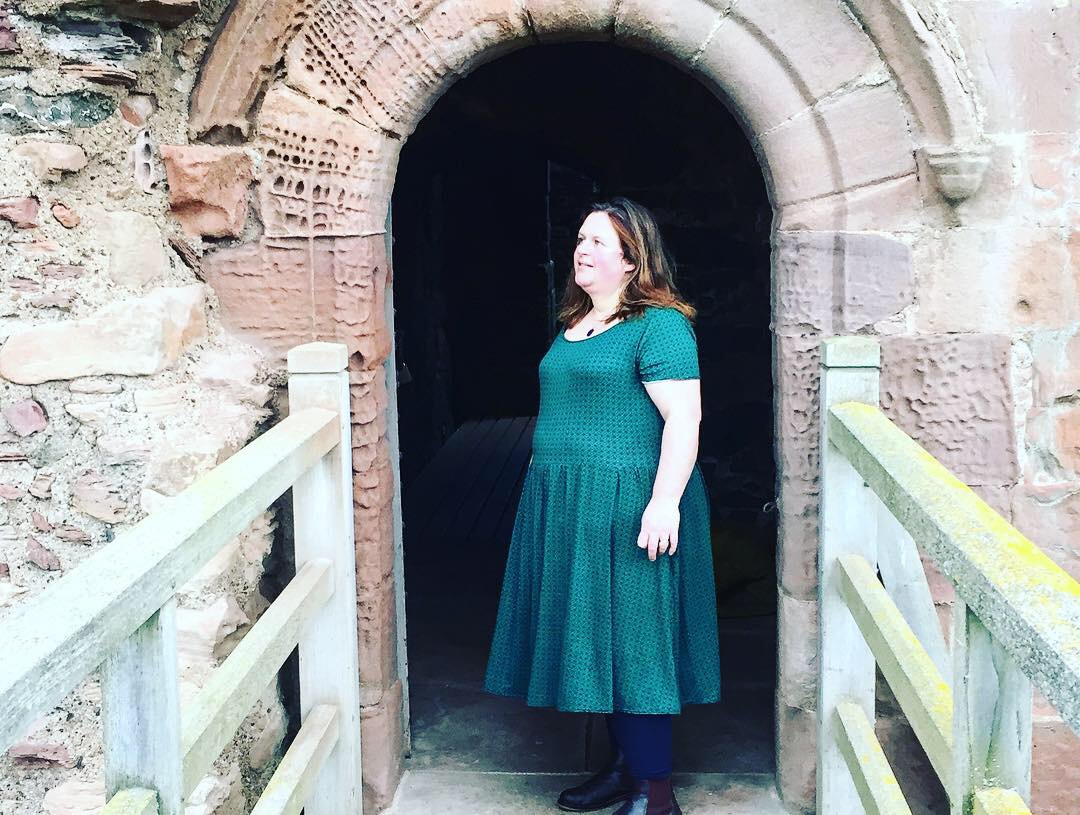
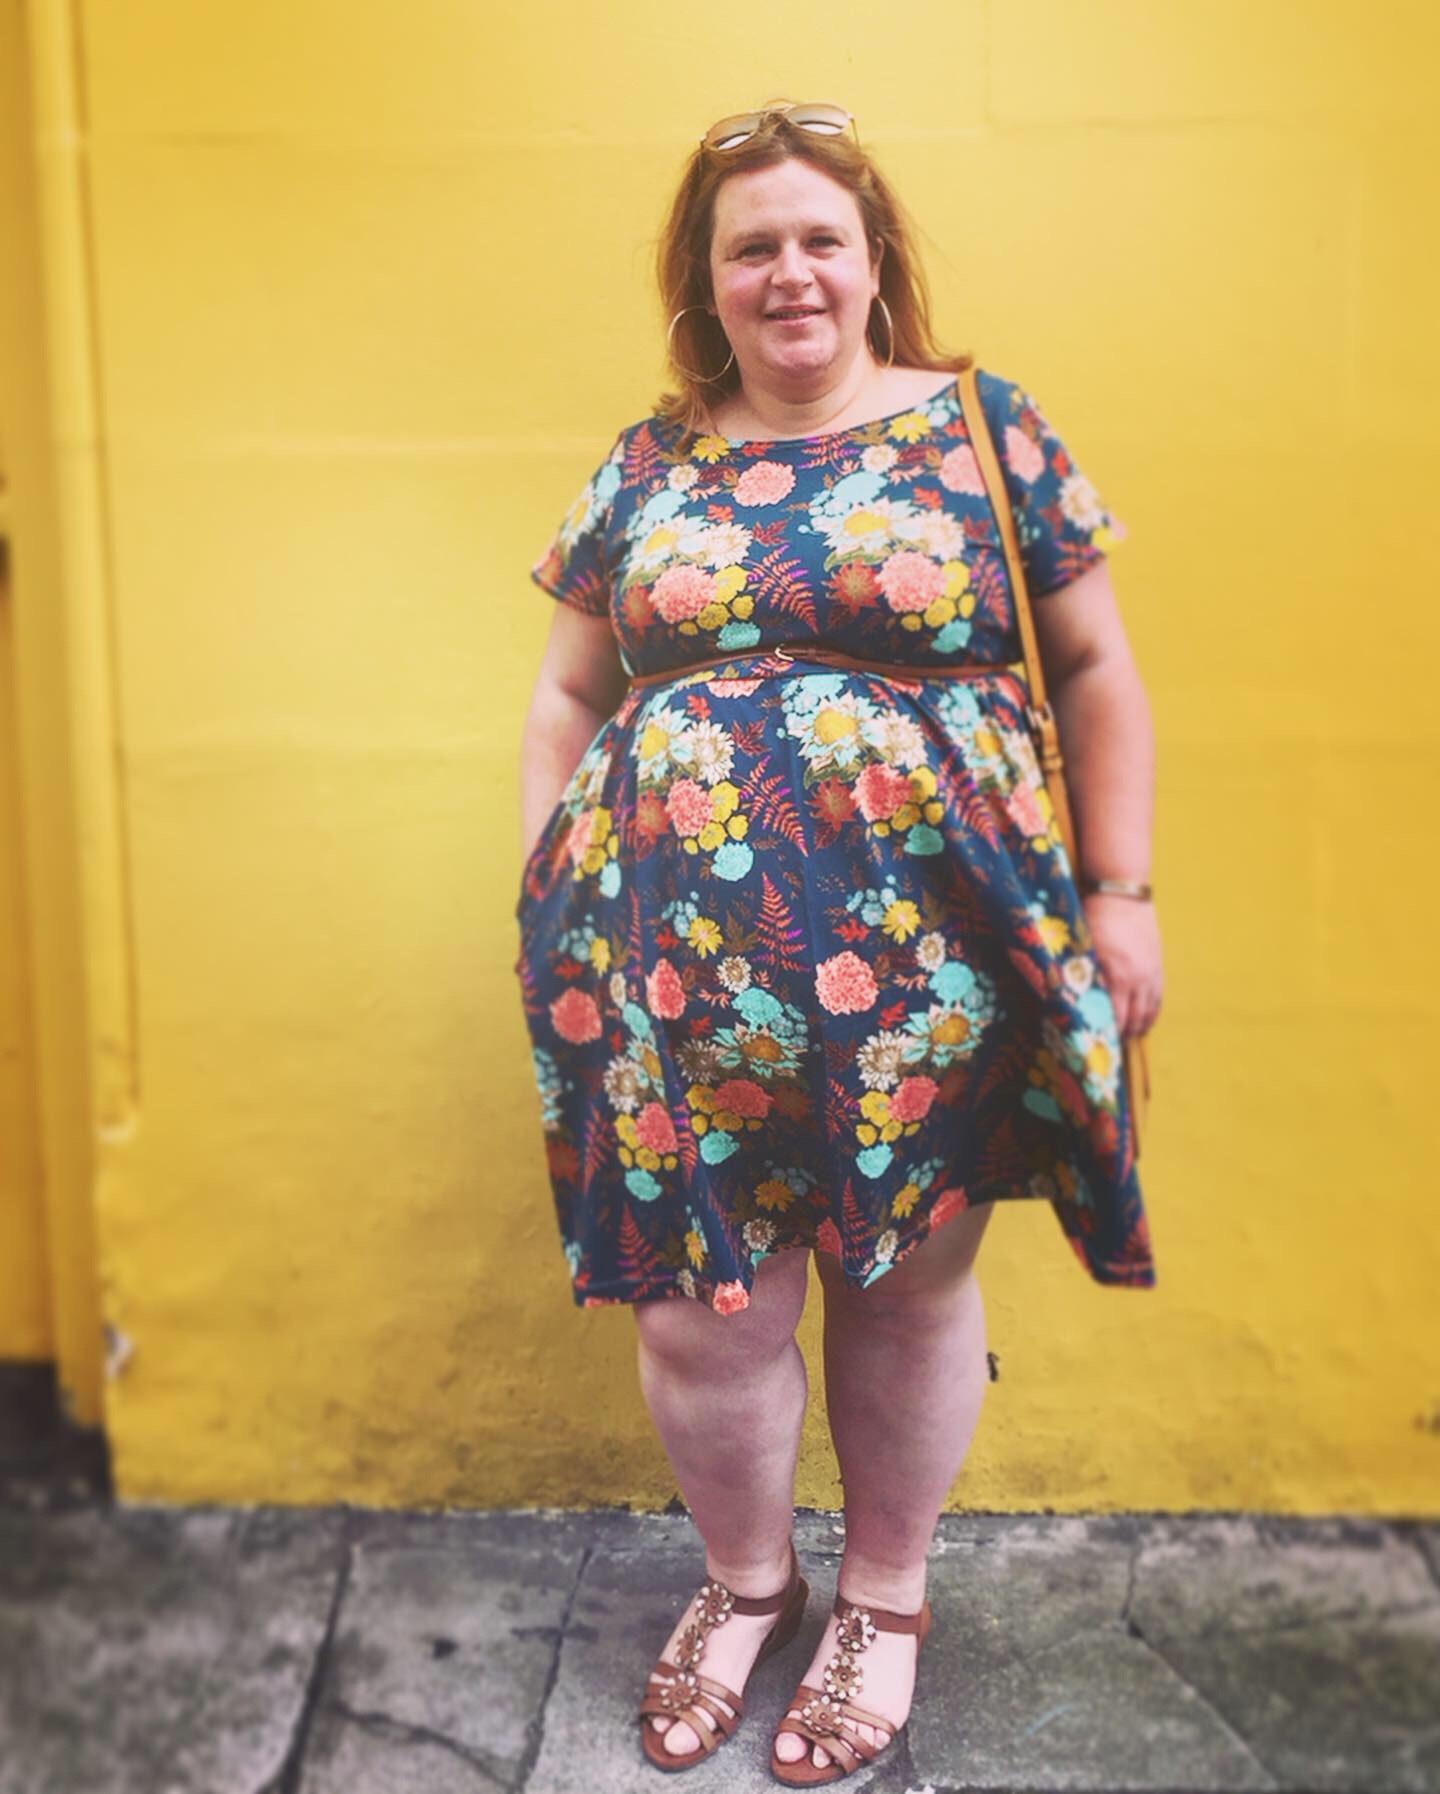
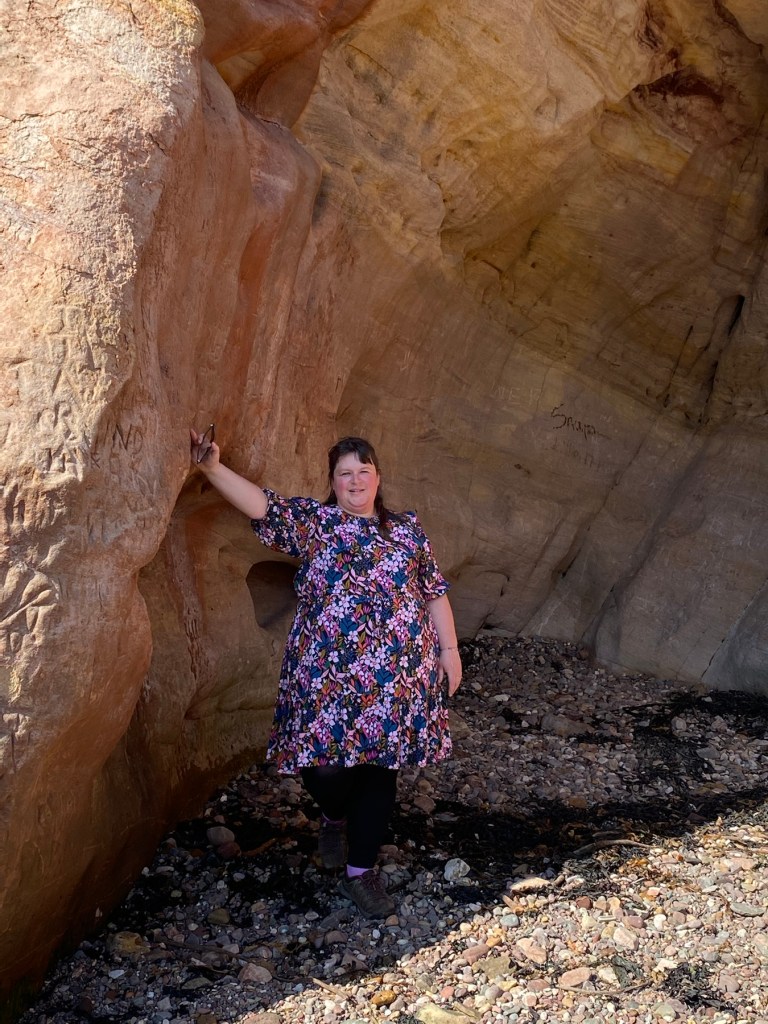
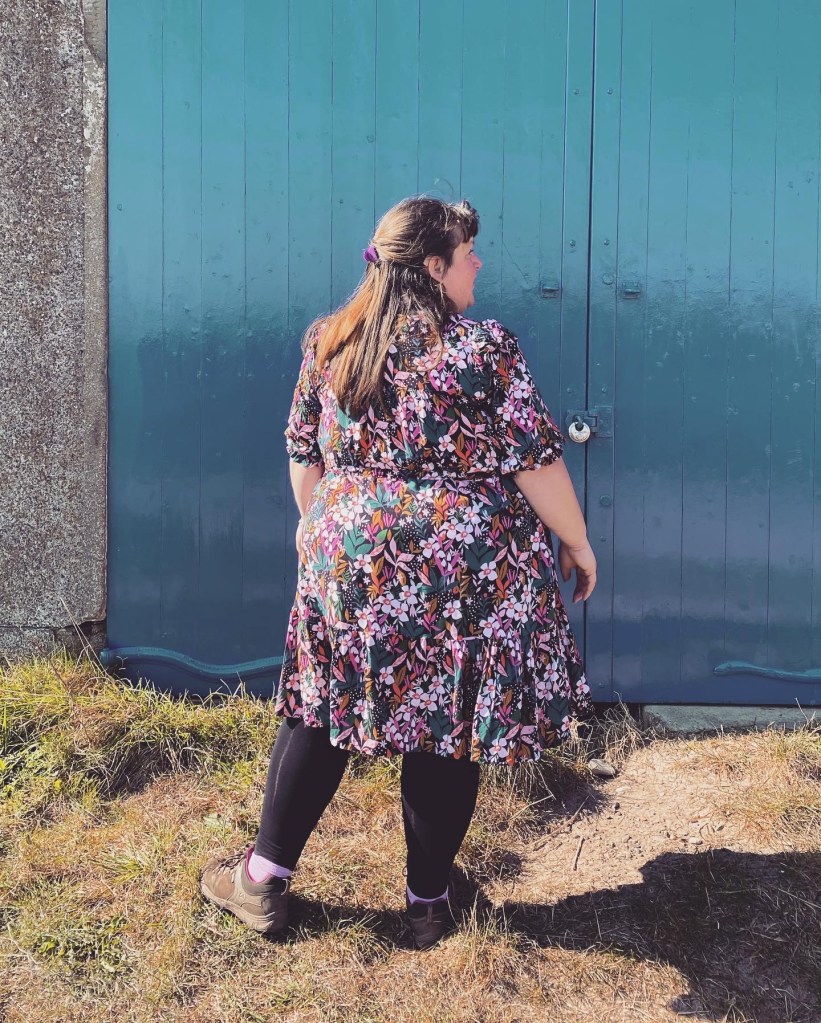
Although I’ve published my photos on Instagram, I thought it would be good just to have my thoughts on the pattern and fit here for my first myosotis dress.

So before I started I check my back measurements according to the pattern piece and shortened the bodice. I think it’s a tad too short in this version but hey ho I’ll still wear it. For my next version I’ll definitely used the for bodice piece and original length. I cut the largest size and instead of 1.5cm/5/8” seam allowance I went for 1cm. The bodice fits really well.

The skirt has no real issues and was fairly straight forward although I only cut one of the lower ruffle and had to do a last minute panic of “ok where’s the remaining pieces of fabric” – which was fine. I pattern match this piece because there’s an extra seam at the back of the dress now because of this rookie mistake!

I think my favourite part of the dress is the sleeves. I’m just loving the ruffles and to me that’s something that’s surprising to me!
The fabric is a Lady McElroy Cotton “Marlie” lawn. The print is digitally printed onto the fabric. The print itself is called “Shades of Autumn – Midnight”. I bought this from The Cloth Shop by Remnant Kings, Edinburgh a good year ago for a myosotis dress and who knew it would turn out so well! I’m pleased it didn’t have too much time in the stash.

I found the collar to be a bit of a nightmare though. The instructions aren’t clear to be frank and if you follow them it leads you into a fiddle. So conferring with my sewing buddies, I’m advised to go and have a look at Professor pincushion on youtube and hey presto, the dress lives!

So there you go – my first and not last Myosotis Dress by Deer & Doe patterns. Thanks for reading and see you back here soon!


So you might gather I’m quite a sucker for the “Moneta” by Colette Patterns and the fact that it’s been a few months since I’ve last wrote a blog post, would be too good an opportunity to miss to give the wee blog a bit of a boost!
So in no order here’s my “Moneta Collection”

🧵Fabric from Pin & Sew
🧵Hacked neckline and sleeves from Seamwork Alice and added a polo neck!

🧵Fabric from the Edinburgh Dress Fabric Company
🧵Hack – scoop back
🧵The Moneta that started it all!
🧵Fabric from John Lewis
🧵Fabric from Fabric Focus
🧵First scoop back hack

🧵The Scoop back with petal sleeves dress
🧵Fabric bought from Fabricate Mirfield
🧵Made it for my 39th Birthday
🧵Fabric from Sewisfaction
🧵Scoop back – ooo er.
🧵Made this for going out to dinner for our 10th Wedding Anniversary

🧵Fabric from Fabric Focus
🧵Scoop back hack

🧵Fabric from Holm Sown
🧵My Christmas Day 2018 dress
🧵Fabric from Fabric Focus
🧵Scoop back & 3/4 length sleeves (must be my favourite combo)!
Would it surprise you if there a few others that are works in progress? Once they are completed, I’ll share them on Instagram @sewdoitemma.
Ok, well hopefully it won’t be as long as last time until I write a blog, but until then … see you soon!
It’s that time of year where any plans I set, kind of go out the window as I sew as many dress I can. The Megan Neilson Sudley Dress fits the bill perfectly whilst using the lovely mint Rose & Hubble cotton poplin.

Because of the better weather coming (finally) in, I’ve been seeing a flurry of dresses being made and when I had the latest list of fabrics for the #minervabrandambassador blog opportunities this one really caught my attention so I was thrilled to have it gifted to me in return for this blog.
To read more, head over to Minerva!

When Friday Pattern Company contacted me, asking if I like to test there most recent pattern there was no hesitation in saying “yes”.

I’m sure you’ve seen the features of this dress but if you haven’t, here’s a illustration below.

The ruffles and the sleeves were the small details that sold it to me in the first instance. But as I made the tester up, the elasticated neckline and the cinched in waist literally blew my mind (in a good way) !
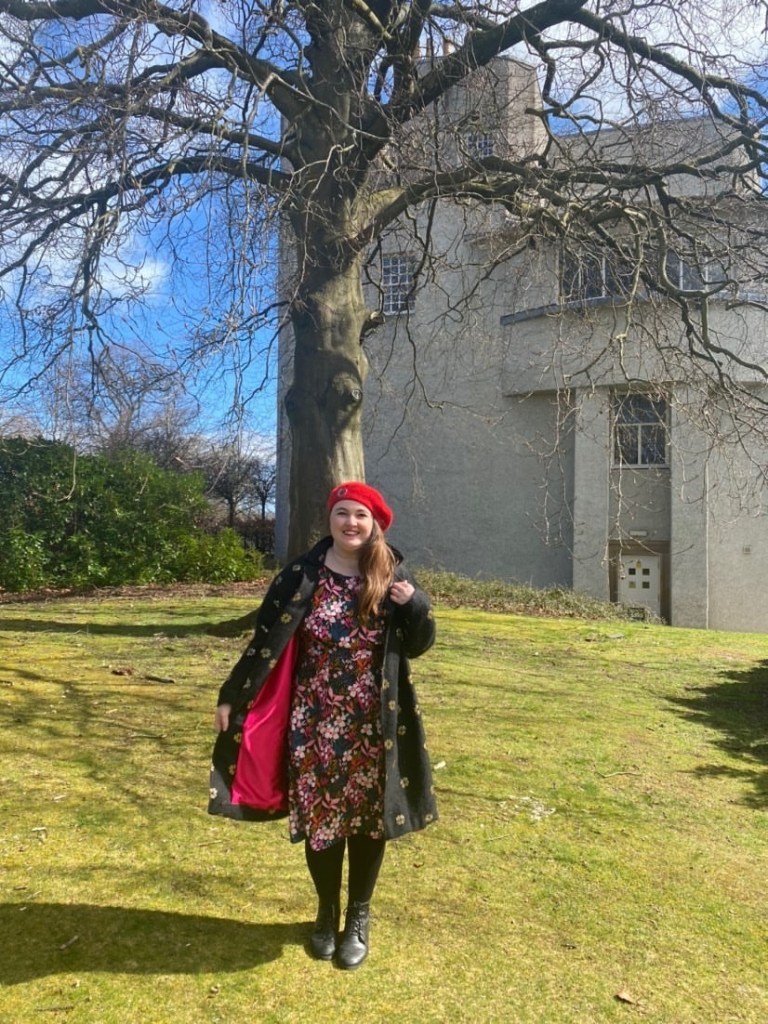
When the Davenport Dress was released, last Friday (16.4.21) – it was a double celebration as Scotland lifted the travel restriction which of course couldn’t pass by without a photo opportunity at a different location without a beige wall! Now don’t get me wrong, I love my beige walls as they allow the details on my garments to speak for themselves but sometimes you just need a different location!

I’ve had this Dashwood Rayon “the Secret Garden” in my stash for a good while and when Emma said she had bought some of the same fabric another wee collab was in motion. I think I bought it from Lamazi Fabrics way back in the day!

Emma @CoffeeAndGlassSlippers made the By Hand London Anna Dress – and boy, she’s knocking it out the park! Absolutely adore this and I think it’s one of my faves thats she’s made so far, Emma never fails to surprise me with her amazing style and sewing talent. I seemingly remember Emma telling me she got her piece of Rayon from John Lewis in Glasgow and it was half price, I think it was just after the 1st Lockdown and shops were just opened. Half price – Utter bargain!!!

I found that the Rayon was a fray magnet. Way worse than the Ravishing Rayon that I used on my Kew Dress.

For some unknown reason, I didn’t finish the edges with the overlocker after I cut which is what I usually do. I did, however finish most of the open edges once I put it together.
Ok the pattern is absolutely fabulous, I can’t fault it, so much so I had a second Davenport Dress ready as part of a collaboration with Felicity Fabrics, before the pattern was released, which you can read all about it here.

Both the Rayon and the viscose serve the pattern well with regards to the the ruffles and gathering. It drapes beautifully.
However, both times I had to slow down at the outer waist piece and how to attach that. Also adding the bodice yoke had me for a moment. I somewhat remember that the first time I did the pattern I had to walk away twice because my head wasn’t picking up the instructions right. You know, that cotton wool fuzzy head … uh huh?!

Im looking to do a third Davenport Dress soon but it will be in a cotton. This pattern in the fabric will be quite different for me but it has such summer like pastel colours I couldn’t say no to it! I also see a hack coming very soon – keep your eyes peeled for that too.

As always, thanks for reading. I’ll probably talk about both Davenport Dresses on my YouTube channel very soon.
Happy Sewing!


Wow. I can’t believe I completed the dress 👗 as it it was touch and go, but I did.
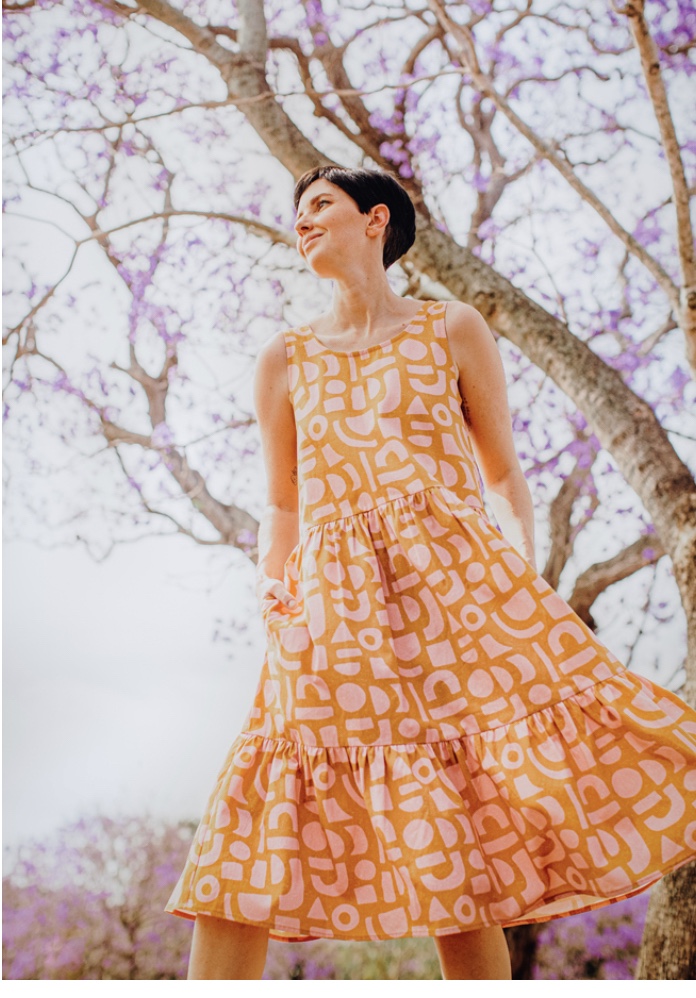
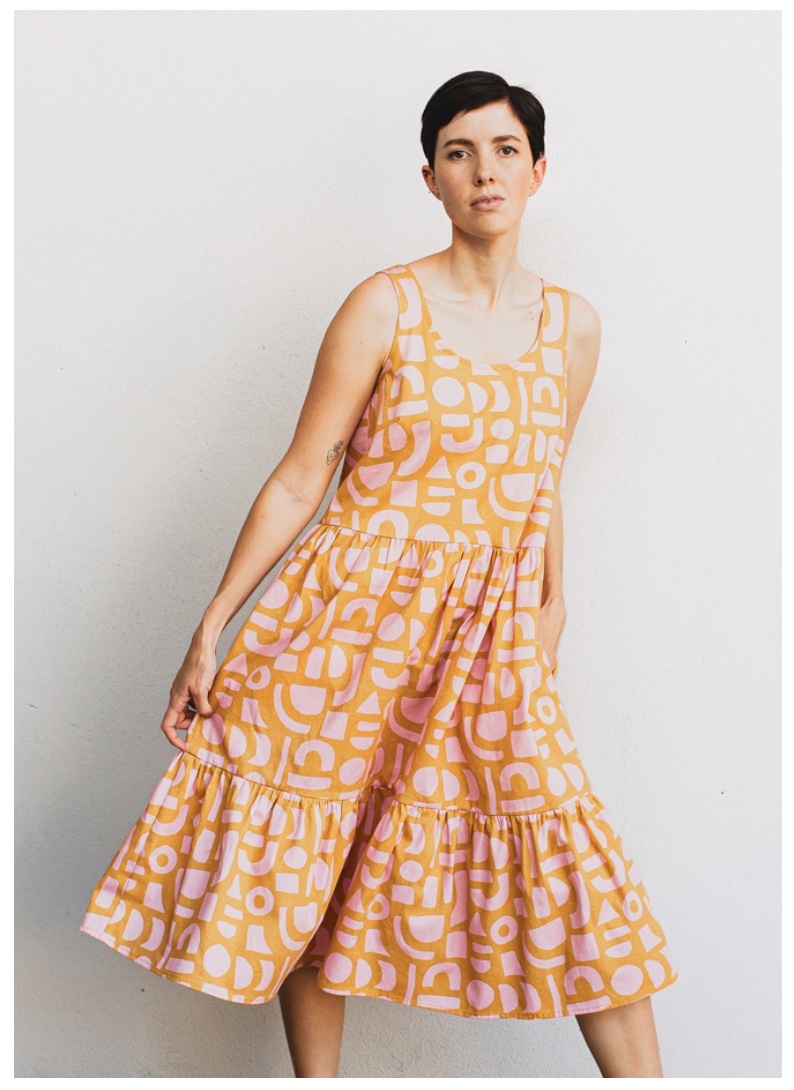
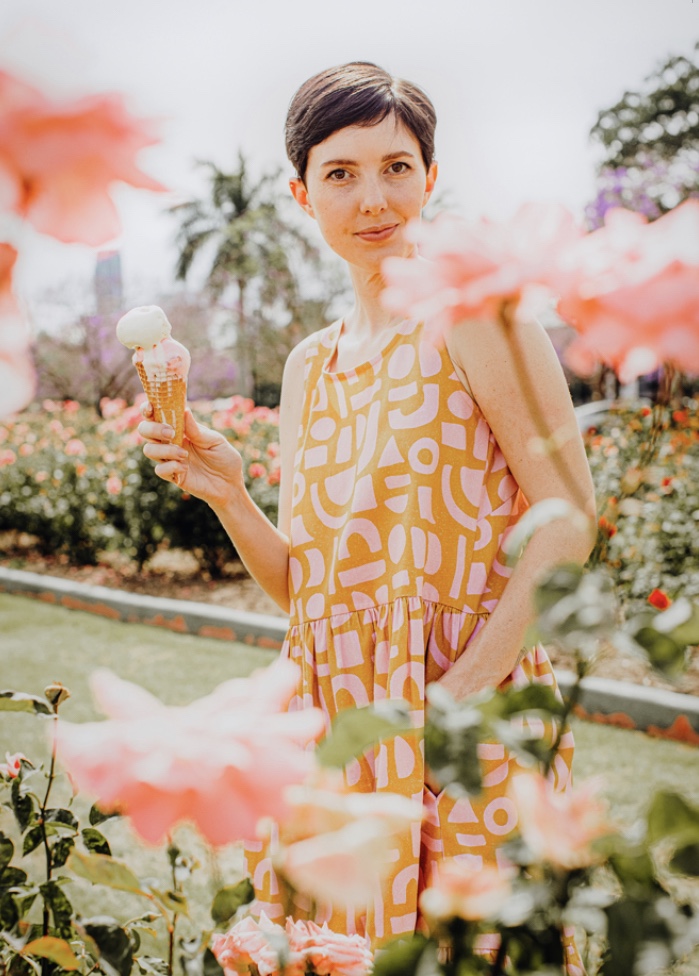
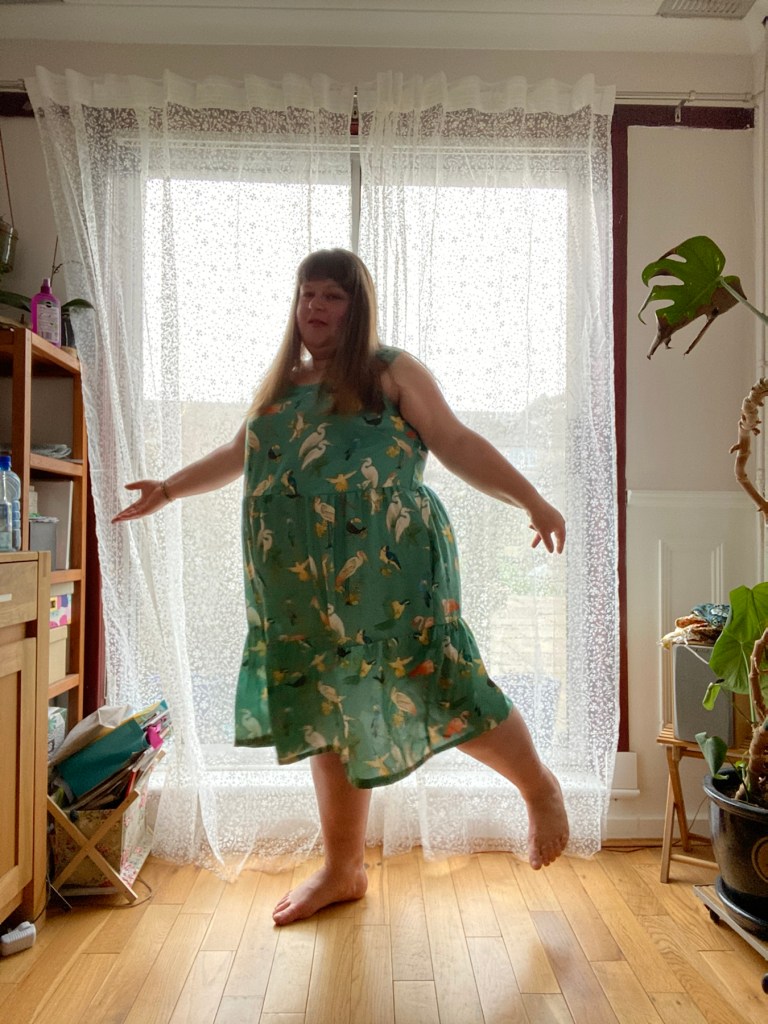
For the challenge, which was created by the fabulous Ruan @TheYorkshireSewGirl and the lovely Sam @Frugalisama over on Instagram, I picked the Bardot Dress which was designed in collaboration with Lauren from @Elbe_Textiles and @PeppermintMagazine.
The Bardot Dress has a decent size range and a good amount of ease. The body measurements start from high bust 28, full bust 31, waist 24.4 and hips 34.6 inches to high bust 51, full bust 53, waist 46, hips 56.3 inches.


Because of the ease and the amount of fabric I had I choose size H for the bodice and I.
The fabric that I choose was “Bird Parade” viscose twill from @FabricGodmother … which I think suits this dress so well, especially for a spring summer print and dress!
I used 3 metres of this viscose twill and that’s all I had. I didn’t use the fabric layout … recently I’ve been playing pattern Tetris and loving the challenge!

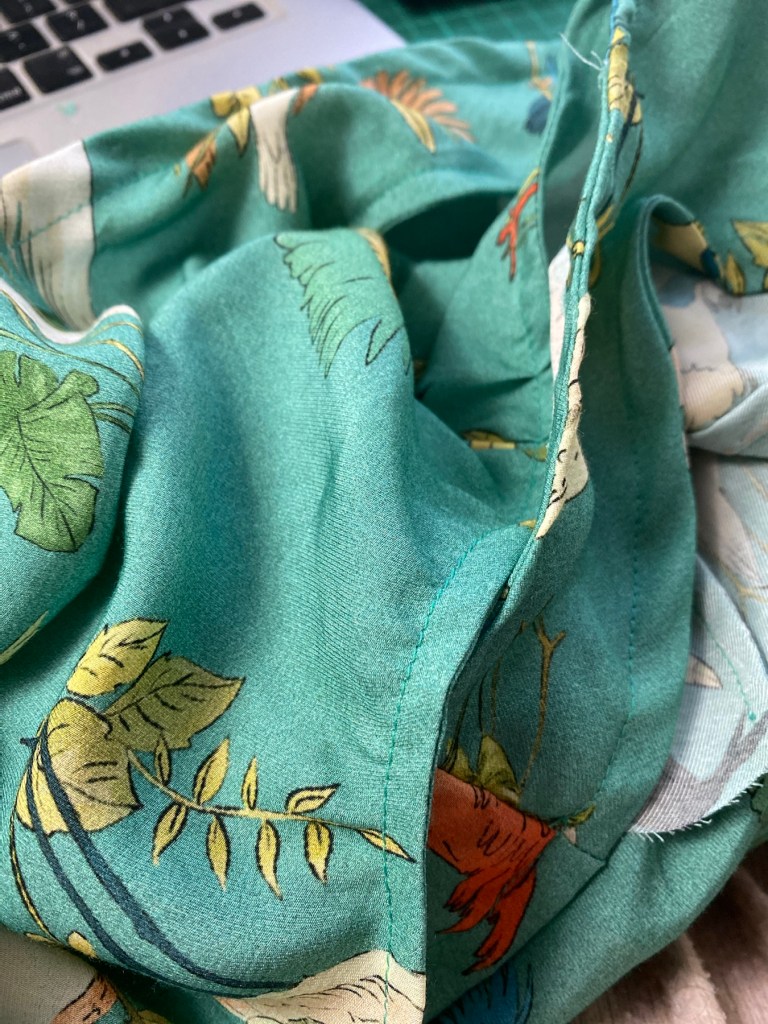
Sewing this up I noticed the fabric was fraying ever so slightly but it was as bad as other viscoses but I did try out French seams and they are on the majority of seams including the pockets and the bodice! This was my first time trying out such skills and I’m gobsmacked that it worked out so well.
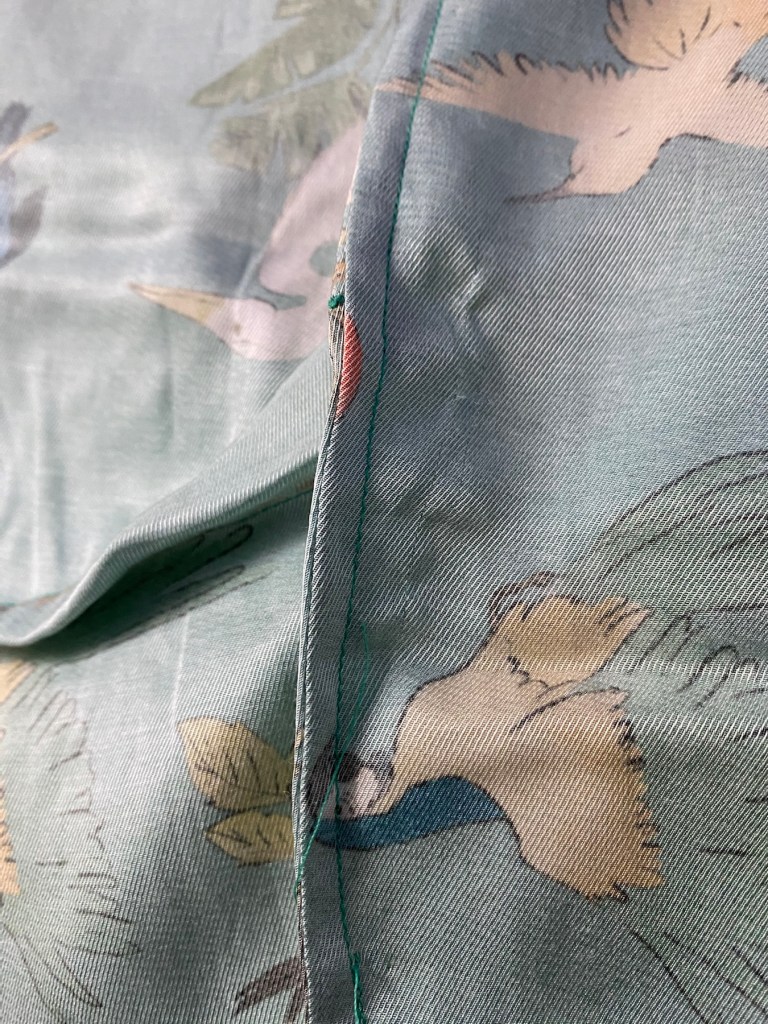
I made my own bias to add to the edges just by cutting out strips of 2cm wide on the bias on a s small piece of left over fabric. It wasn’t straight or neat but it does the job and you can’t see the wobbly edges as they are on the inside.
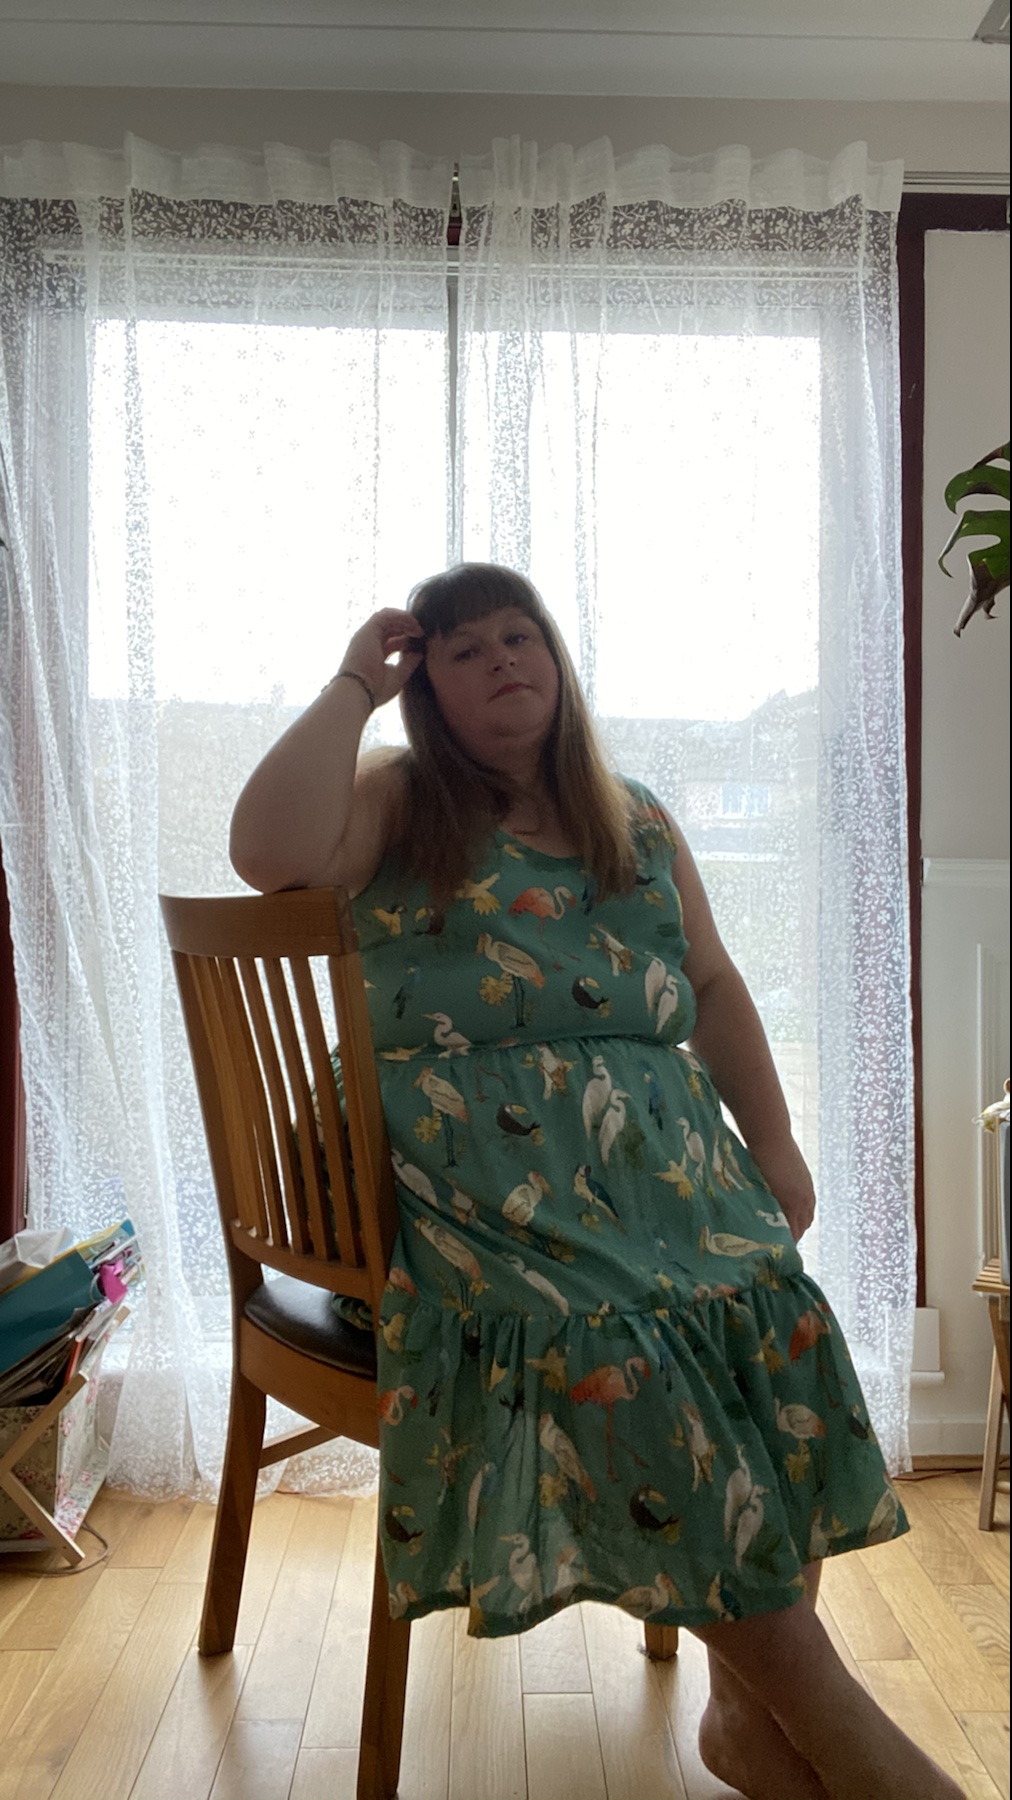
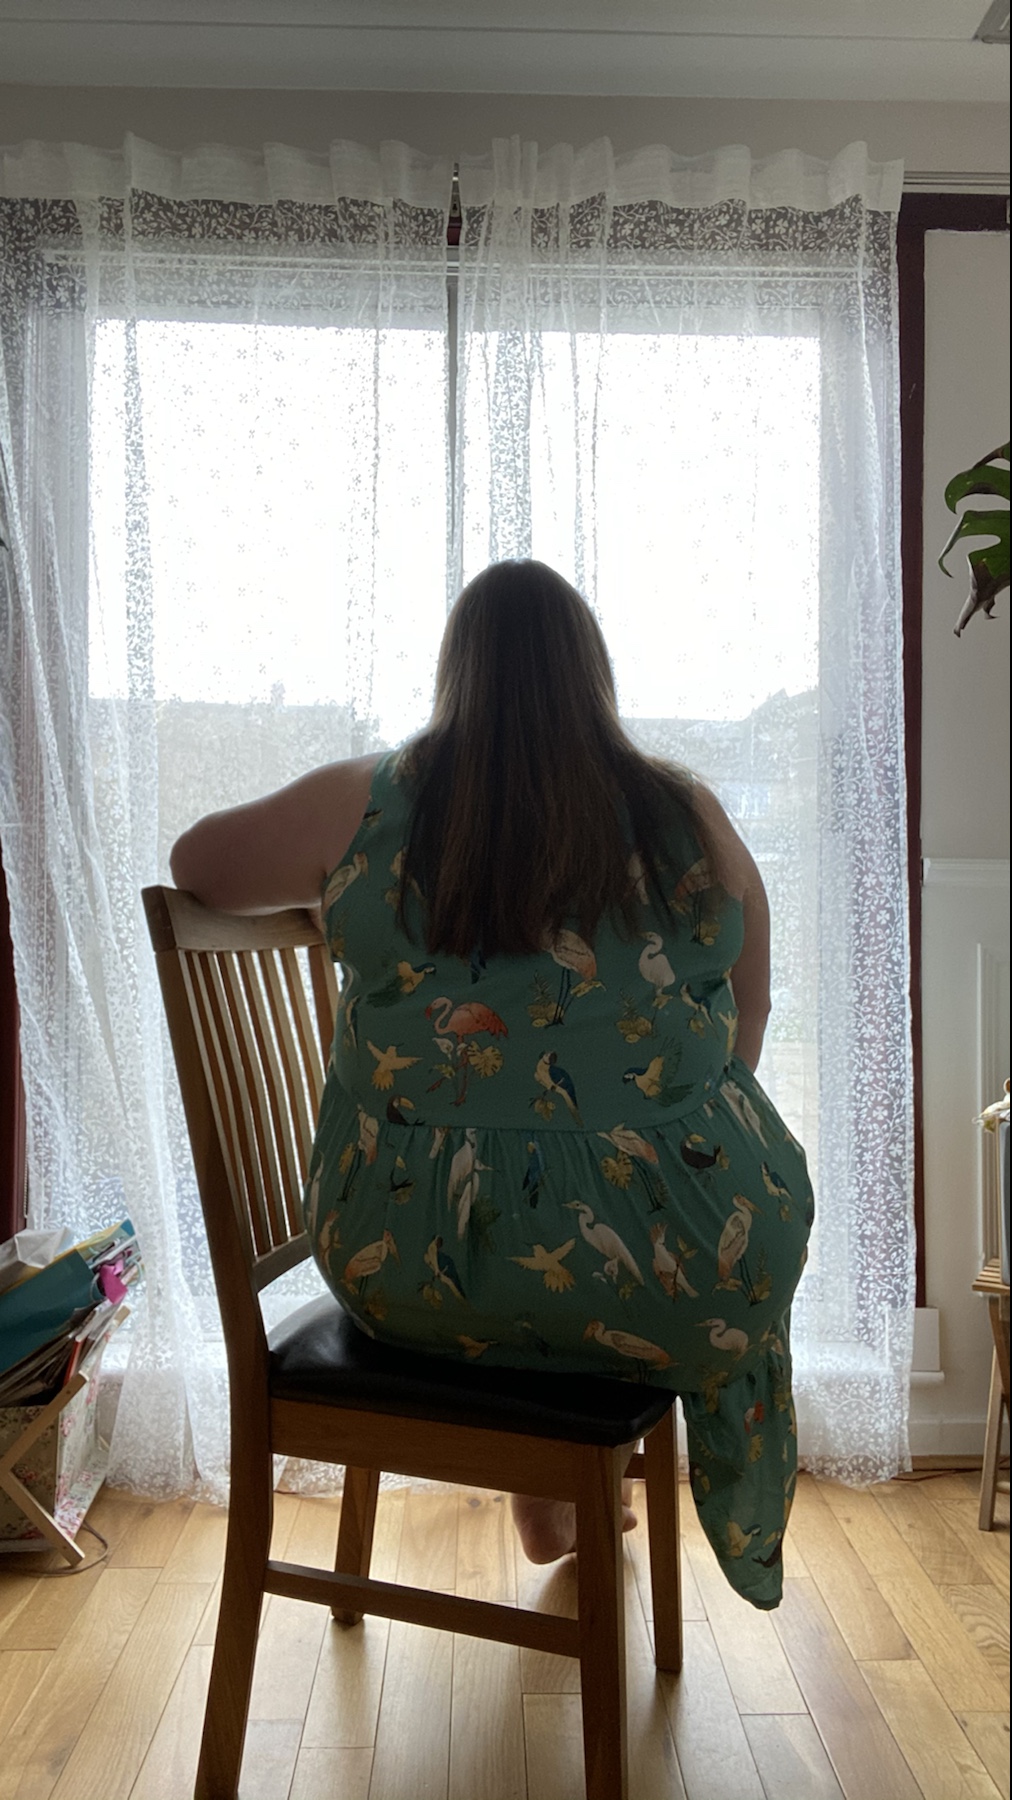
This dress took a lot of gathering and I mean a lot! Lots of patience, even more pins and delicate precision were required to get even gathers.

I’d definitely recommend this dress for summer holidays or lounging about at home on a hot day. The instructions are really good but I really didn’t use them that much. I kinda just went for it!

When I do this dress again and I will do it again, I’ll size down further on the bodice and shorten the shoulder straps and I’ll probably shorten the bodice. I’ll still swan about in this dress though as it’s got swoosh appeal!
I just want to thank both Ruan and Sam for this amazing challenge. It’s been so nice to see so many lovely makes from the community and find some more free patterns that are size inclusive. On that note, I think I’ll be trying the Peppermint Maxi Dress and the Lucia from Mood fabrics, very soon.


Happy Sewing!
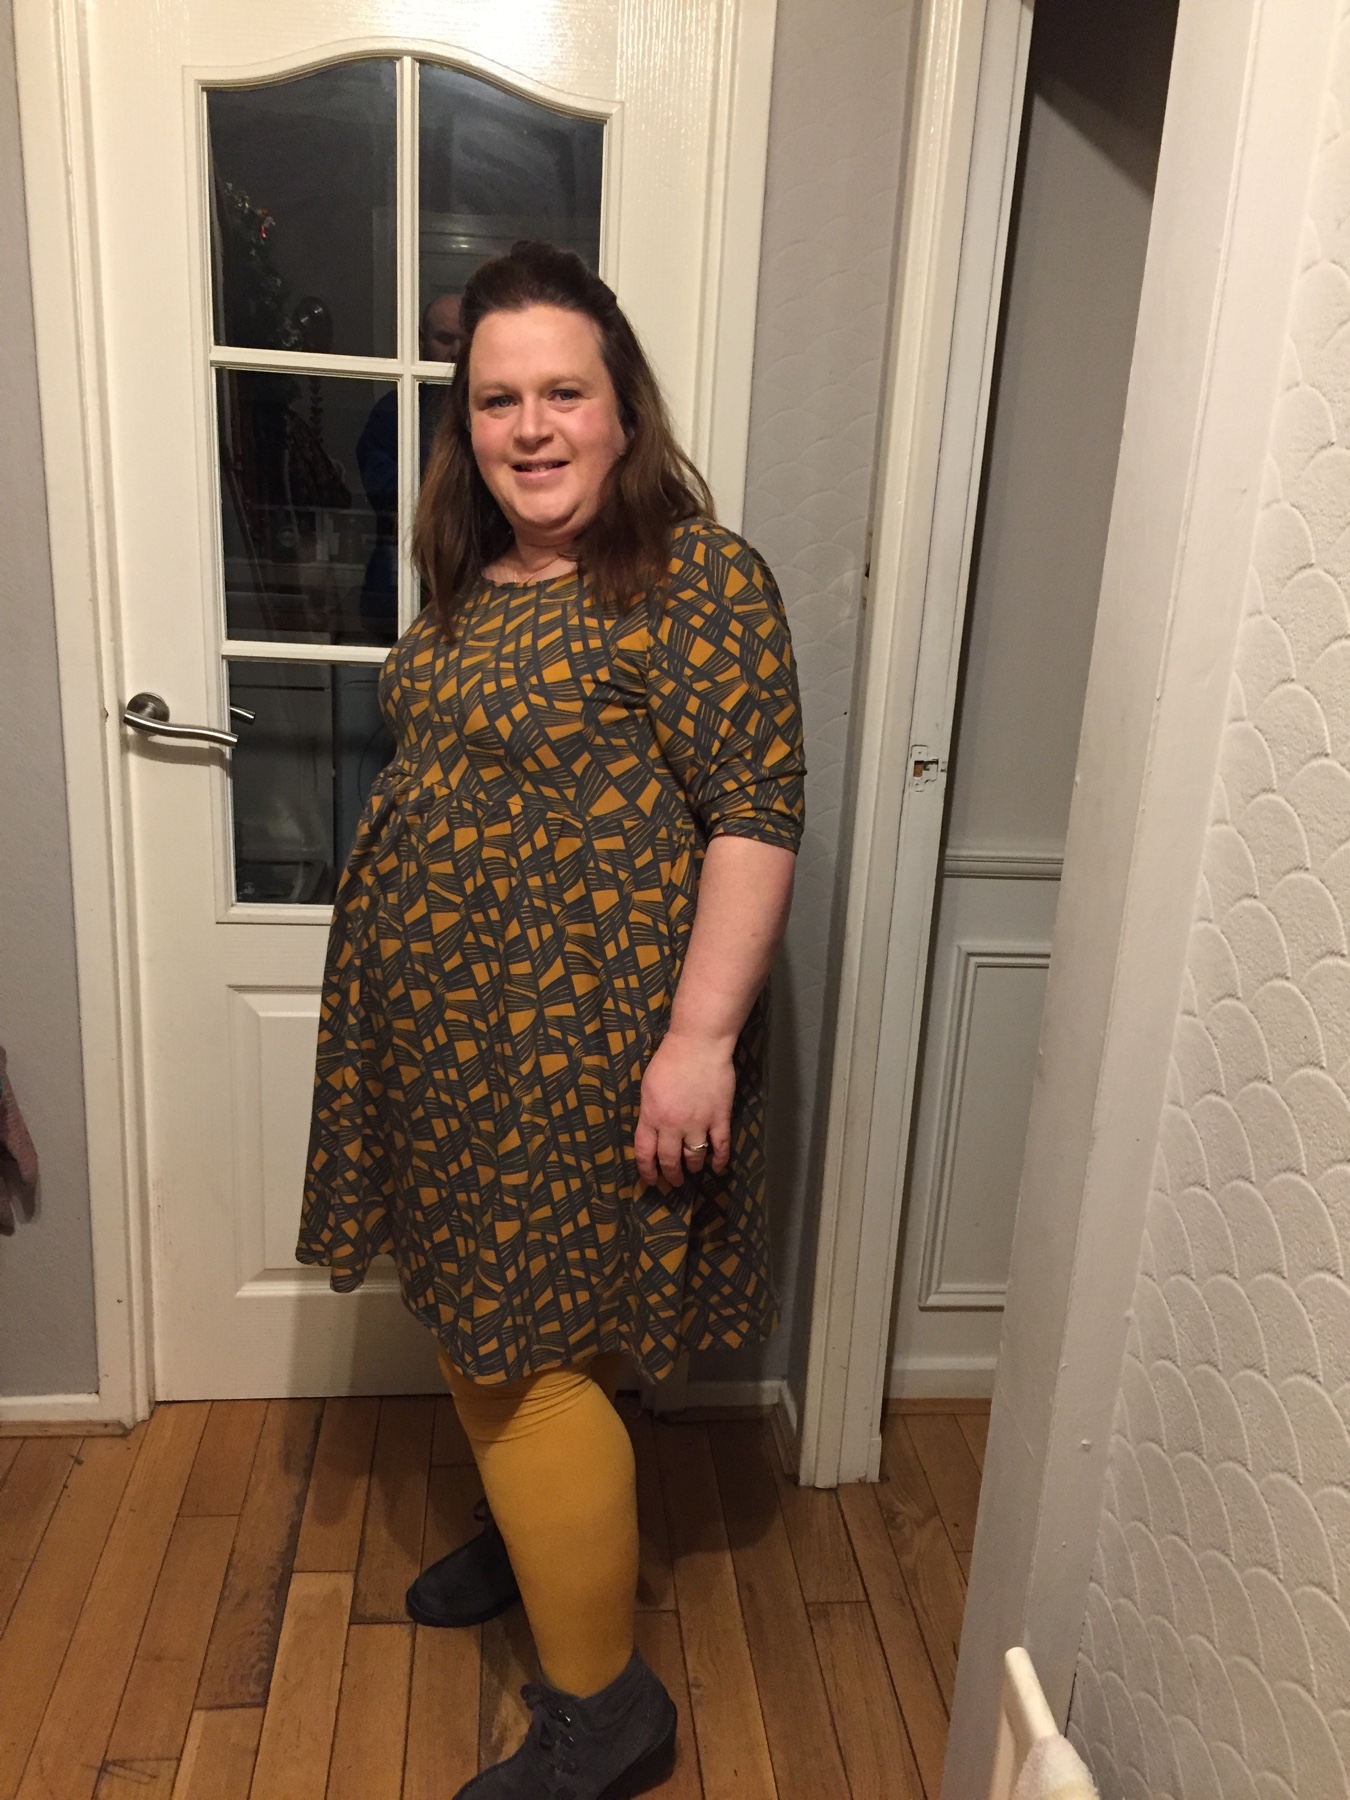
Ok, let me explain what #theEmmaProject is!
Emma and I met on Instagram when I had a destash and since then we’ve have lots of chats via DMs. We are still to meet IRL but that will come along with a serious splurge on fabric when we are allowed to meet!
Both Emma @CoffeeandGlassSlippers noticed we’ve got a few of the same fabrics and then we got chatting and came up with this collab!
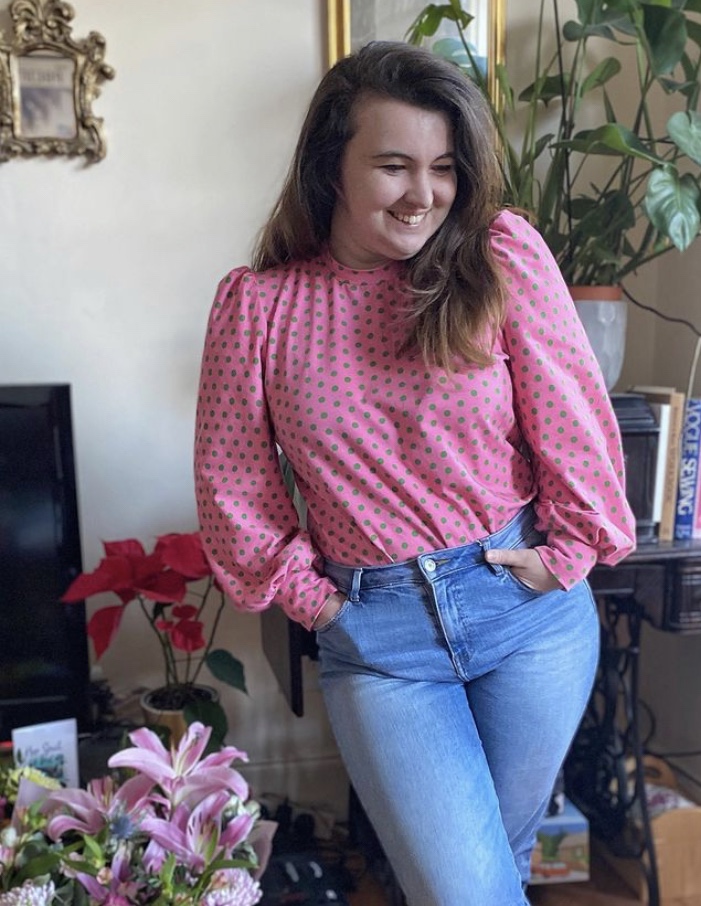

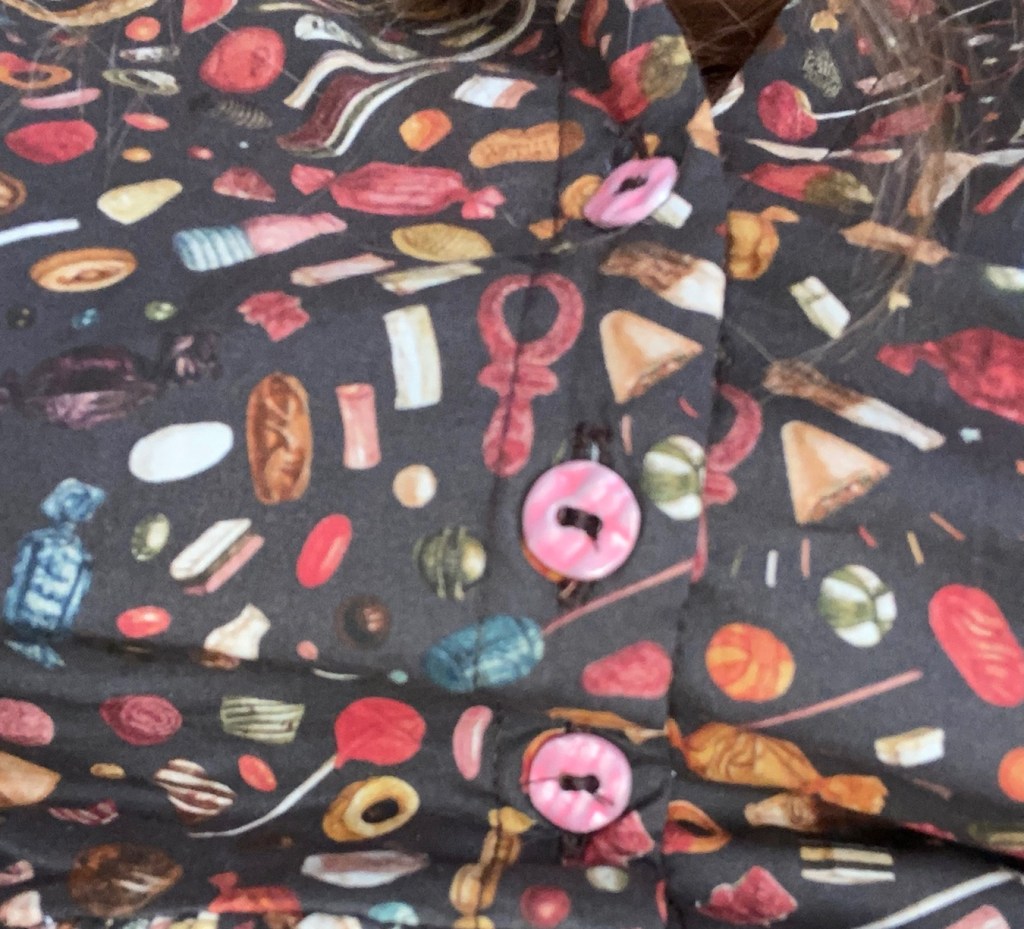
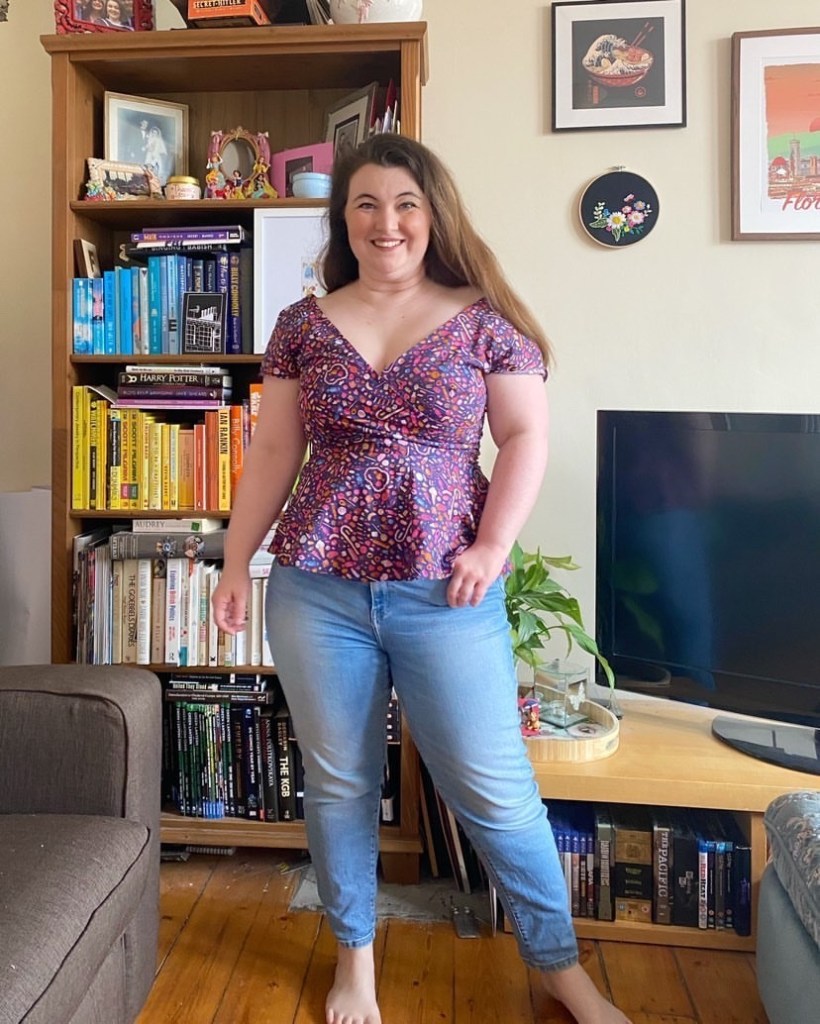
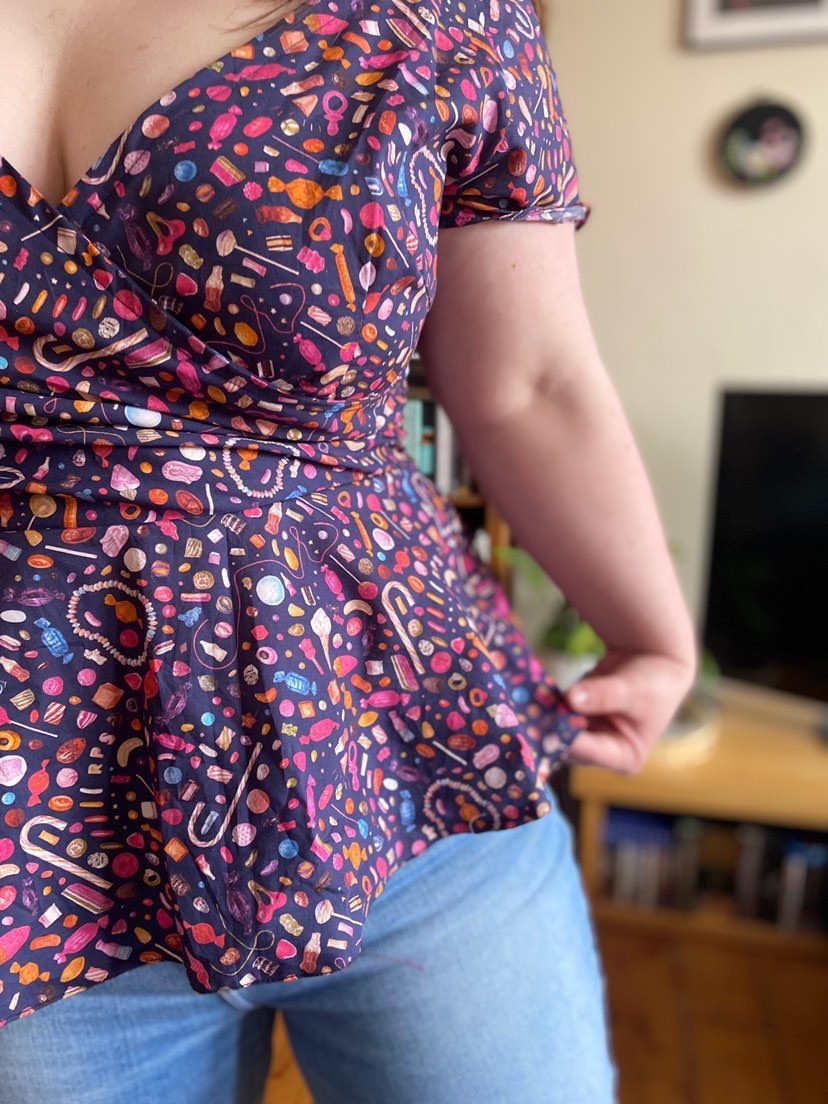
So to start off we’ve decided to use our Liberty Candy/Sweet Cotton Lawn. Although they are different colour ways, mine is brown and Emma’s is purple, they still have the same sweetie print.

I’ve had this in stash for absolutely ages, actually it’s went into my destash a couple of times and didn’t sell. Because it’s Liberty I really couldn’t take too much money off it as it wasn’t cheap to buy and there was 3 metres of it.
I’m glad I’ve turned the fabric now into a dress. I’m contemplating on doing a matching mask and hairband, although I probably won’t wear them all at the same time together unless it for photos!
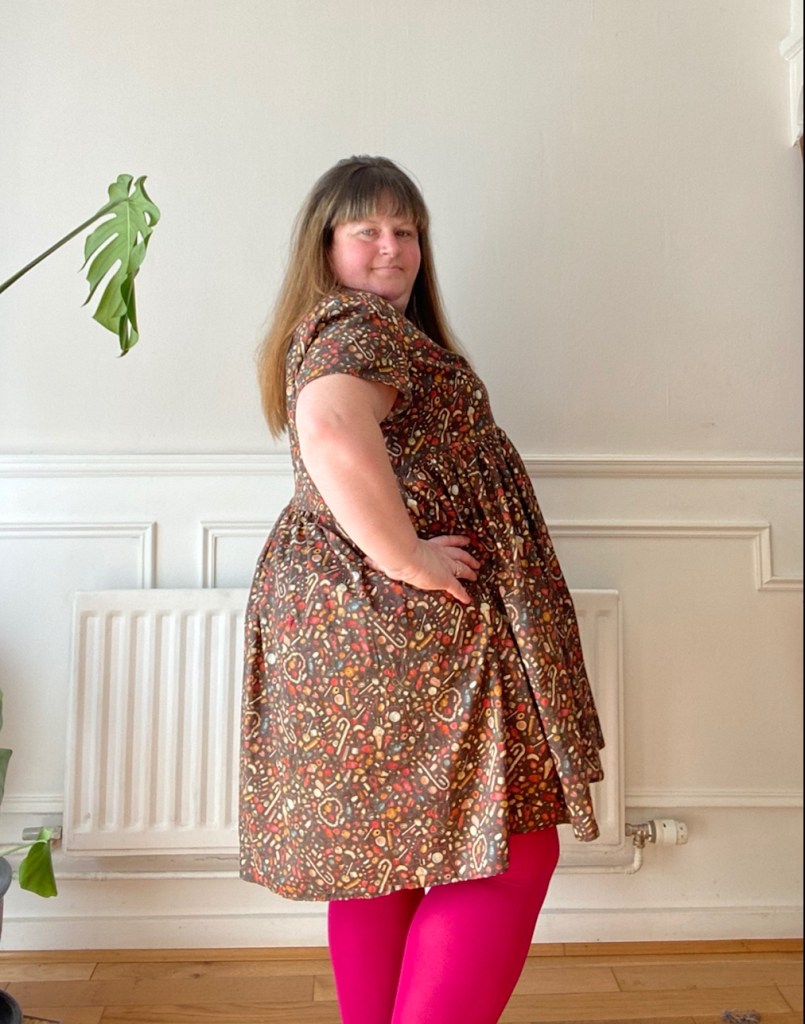
For this dress, I choose the myosotis dress by Deer & Doe Patterns. This is the second time I’ve used this pattern and the colours are quite similar!

Now I know this pattern isn’t fully size inclusive and the fact that Deer & Doe really have fucked up with regards to their plans and eh excuses, I won’t be praising them in that way anytime soon once the actually release something that’s surpasses a 60” hip (body measurements). I will review the patterns when they do eventually show the light of day.
When I did my first myosotis dress, the mandarin collar was quite tricky but this time it seemed to be more satisfying to sew it together. Perhaps it was the second time I did it and also I think I looked up a few YouTube videos just to make sure that I was getting it right.
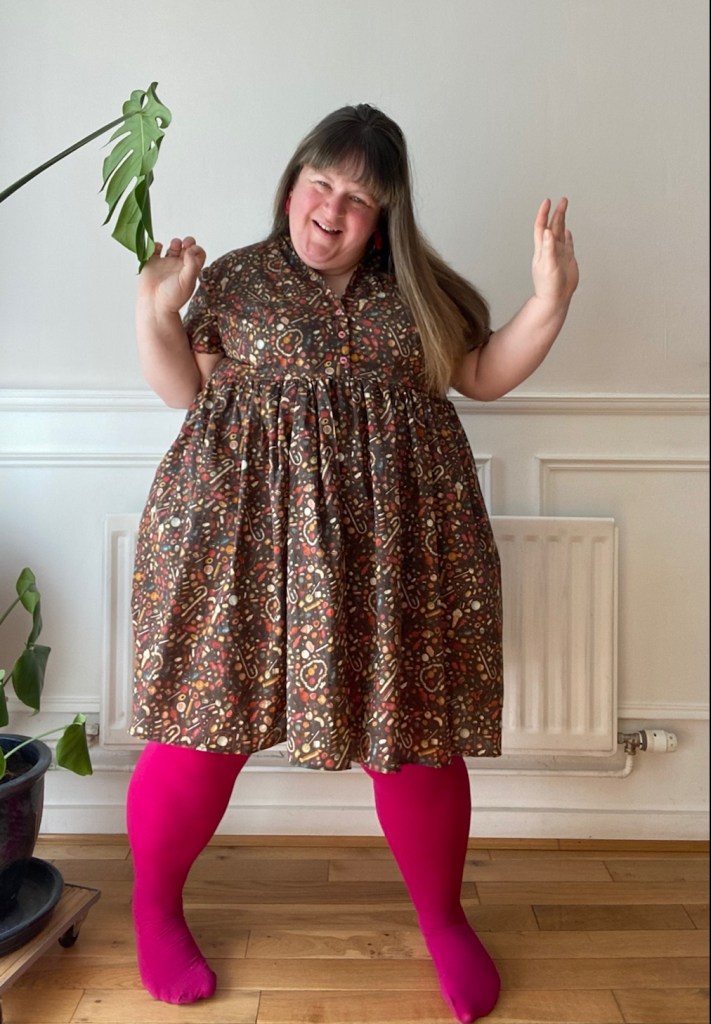
Yes, it has pockets … and they are a good size – I love a dress with pockets.

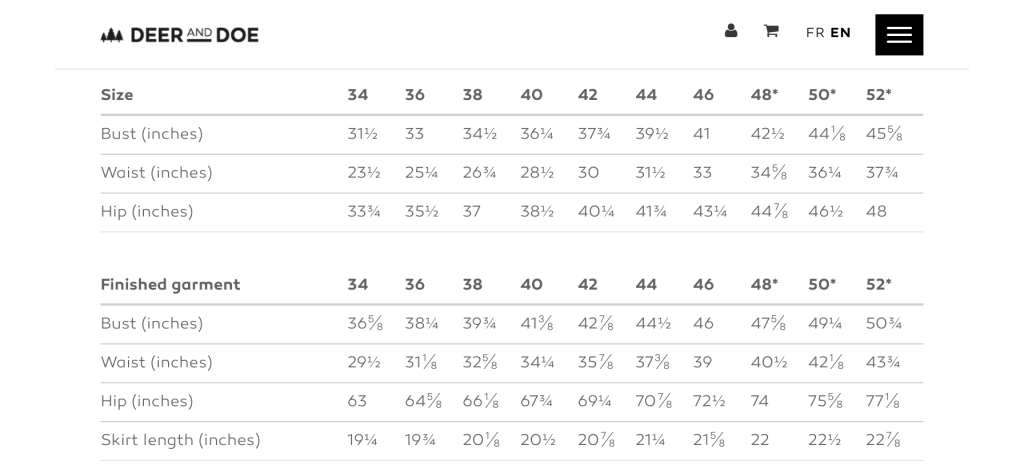
I’ve got the pdf pattern and although it only goes up to size 52* – Bust 45 5/8” Waist 37 3/4 Hip 48, I don’t mind the fit. Perhaps maybe in the future I could add some ease by slightly grading it out but to be honest, I don’t think I need it.
I added two labels, one being “Room for Cake” by Pink Coat Club and the other “Be Yourself” by Kylie and the Machine.
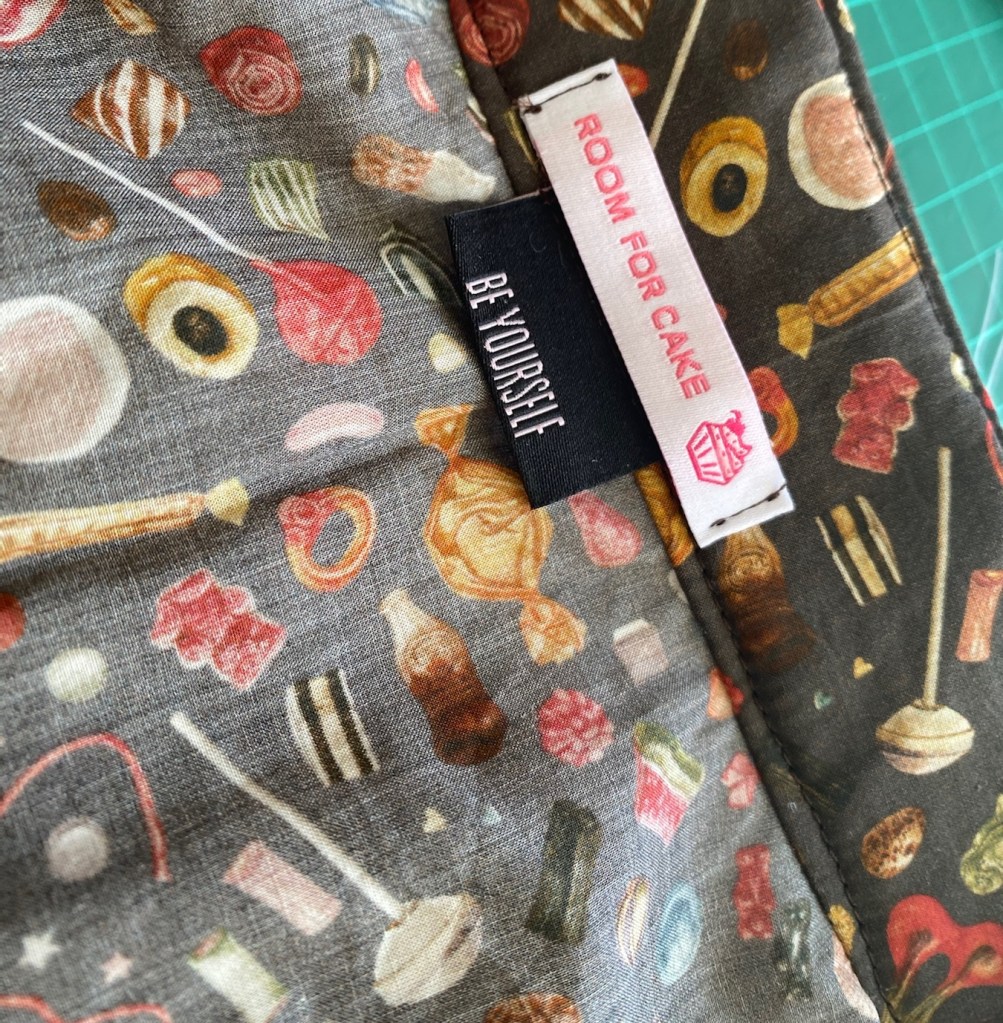
Now I’ve started to use a fabric glue stick for my labels – it’s a game changer. Before I found my labels going slightly crooked even with a pin and taking it slowly. With the fabric glue stick, that I purchased from Little Rosy Cheeks, there’s no more crooked labels going forward!

The gorgeous pink buttons are from Textile Garden. Textile Garden is one of my go to online button shops!
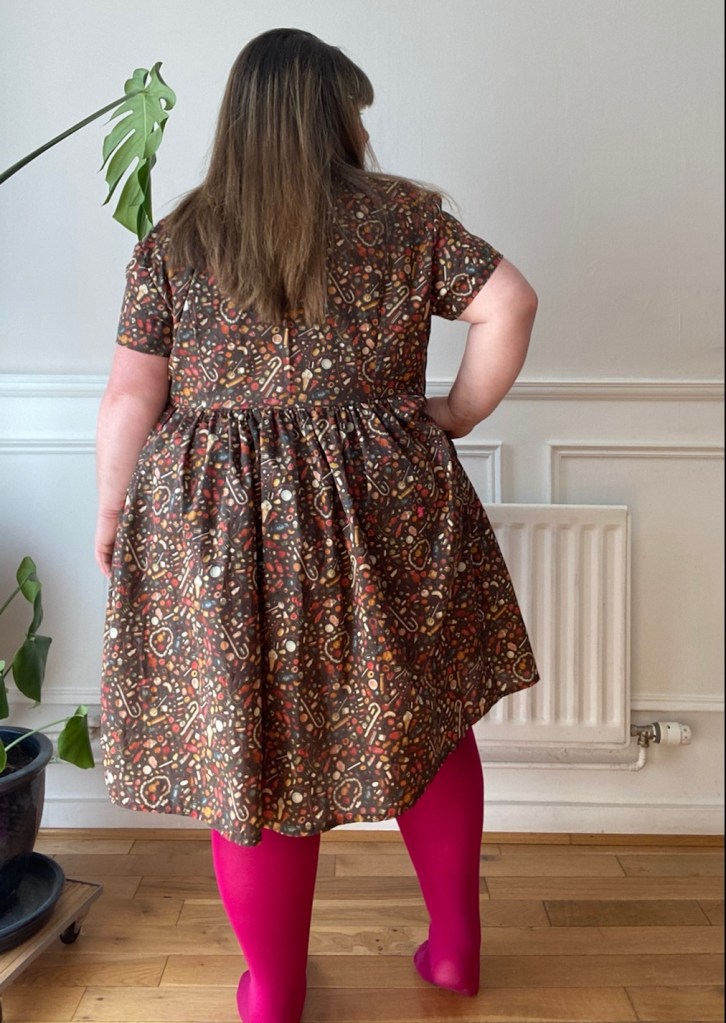
I do love this version of myosotis dress without the frills and ruffles. I think with the busy print it would be far too much with the ruffle on the bottom skirt and on the sleeves, plus I can easily get a cardigan or jacket on!
Going forward, I think I will add some length onto to the bodice. There’s nothing wrong with this version and my first but I do feel I could get away with more length in the bodice. Also I’m going to try the wonderful Marie’s @stitchodyssey’s no-collar hack on my third one, whenever that may be!

So there you have it. A blog post and a new make in one. Yes it’s been a while (over a month!) but I’m back and I hope you are ready for more posts coming your way.
Here’s the lovely Emma in her sweet Liberty make. Emma hacked the Maisie Dress into a top and I think it’s absolutely gorgeous! I think if I ever see this purple colour-way, I’ll be snapping some up!


Annnnnd Emma and I will be returning with another collaboration. And we can’t wait to share!

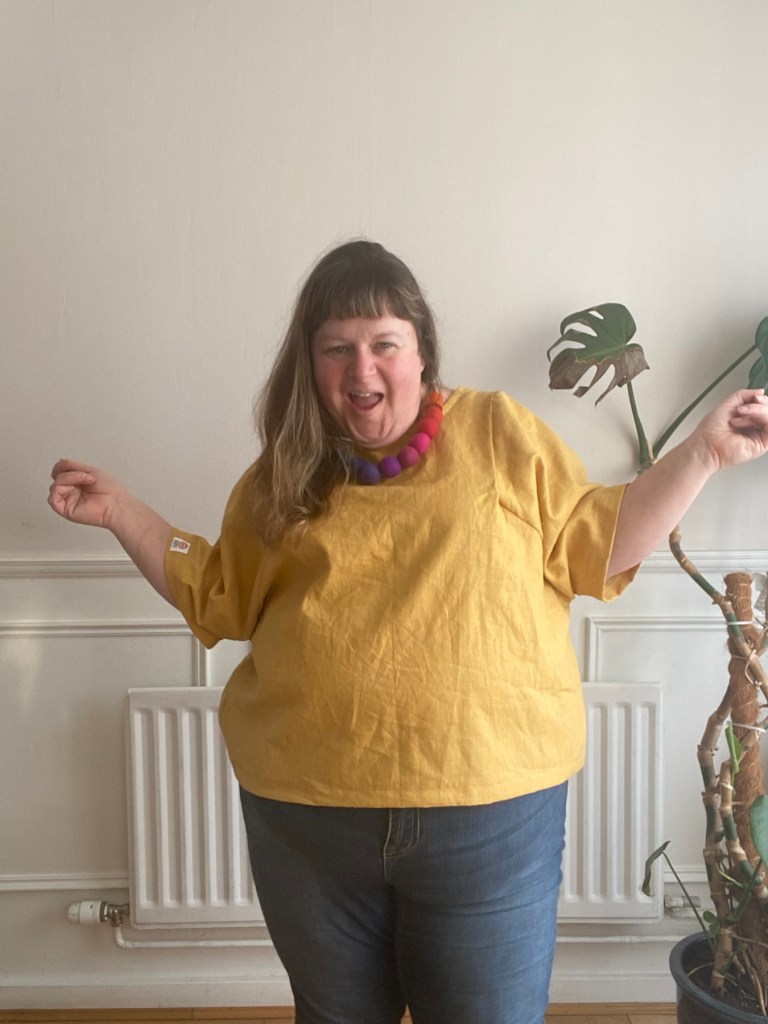
Disclaimer: I was given the Block Tee from Tara (Paper Theory Patterns) in exchange for my thoughts. I didn’t have to post anything but here you have it!

Formerly known as the Kabuki Tee it’s been given the new name and now goes under The Block tee.

After some feedback and consultation with the community, Tara felt that having no Japanese heritage herself, it was only right to change the the name.

As well as a big name change, The Block Tee has has some small changes in the grading. This was also from feedback from previous customers. The change is small yet will help with the fit on the shoulders. The shoulder grading increments has decreased between the sizes 18-28, so the length of the sleeves aren’t as long.
Making the Block Tee was fun, quick but somewhat challenging as doing sharp right angle turns is not a quick job and you want to take care doing it.
If you are stuck and I was just needing that little extra visual, Tara has a really good video of how to do the Right Handed corners on her website, which helped me a lot.
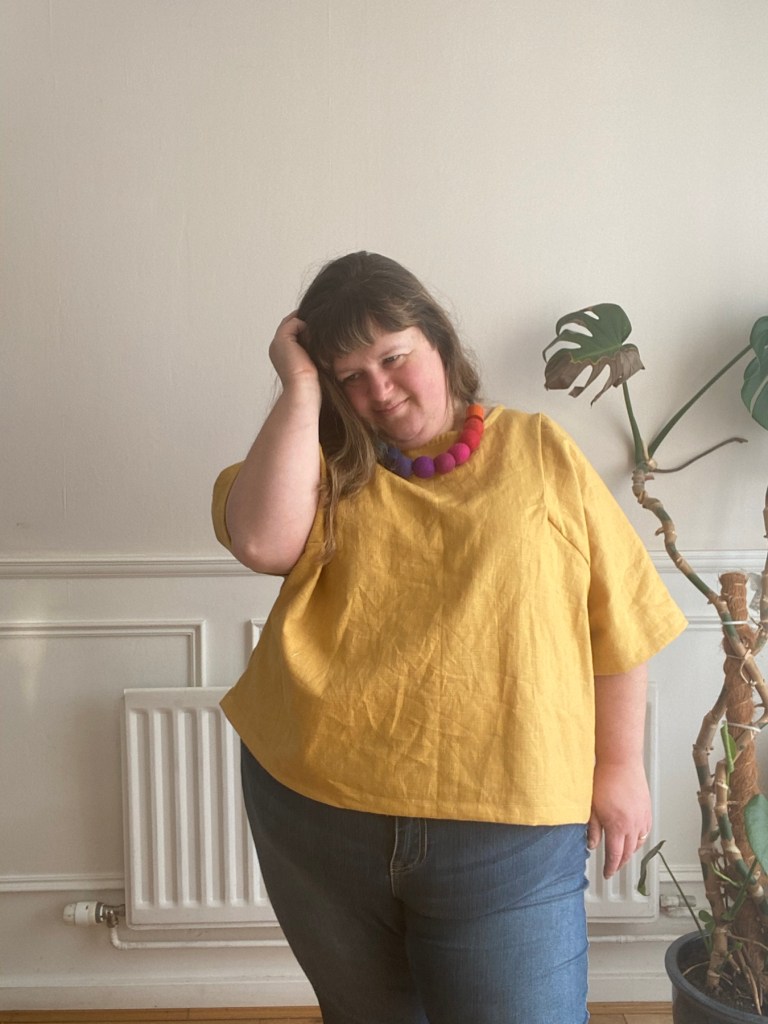
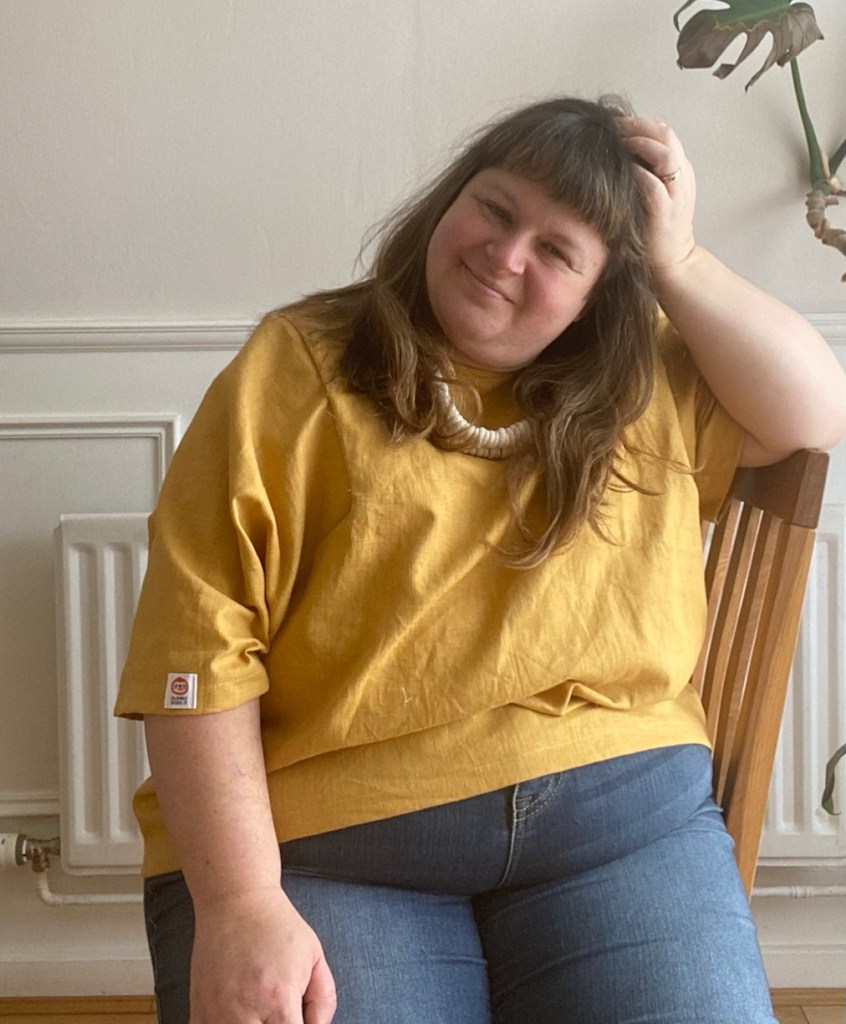
Without any doubt, I cut two Block Tees’ … yep I didn’t do a toile, yep I’m a bad ass but I had totally faith in Tara’s design. I used linen: mustard yellow from Selvage and Bolts and the green from Blackbird Fabrics.
I graded from a 22 at the arms and bust to a 26 at the hips. I could always go down a size all over since the pattern has lots of ease.

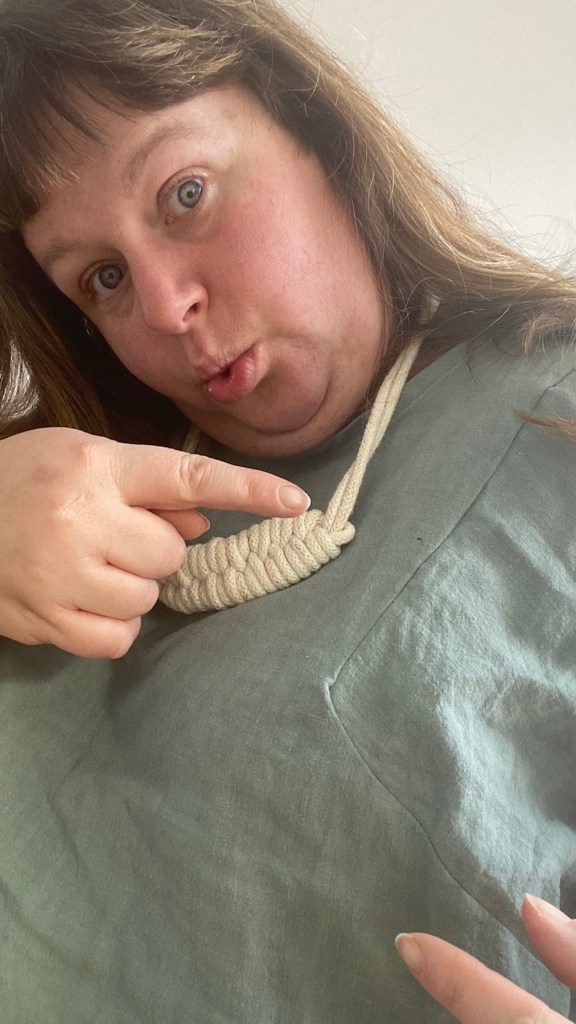
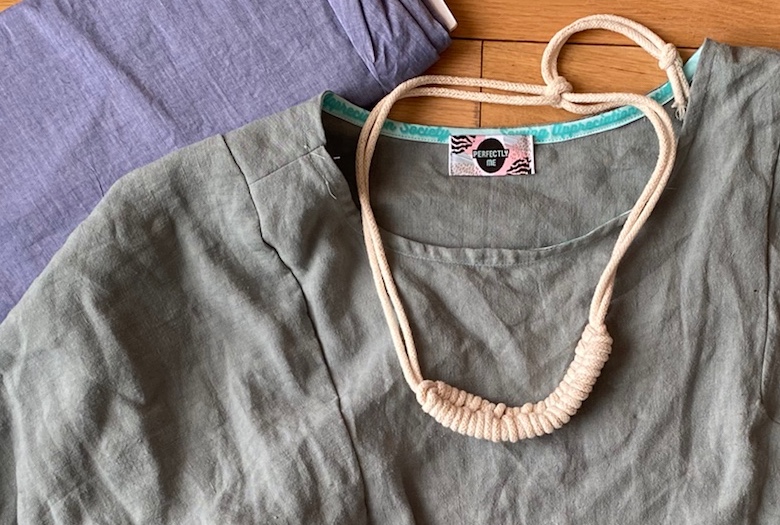
I found that I used under 1.5 metres especially without needing to cut the piece for the bias binding as I wanted to use some of the bindings that I bought from The Specky Seamstress (The “Sewing Appreciation Society” Bias was received as a gift).
It’s quite a handy pattern and I feel I’m going to potential do a Block Tee with some of my scraps (watch out for that!).


I’m pretty chuffed with the results and yes I feel I need to practice these right angles! It’s a lot trickier than I thought but don’t let that put you off. Just take your time and pin pin pin!
Like most makes these days, before I start sewing pieces together, I overlock the edges. One for finish and two, to stop any fraying.
The details of the Block Tee are really smart. I like the lines that it has. It’s just has a different spin on the Box top.
I’m super chuffed that the block tee goes to 57.5”/146cm hip body measurements. It’s got a good amount of ease in it too. It’s going to be a nice staple in my wardrobe, especially in linen over the summer period.
If you haven’t tried The Block Tee yet and would like to give it a try, I’d definitely give you a gentle nudge of encouragement. However (again!), go slow round those corners!
The Mustard Yellow Block Tee Details:

The Green Block Tee Details:

Happy Sewing!
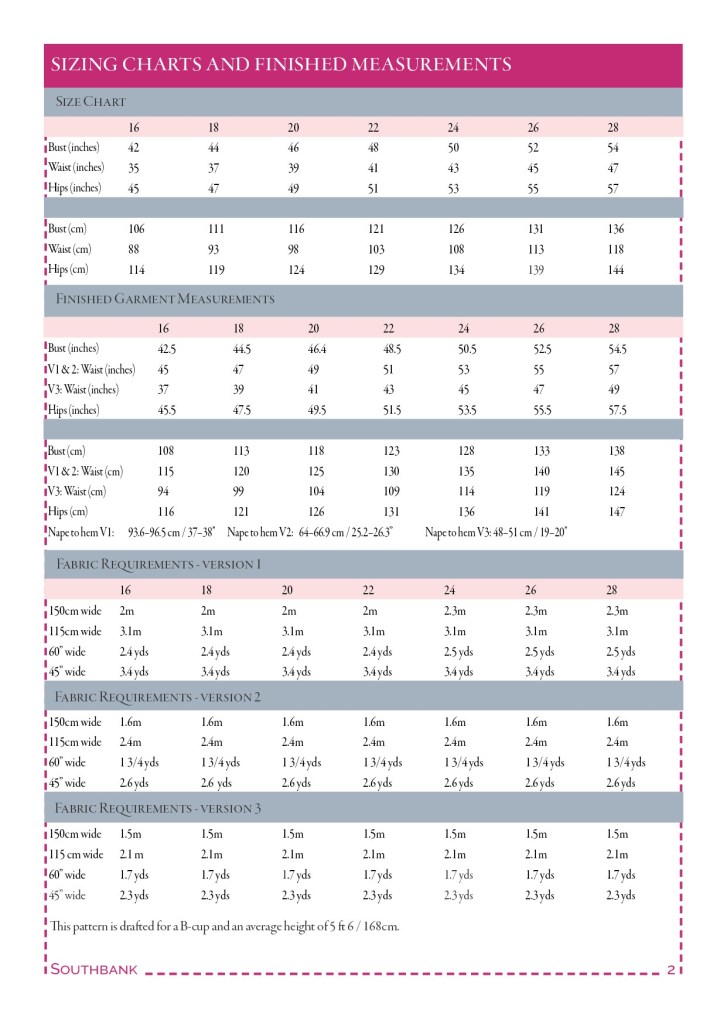
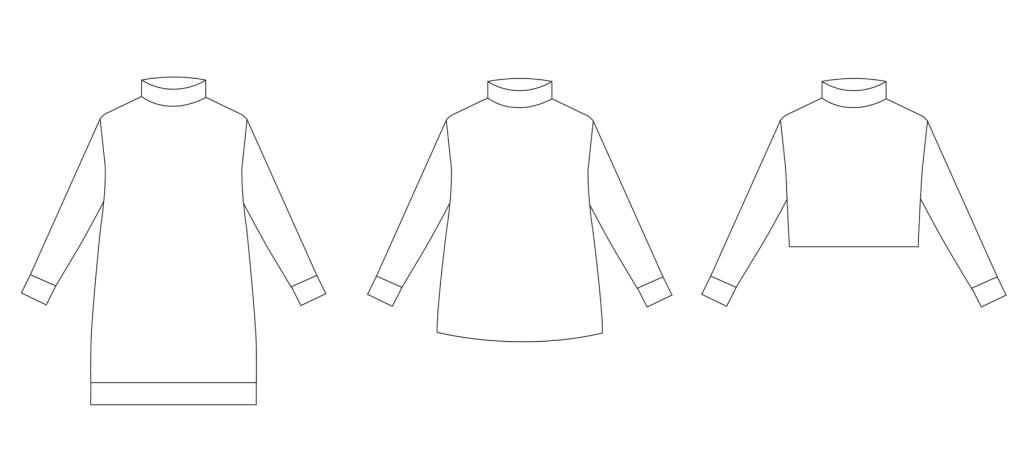
The Southbank Sweater is one of those patterns that since it was released was on my radar.
Unfortunately, when it was released back in the day, the sizing wasn’t inclusive but it didn’t stop me from buying the paper pattern and forever procrastinating whether I should or should not try and grade it up.
But when Nina Lee updated the Southbank with more inclusive sizing I quickly bought the pdf and then destashed the paper pattern to a new home.
However, the pdf lay waiting to be used for a while until December 2020 when Caroline (cme_202) and I collaborated on the Sew Cosy Winter Party.

The Southbank Sweater was one of the 6 sweaters I had on my short list but me being me, I always take too much on and only get half done … Southbank was in the batch cut though, it just didn’t get Sewn up until very early February.
Nevertheless, I love it. It’s so cosy and easy to wear. I can also layer up underneath or treat it as a cosy dress.


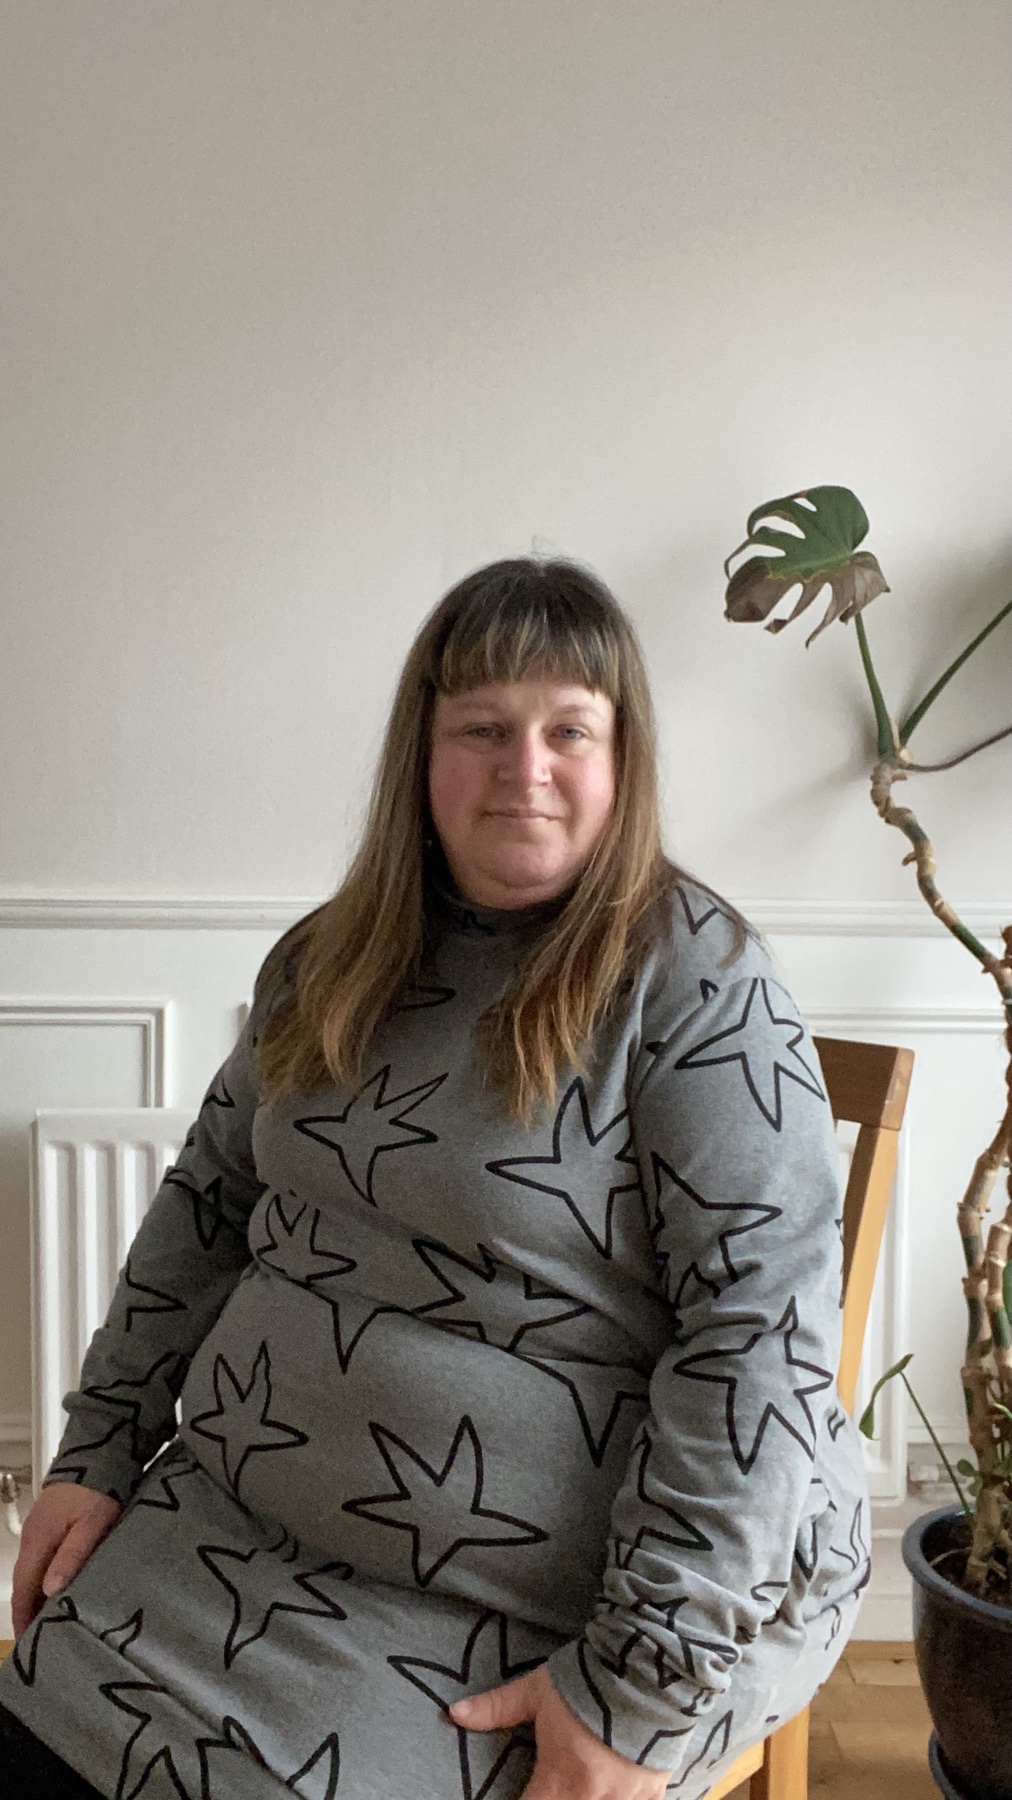
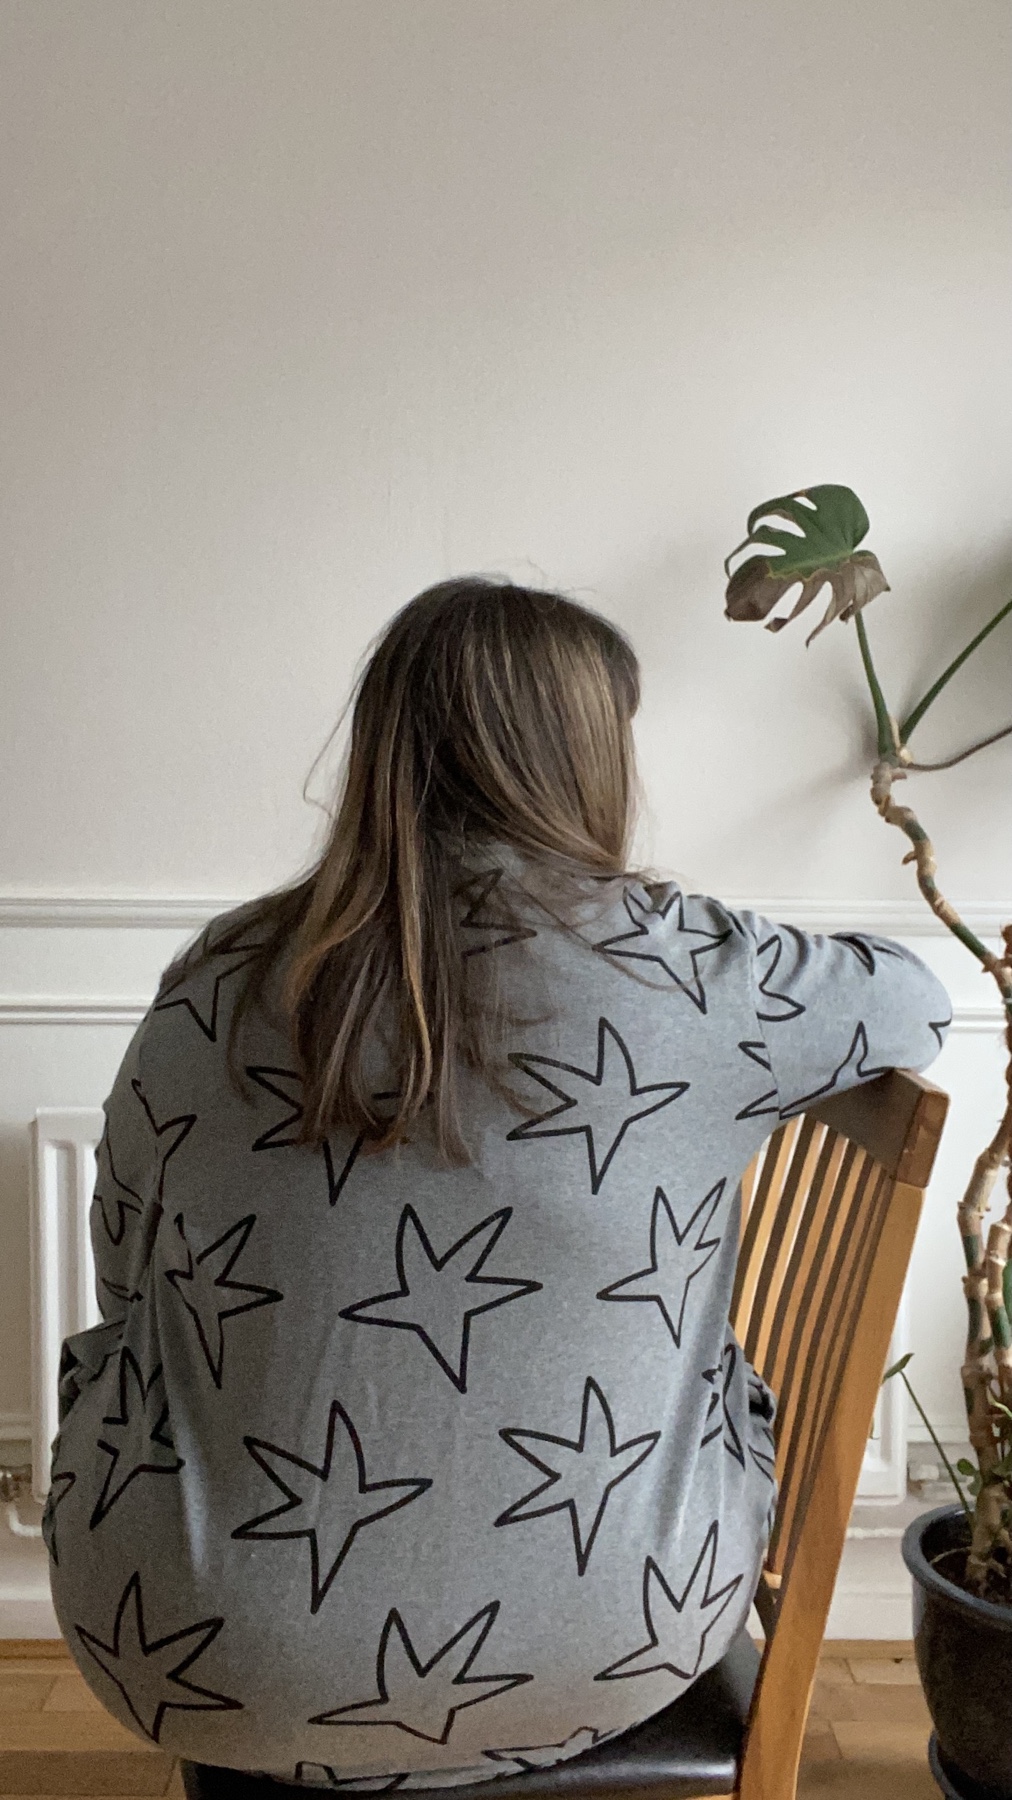
The fabric is from Pin and Sew UK. It’s a sweater loopback jersey and like always, it’s amazing quality!
Again, another pattern that I can see I’ll get more use out of. I see myself using the cropped version over a dress and trying out the hip length with a pair of jeans or dressed up with a skirt.
Happy Sewing!

Disclaimer: Jennifer Lauren Handmade gave me a copy of the Dulcie Pinafore in return of a honest review.
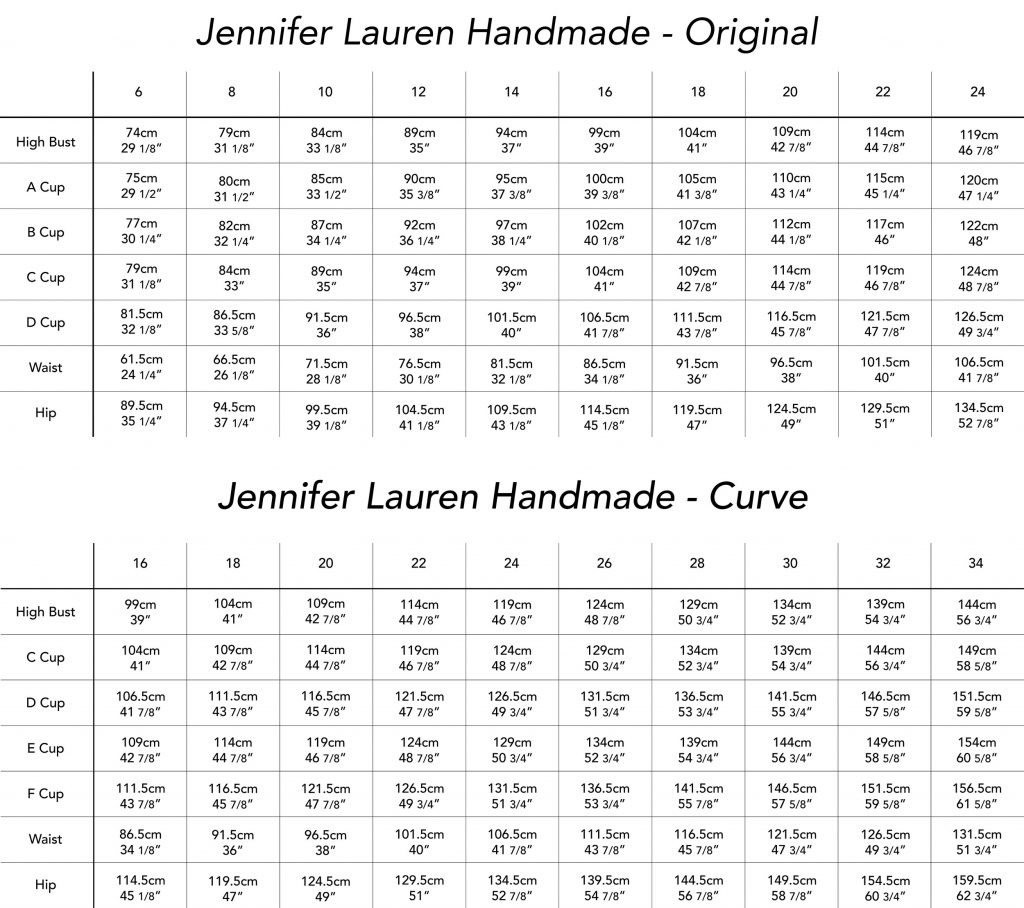
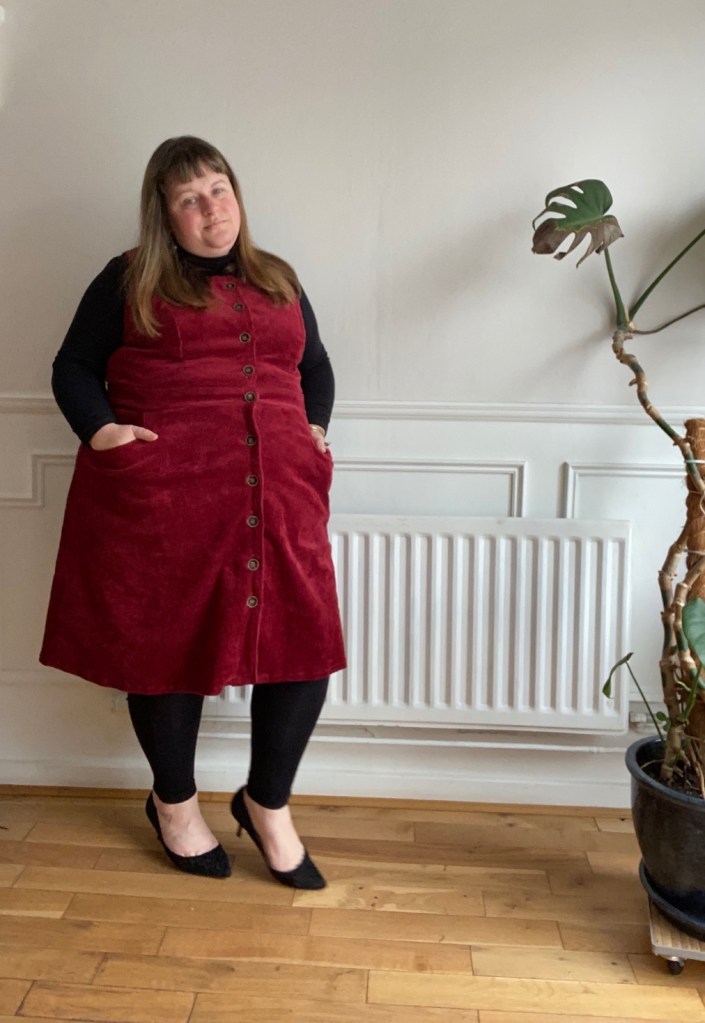
The Dulcie Pinafore is one of JHL’s most recent patterns and it really did appeal to me. The pinafore is in the new size range which goes from a size 6 to a 34 and also includes 6 cup sizes.
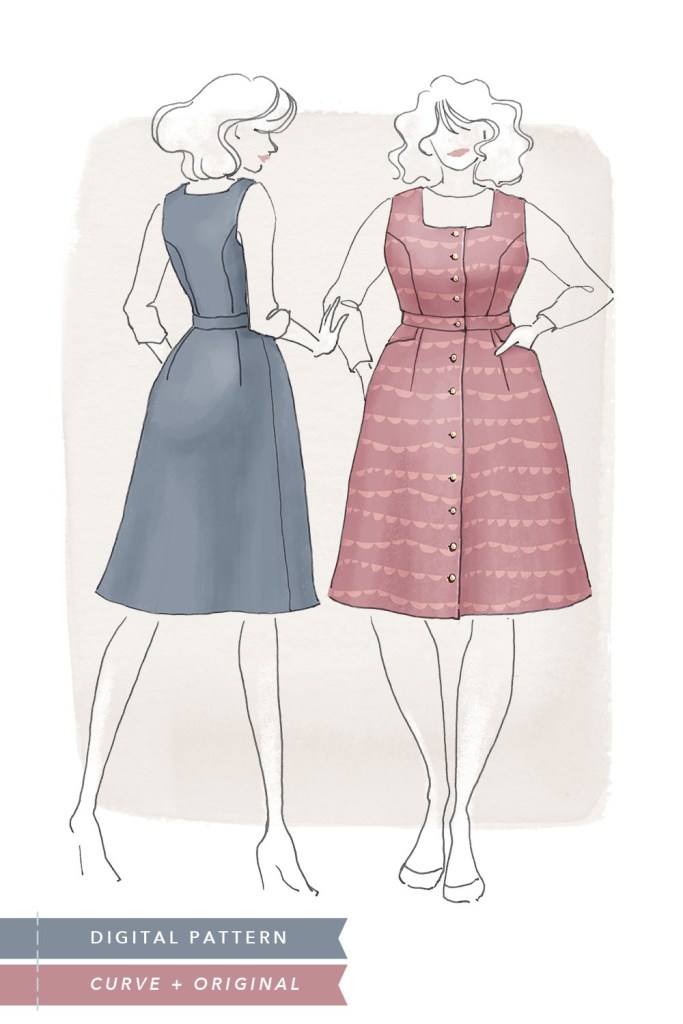
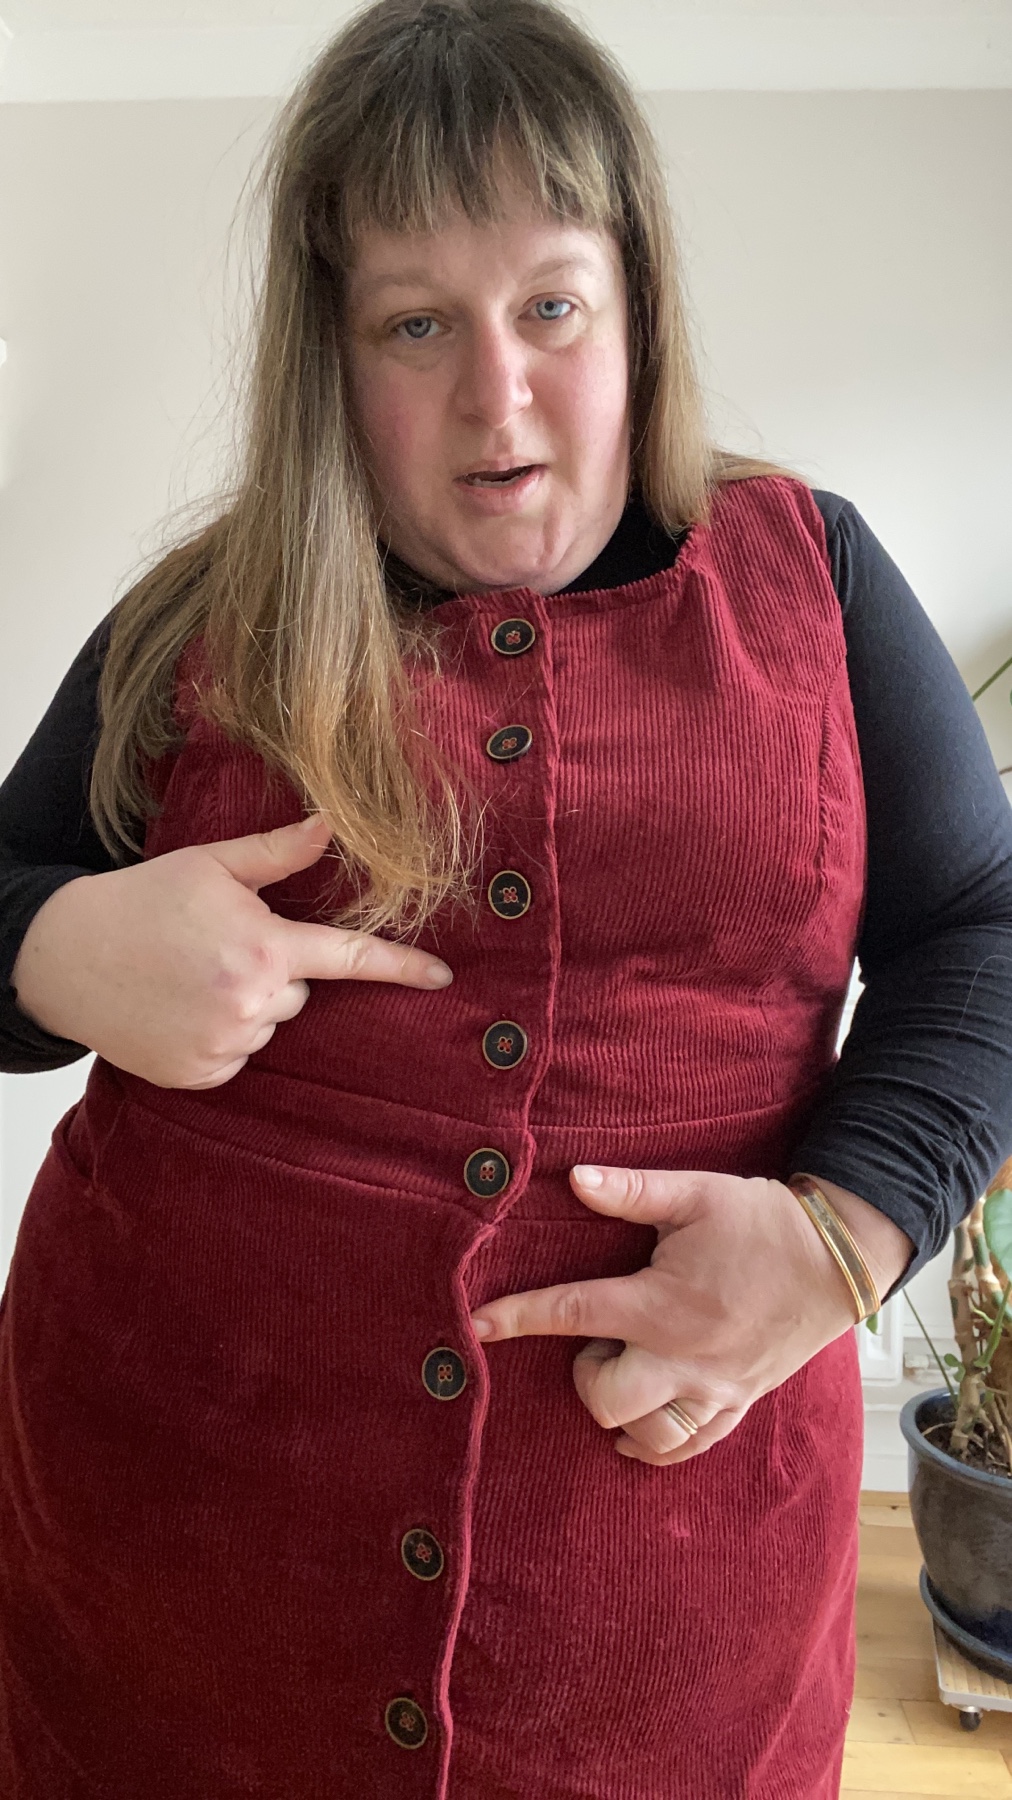
One of the design aspects of the pinafore that appealed to me was the square neckline as was the princess seams and the button details.
For sizing, I carefully followed Jennifer’s instructions and cut a 22 C-cup size in the new curve range for the bodice. And for the skirt I cut out the size 28. I used the back darts in the skirt to take out the excess that was left where I matched the bodice and waistband to the skirt piece. Ideally I think if I had realised how much excess there was before I added the side pockets I would put some of the extra fabric in the dart behind the pocket. Nevertheless it seemed to work out.
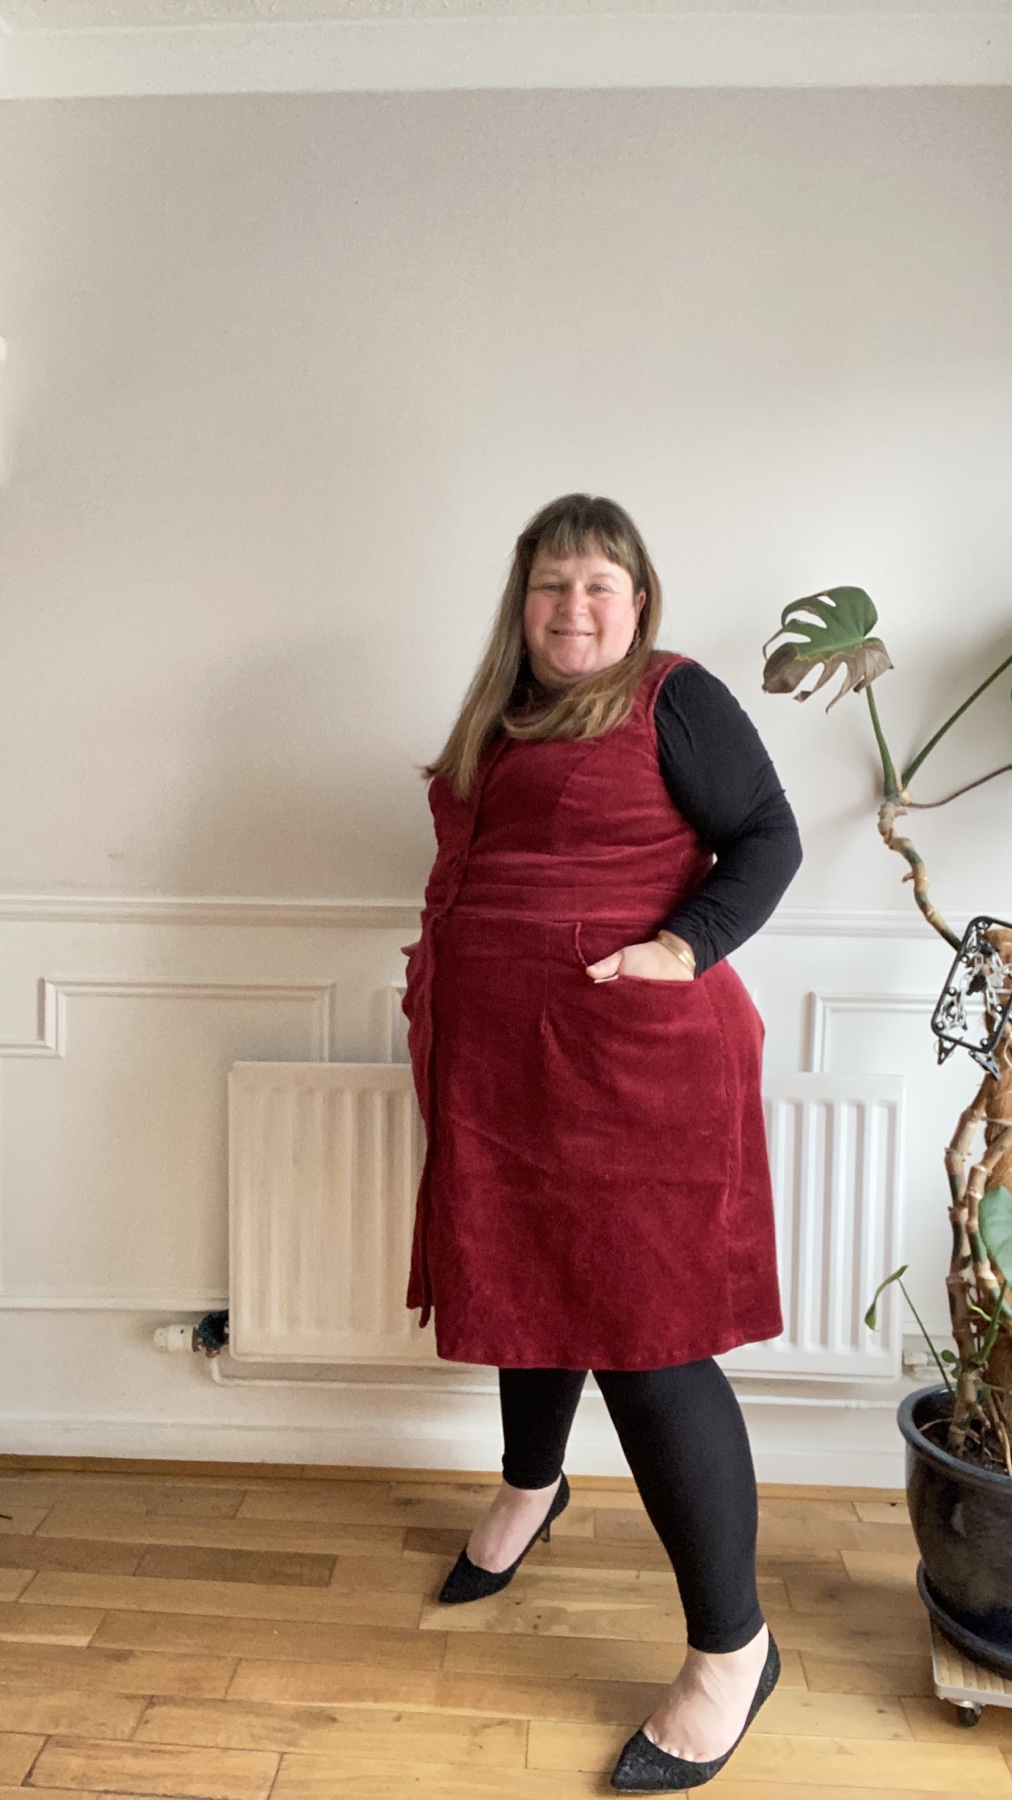
Talking of the pockets, they are a really good size and I like how they are positioned. I had to add a label to one of them just to highlight them!

If you think that’s the only label I stitched in, well you’ll be pleased to hear that it’s not! I added KATBs’ “Look After Me” and Little Rosy Cheeks’ “You Do You” to the back neckline.

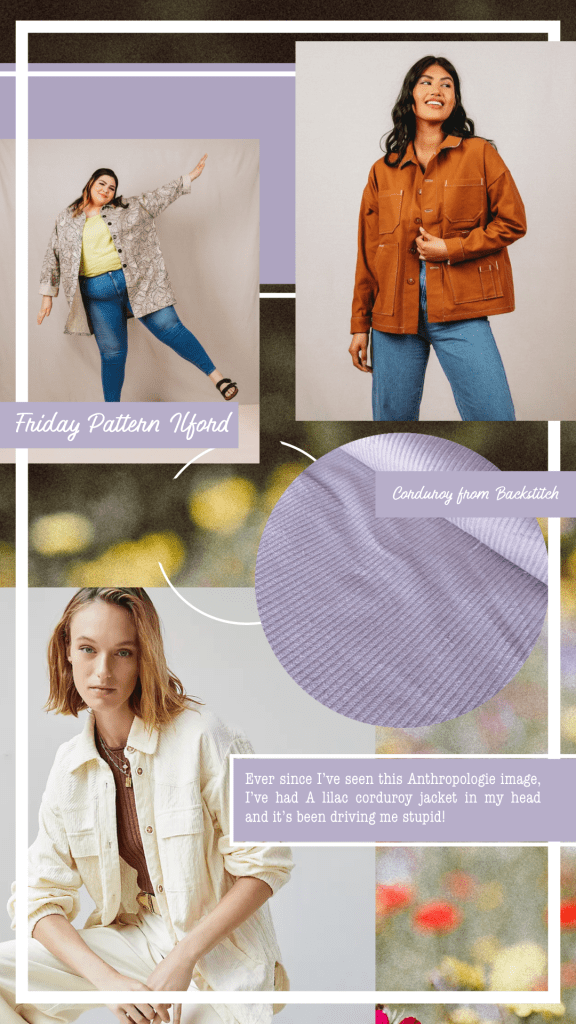
This red corduroy was from my stash, unfortunately I can’t remember where I bought it from but it’s a lovely jewel tone. I had 2.5 meters of the corduroy and it worked out well although I seemed to have got the nap upside down … you know the stroke direction. The corduroy has a slight stretch to it as well which isn’t a bad thing especially with a pinafore and lockdown weight!
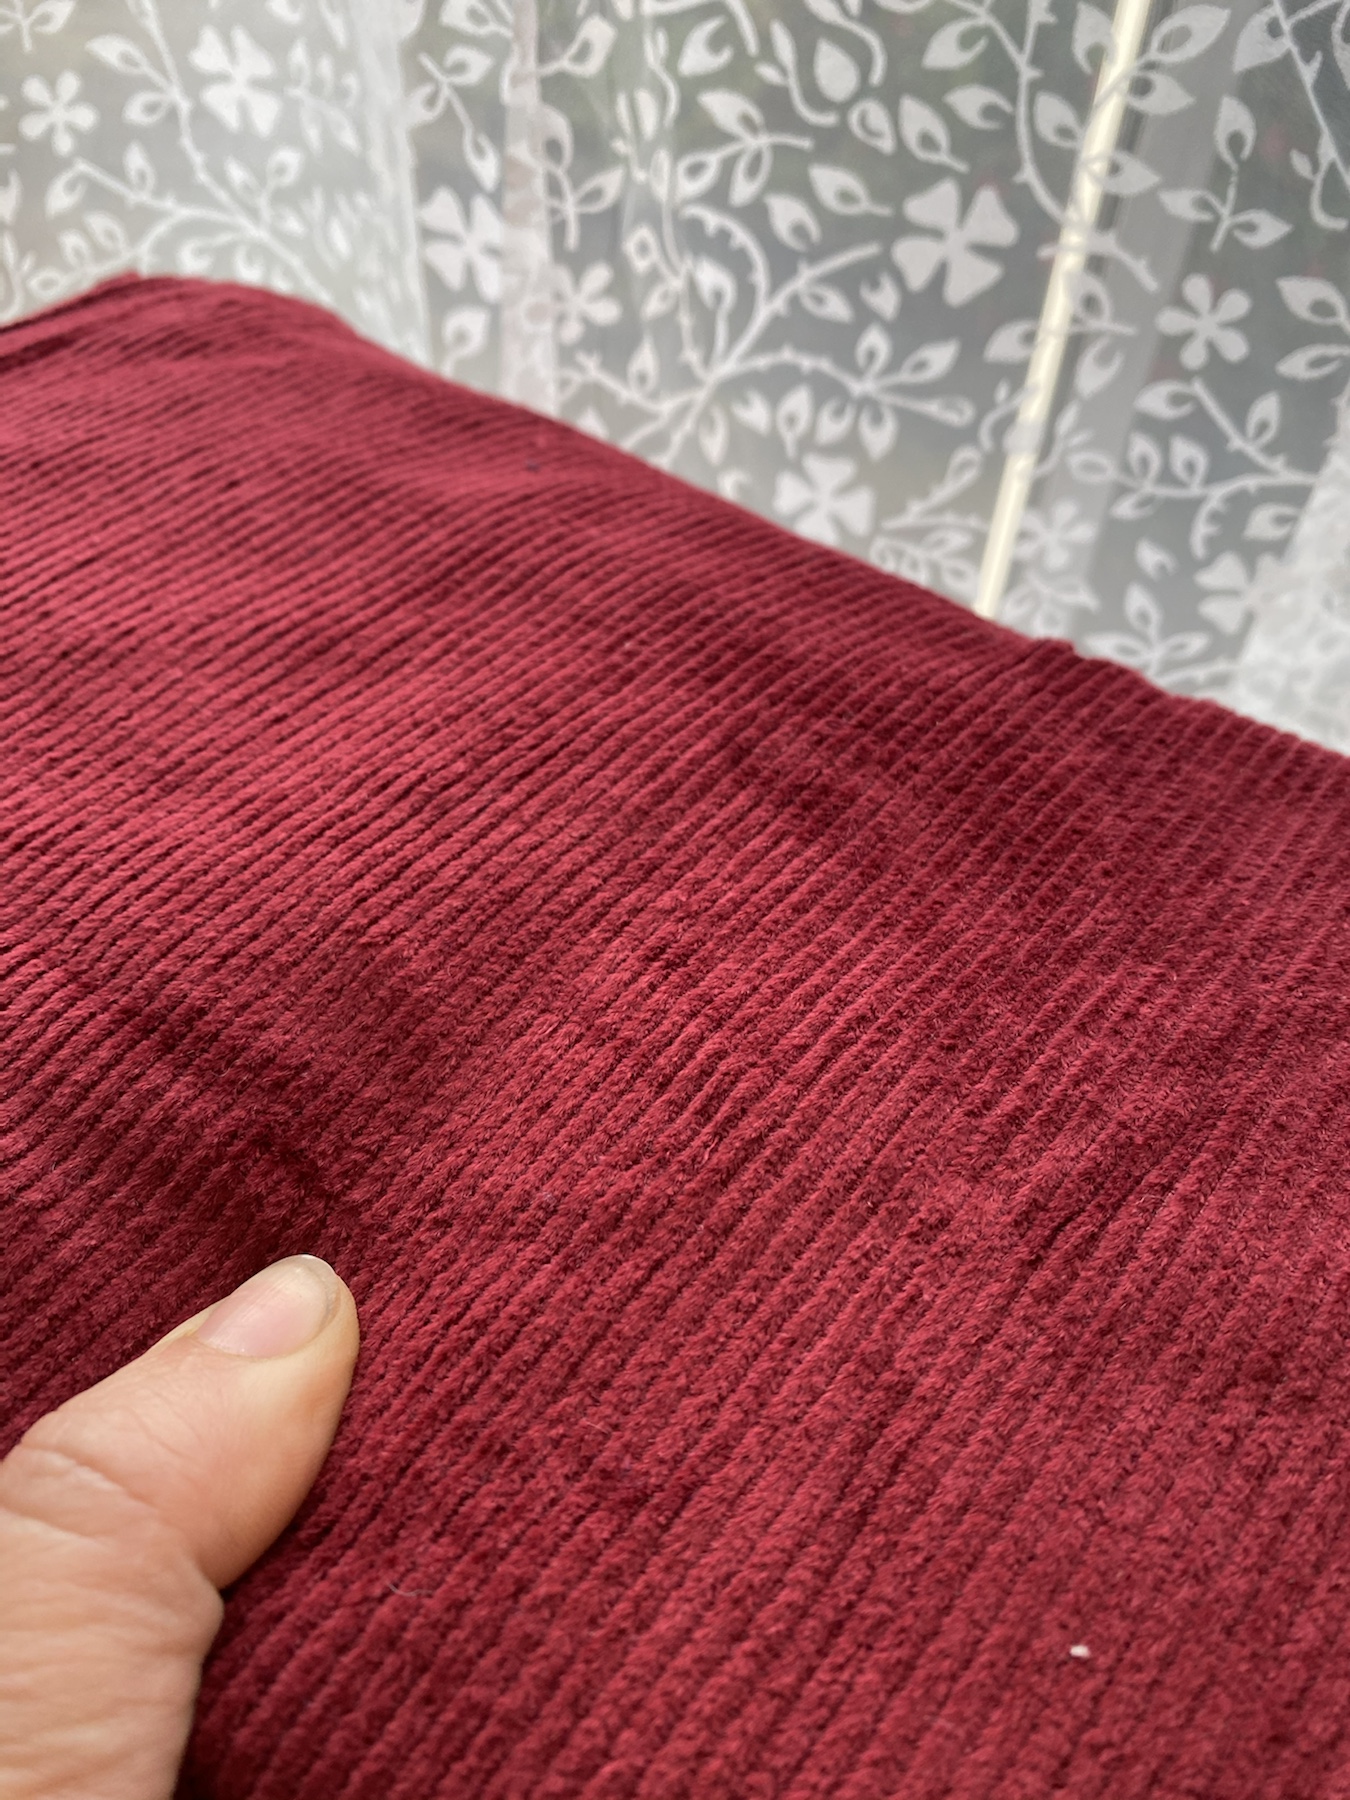
Lovely stretch corduroy and perfect for the Dulcie Pinafore!
The 22mm buttons were from the Textile Garden. I wanted something that was going to compliment the red earthy tones and I think I did pretty well matching up via the internet. If I was stuck on buttons I would have normally went and checked out The Cloth Shop (Remnant Kings) but they closed just before the pandemic hit and if we are in lockdown and in tiers, it makes it more difficult to factor in travel and sourcing locally. Anyway, I think the Textile Garden buttons are just the match for this pinafore!

I love how the bodice is lined. It just finishes it well. I used some lining that was gifted to me by a friend and it lay in my stash waiting for the right project. I wonder, if I could line the skirt on and future Dulcies’? I probably could, I’d would just need to sit down and work it out.

Ok, the verdict – I really do love it. However, I know I need to make some knit tops that will work with it other than this black RTW top but that’s not a bad thing now is it?!


I might go up a size in the bodice, just for a little more wiggle room, cancel that – its fine. Stretch corduroy is a good friend!
Ok. I’m definitely loving this pinafore. Prepare for another one in the future!
Happy Sewing!
Disclaimer: I was given this fabric in return for a review over on Minerva. This is a basic post, so please check out my blog post over on Minerva!
What is happening? After three years of not completing make nine and a year off, I am powering through this years make nines.

Could it be I’ve managed to get confidence with my sewing skills – who knows, but I like it.
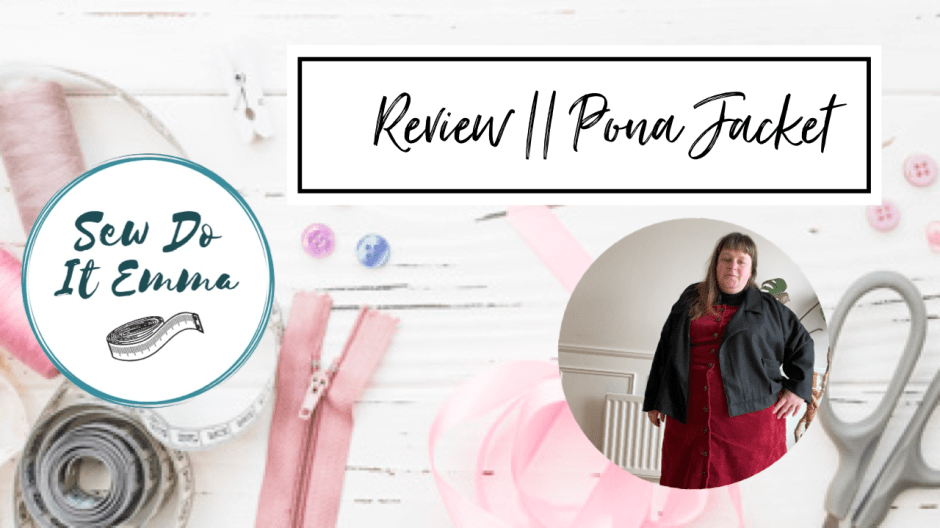
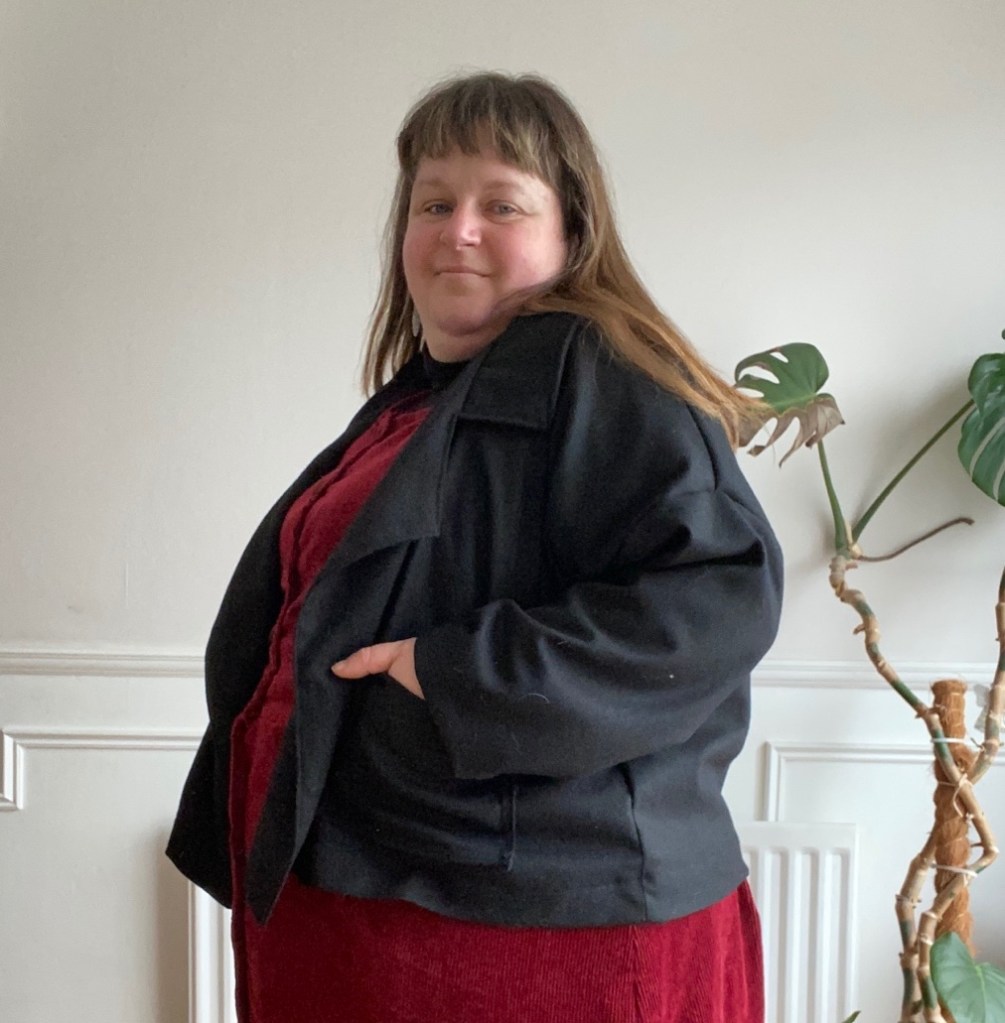
So, the Pona Jacket by Helen’s Closet Patterns kinda reminds me of similar RTW jackets that I’ve had in the past and will be a to go to pattern for the future.
I really enjoyed making the Pona Jacket. Helen’s instructions are second to none one of the best instructions around. I used the lining hack on her blog post on her website to insert the lining to this jacket.
For more information … please go to Minerva!
Thanks for reading