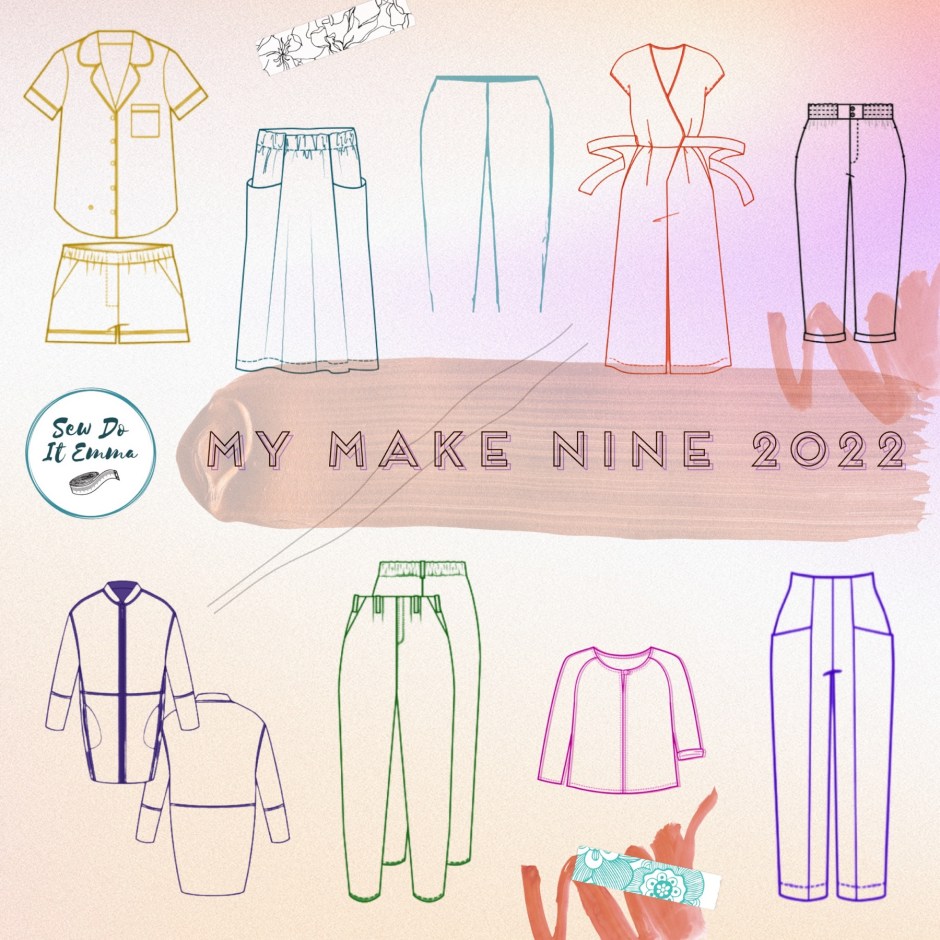
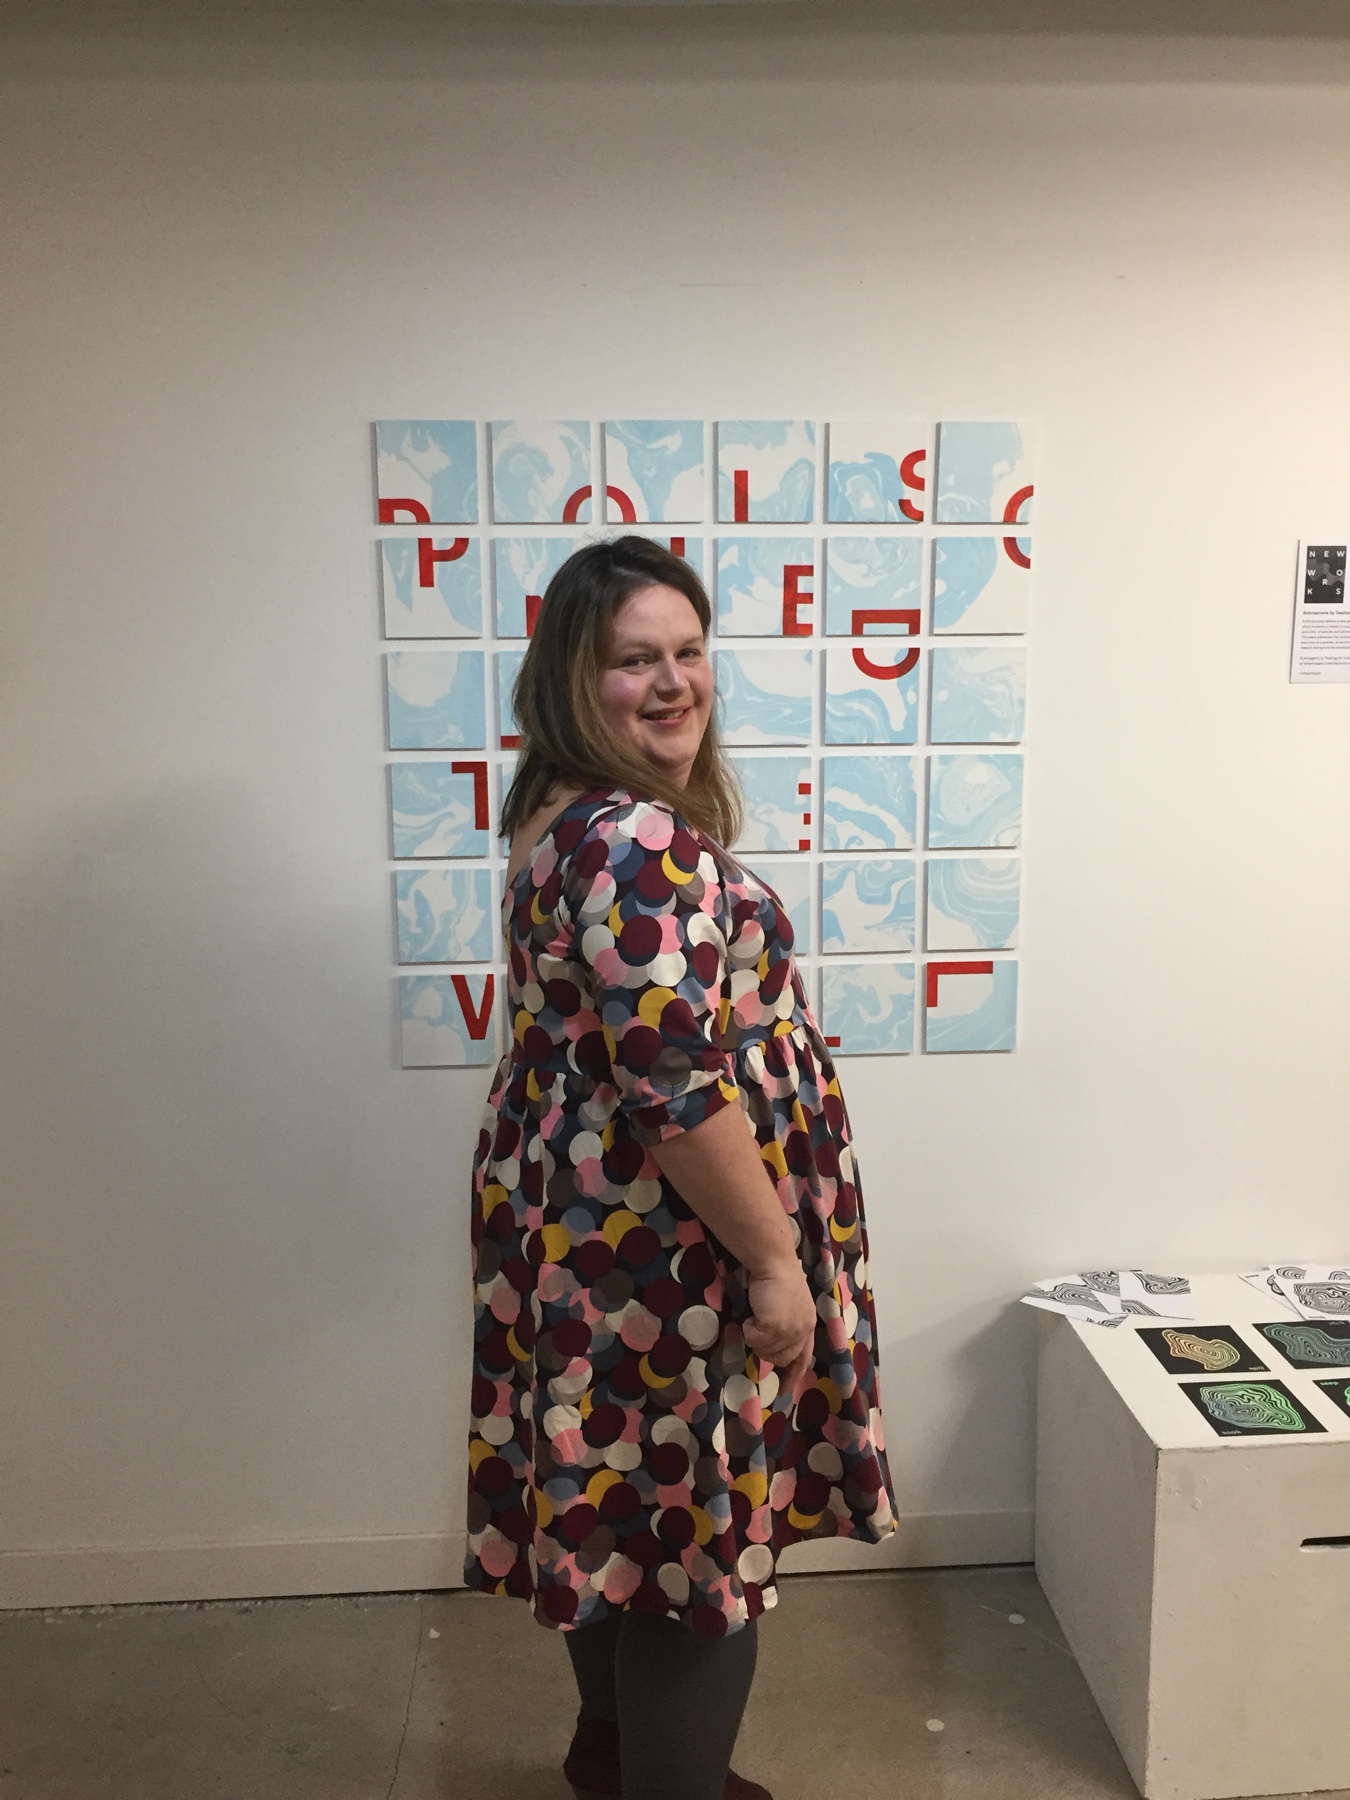
As I start to write this, it’s 3 days into this brand spanking new year and for the month of December 2021, I’ve been really narrowing down what I want to sew for the Make Nine Challenge 2022.
A lot of people don’t like set goals and although I started off well in 2021 (I completed 4 out of nine garments before April) but then all the patterns were like “make me Emma”! For some reason, for once this didn’t overwhelm me into a loss of sewjo, in fact I made over 70 items, most of which was clothing for myself apart from one or two presents including a Jude Beanie and a Jackson Pullover for Paolo, my husband.
I’m trying to make this years goals more realistic using mostly fabrics and patterns from my stash, which seems way too sensible for me.
But anyway here’s my make nine 2022 plans …
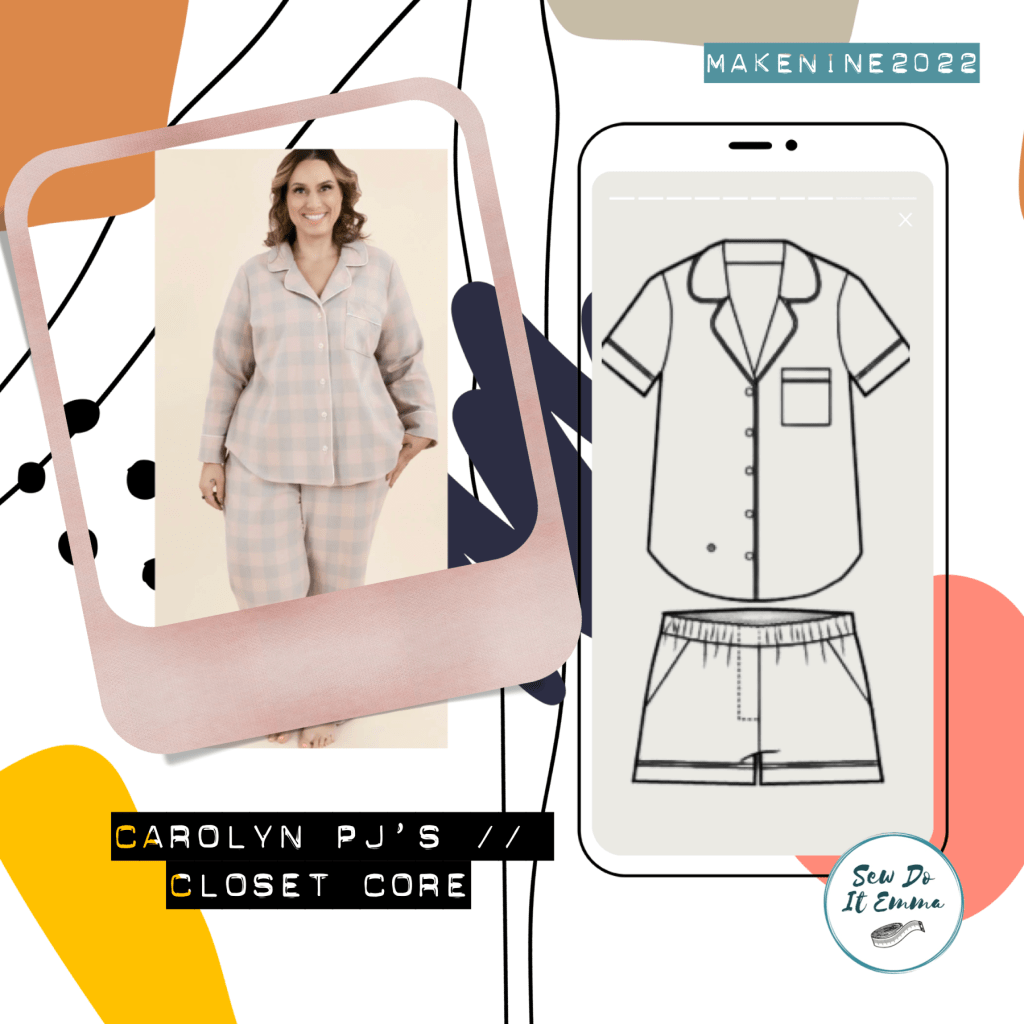
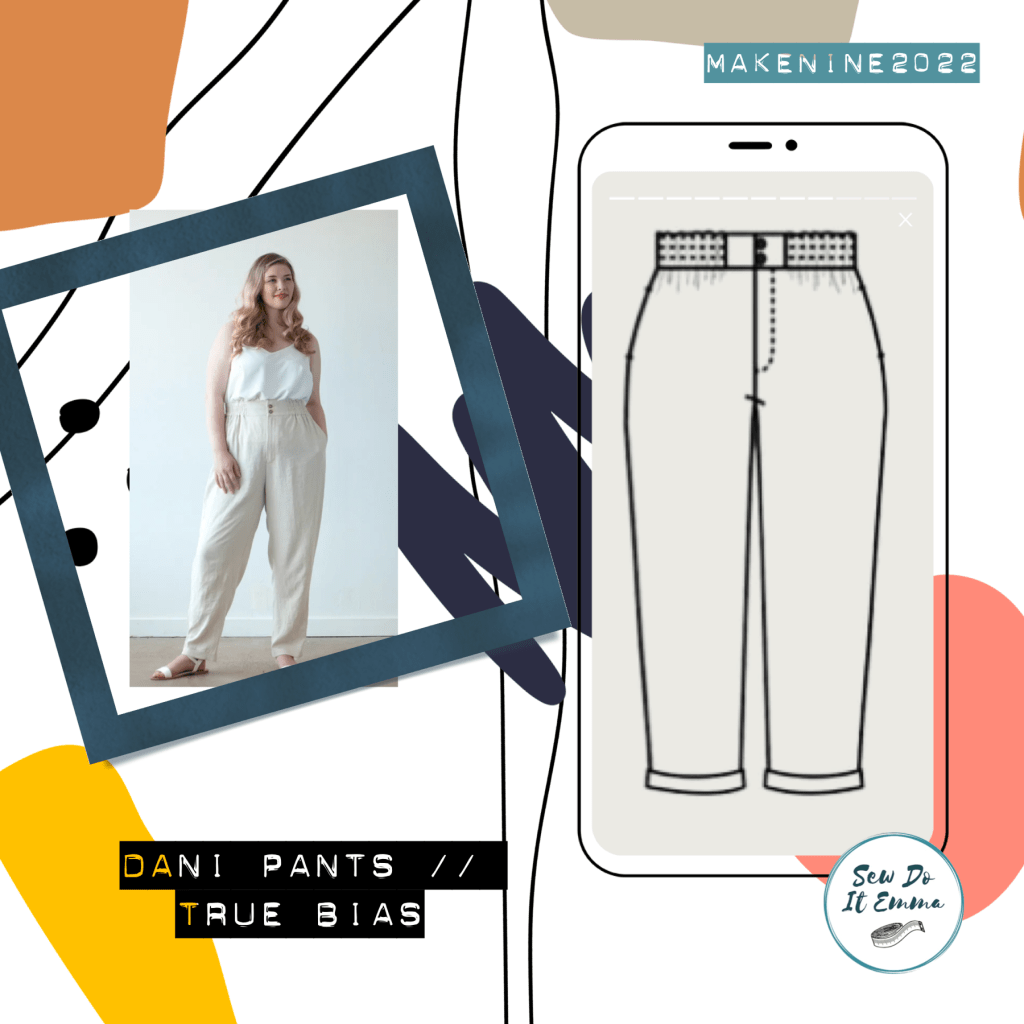
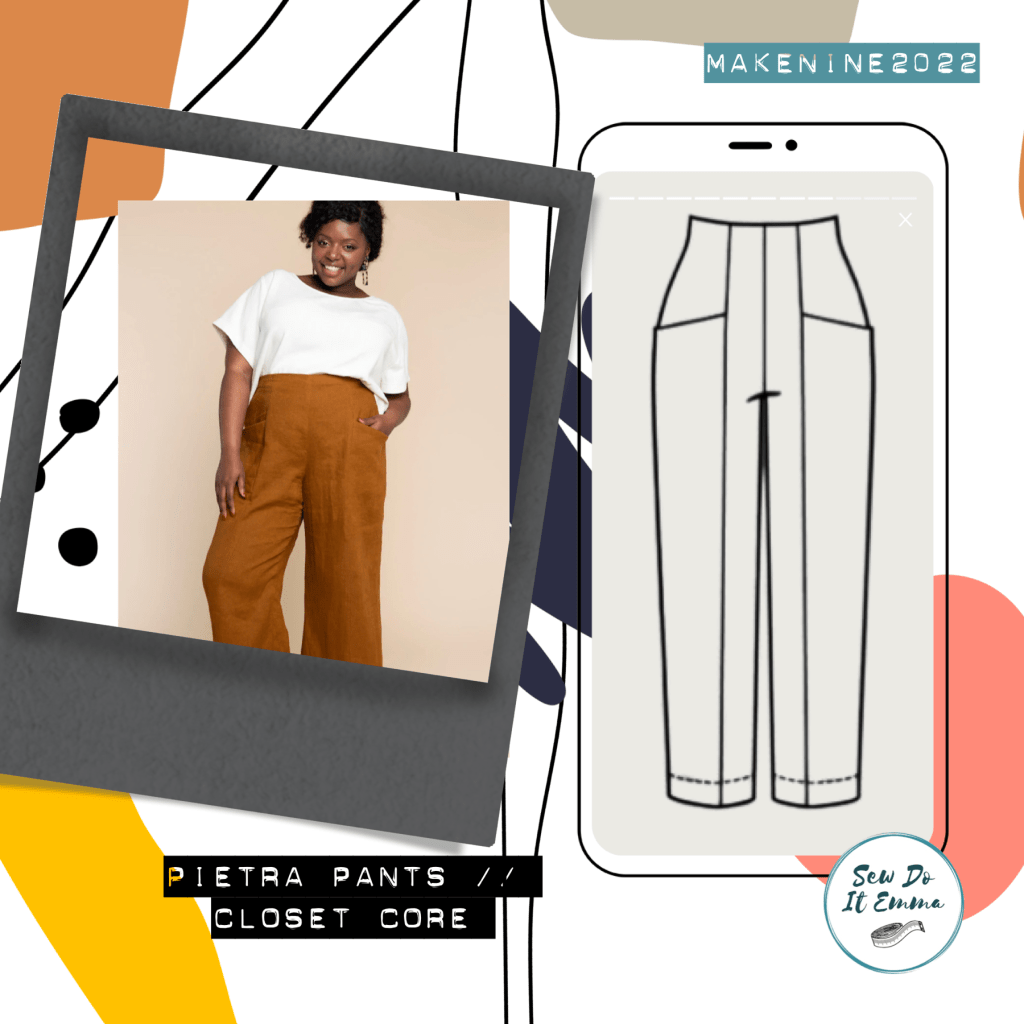
Magna Pants from Jenny Rushmore of Cashmerette Patterns. The Paper Theory’s Zadie is the only pattern being carried over from last year’s Make Nine. I’m opting for the shorts when I do the Carolyn PJ’sHoping to make a linen Remy! I think these will be my new to reach for when make them! I gotta feeling! Spurred on from Yvette aka @blossomsandwich on Instagram from her recent vlog on her YouTube channel – gonna give the Dani’s a spin too!I think this will be my first make nine project to tackle this year! Yes, I’m on a whole trouser journey- can’t wait to make the Pietras!There’s a gap of Skirts in my wardrobe, so opting for the Pocket Skirt this year.
So that’s my choices of patterns for my Make Nine 2022 and I’m planning to write a blog post with the choices of fabrics to go with each project, which I’m finalising at the moment.
I hope however you celebrated your holidays, it was a good period and regardless how it was I really hope 2022 is bigger and better for you.
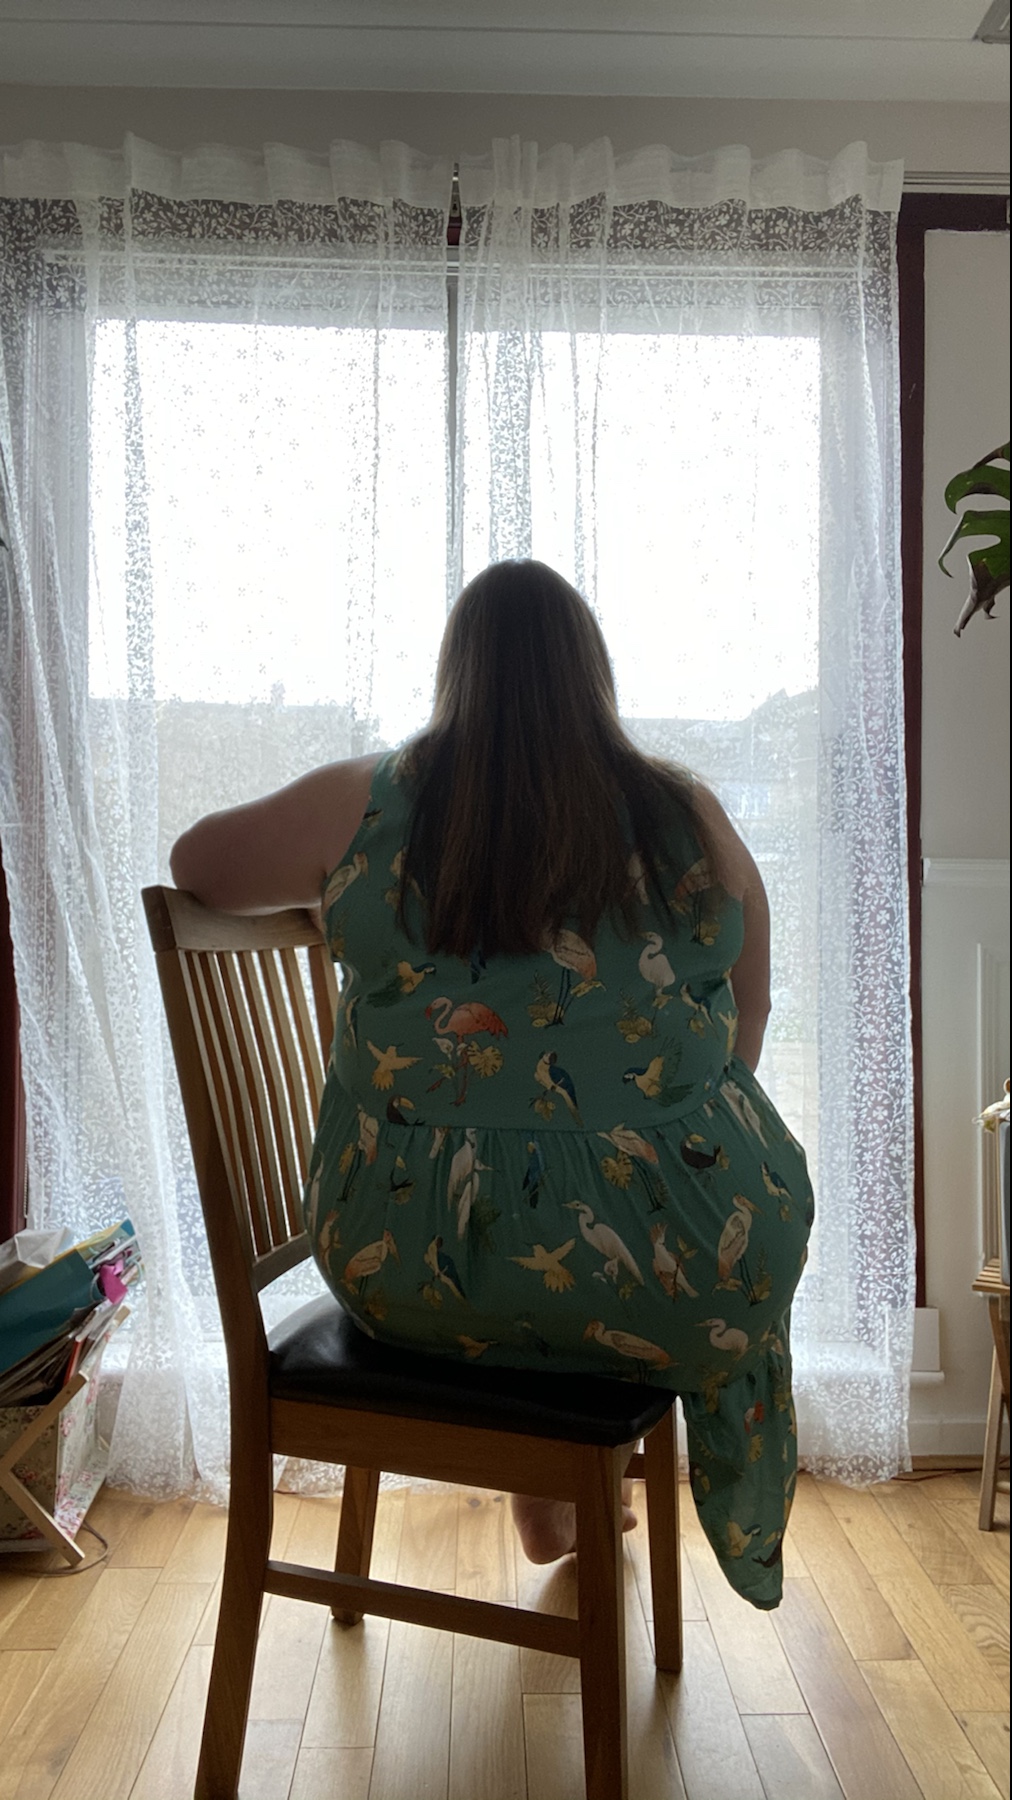
The Bardot Dress has a decent size range and a good amount of ease. The body measurements start from high bust 28, full bust 31, waist 24.4 and hips 34.6 inches to high bust 51, full bust 53, waist 46, hips 56.3 inches.
Because of the ease and the amount of fabric I had I choose size H for the bodice and I.
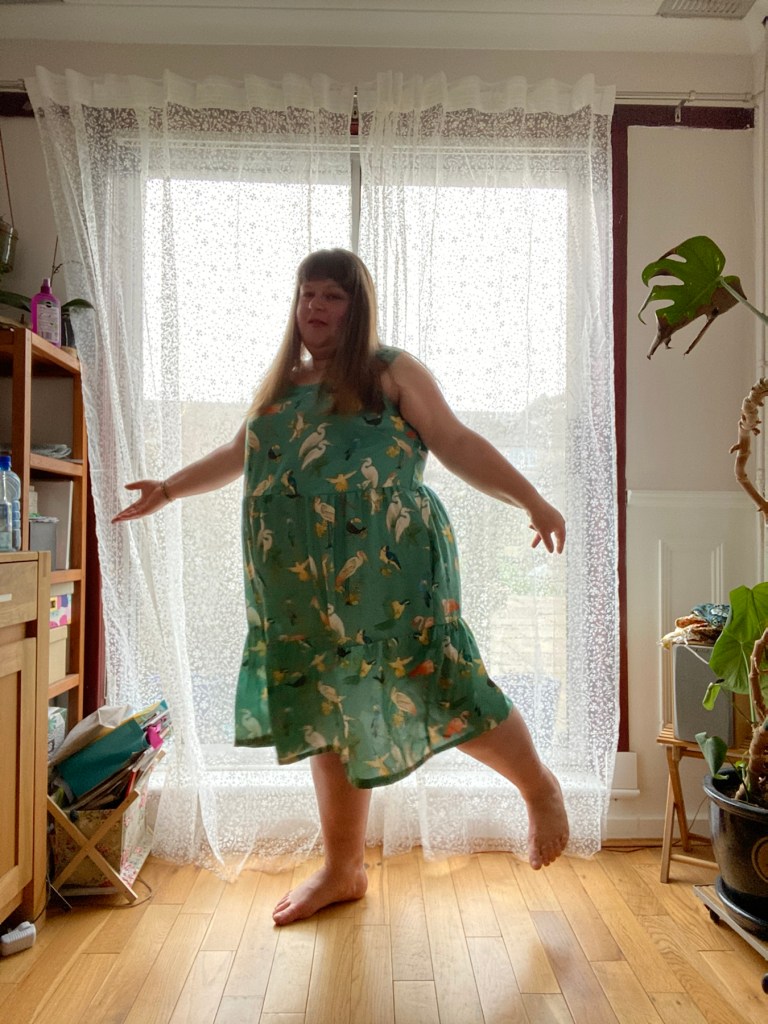
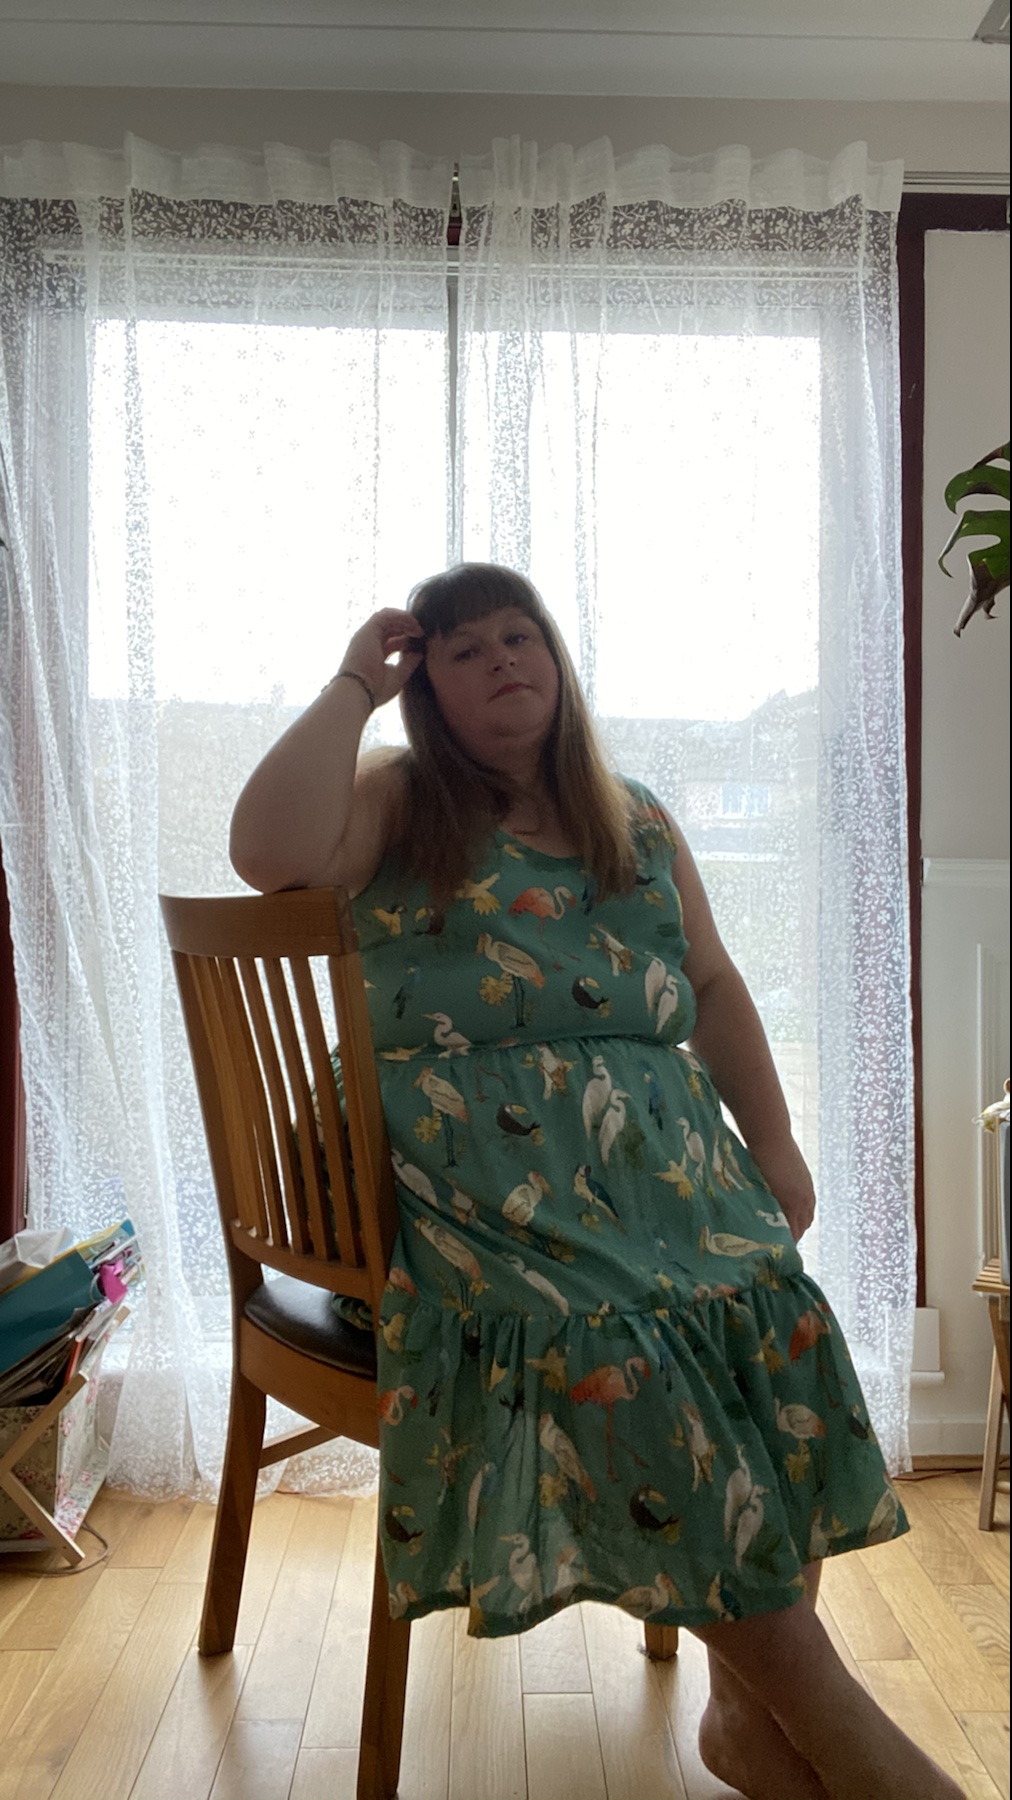
The fabric that I choose was “Bird Parade” viscose twill from @FabricGodmother … which I think suits this dress so well, especially for a spring summer print and dress!
I used 3 metres of this viscose twill and that’s all I had. I didn’t use the fabric layout … recently I’ve been playing pattern Tetris and loving the challenge!
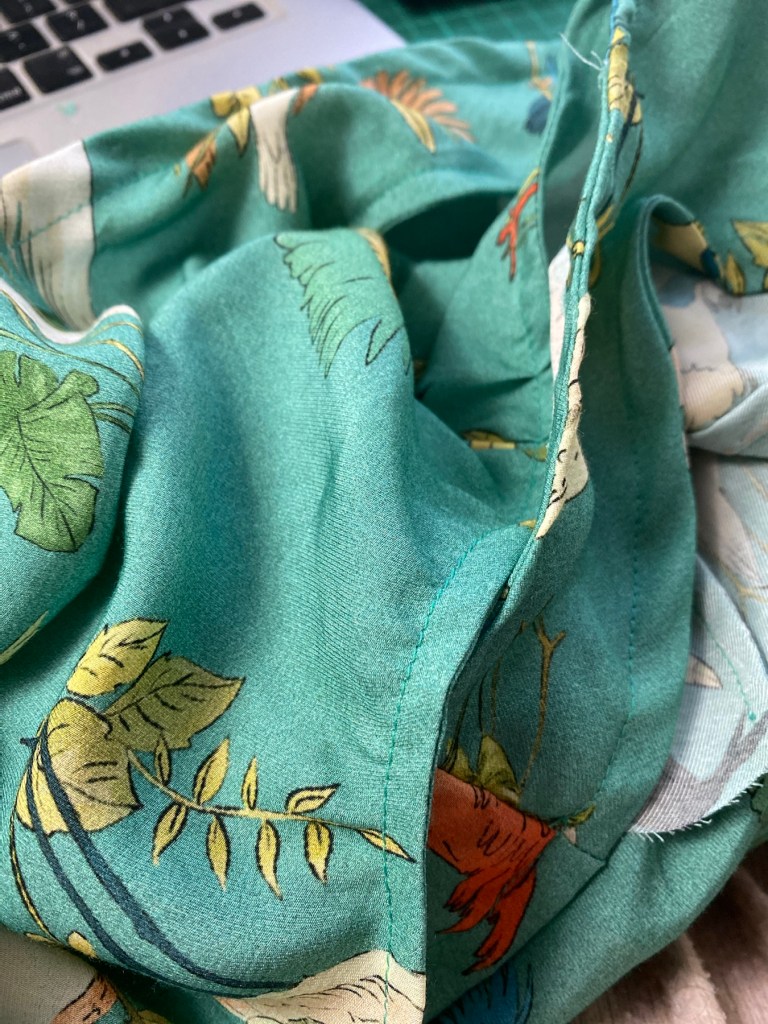
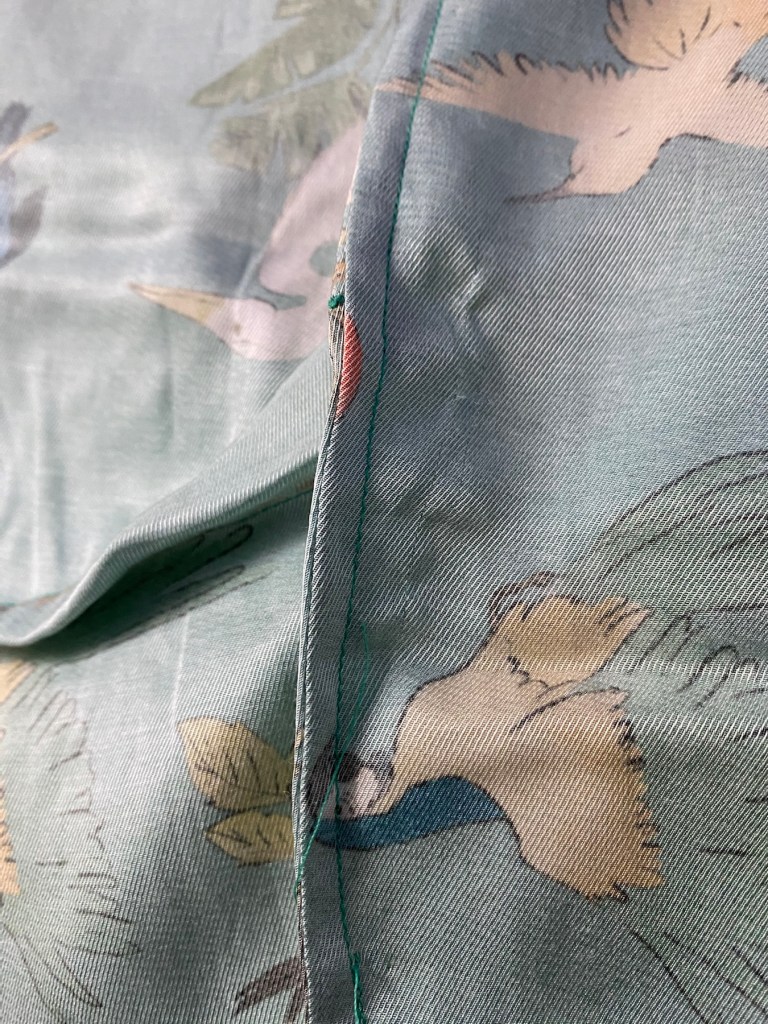
Sewing this up I noticed the fabric was fraying ever so slightly but it was as bad as other viscoses but I did try out French seams and they are on the majority of seams including the pockets and the bodice! This was my first time trying out such skills and I’m gobsmacked that it worked out so well.
French Seams!
I made my own bias to add to the edges just by cutting out strips of 2cm wide on the bias on a s small piece of left over fabric. It wasn’t straight or neat but it does the job and you can’t see the wobbly edges as they are on the inside.
This dress took a lot of gathering and I mean a lot! Lots of patience, even more pins and delicate precision were required to get even gathers.
I’d definitely recommend this dress for summer holidays or lounging about at home on a hot day. The instructions are really good but I really didn’t use them that much. I kinda just went for it!
When I do this dress again and I will do it again, I’ll size down further on the bodice and shorten the shoulder straps and I’ll probably shorten the bodice. I’ll still swan about in this dress though as it’s got swoosh appeal!
I just want to thank both Ruan and Sam for this amazing challenge. It’s been so nice to see so many lovely makes from the community and find some more free patterns that are size inclusive. On that note, I think I’ll be trying the Peppermint Maxi Dress and the Lucia from Mood fabrics, very soon.
Disclaimer: I was given this fabric in return for a review over on Minerva. This is a basic post, so please check out my blog post over on Minerva!
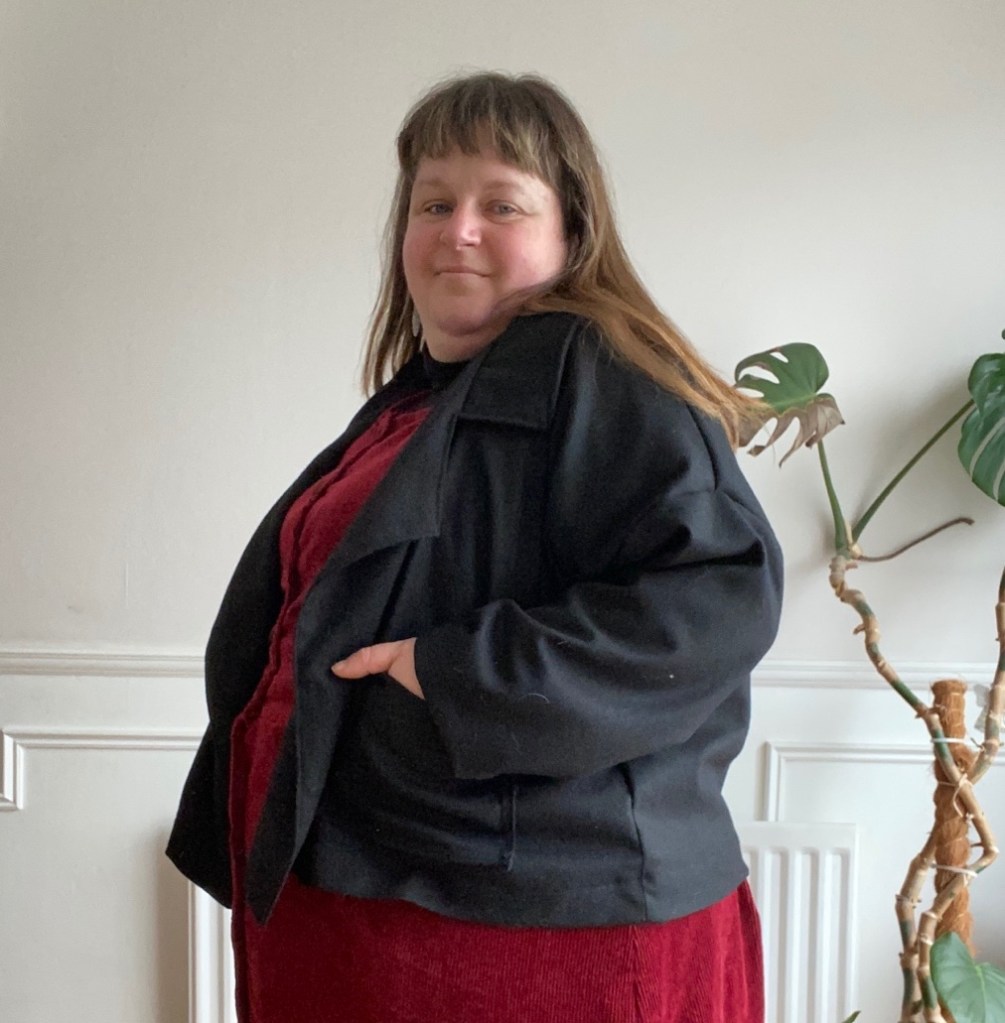
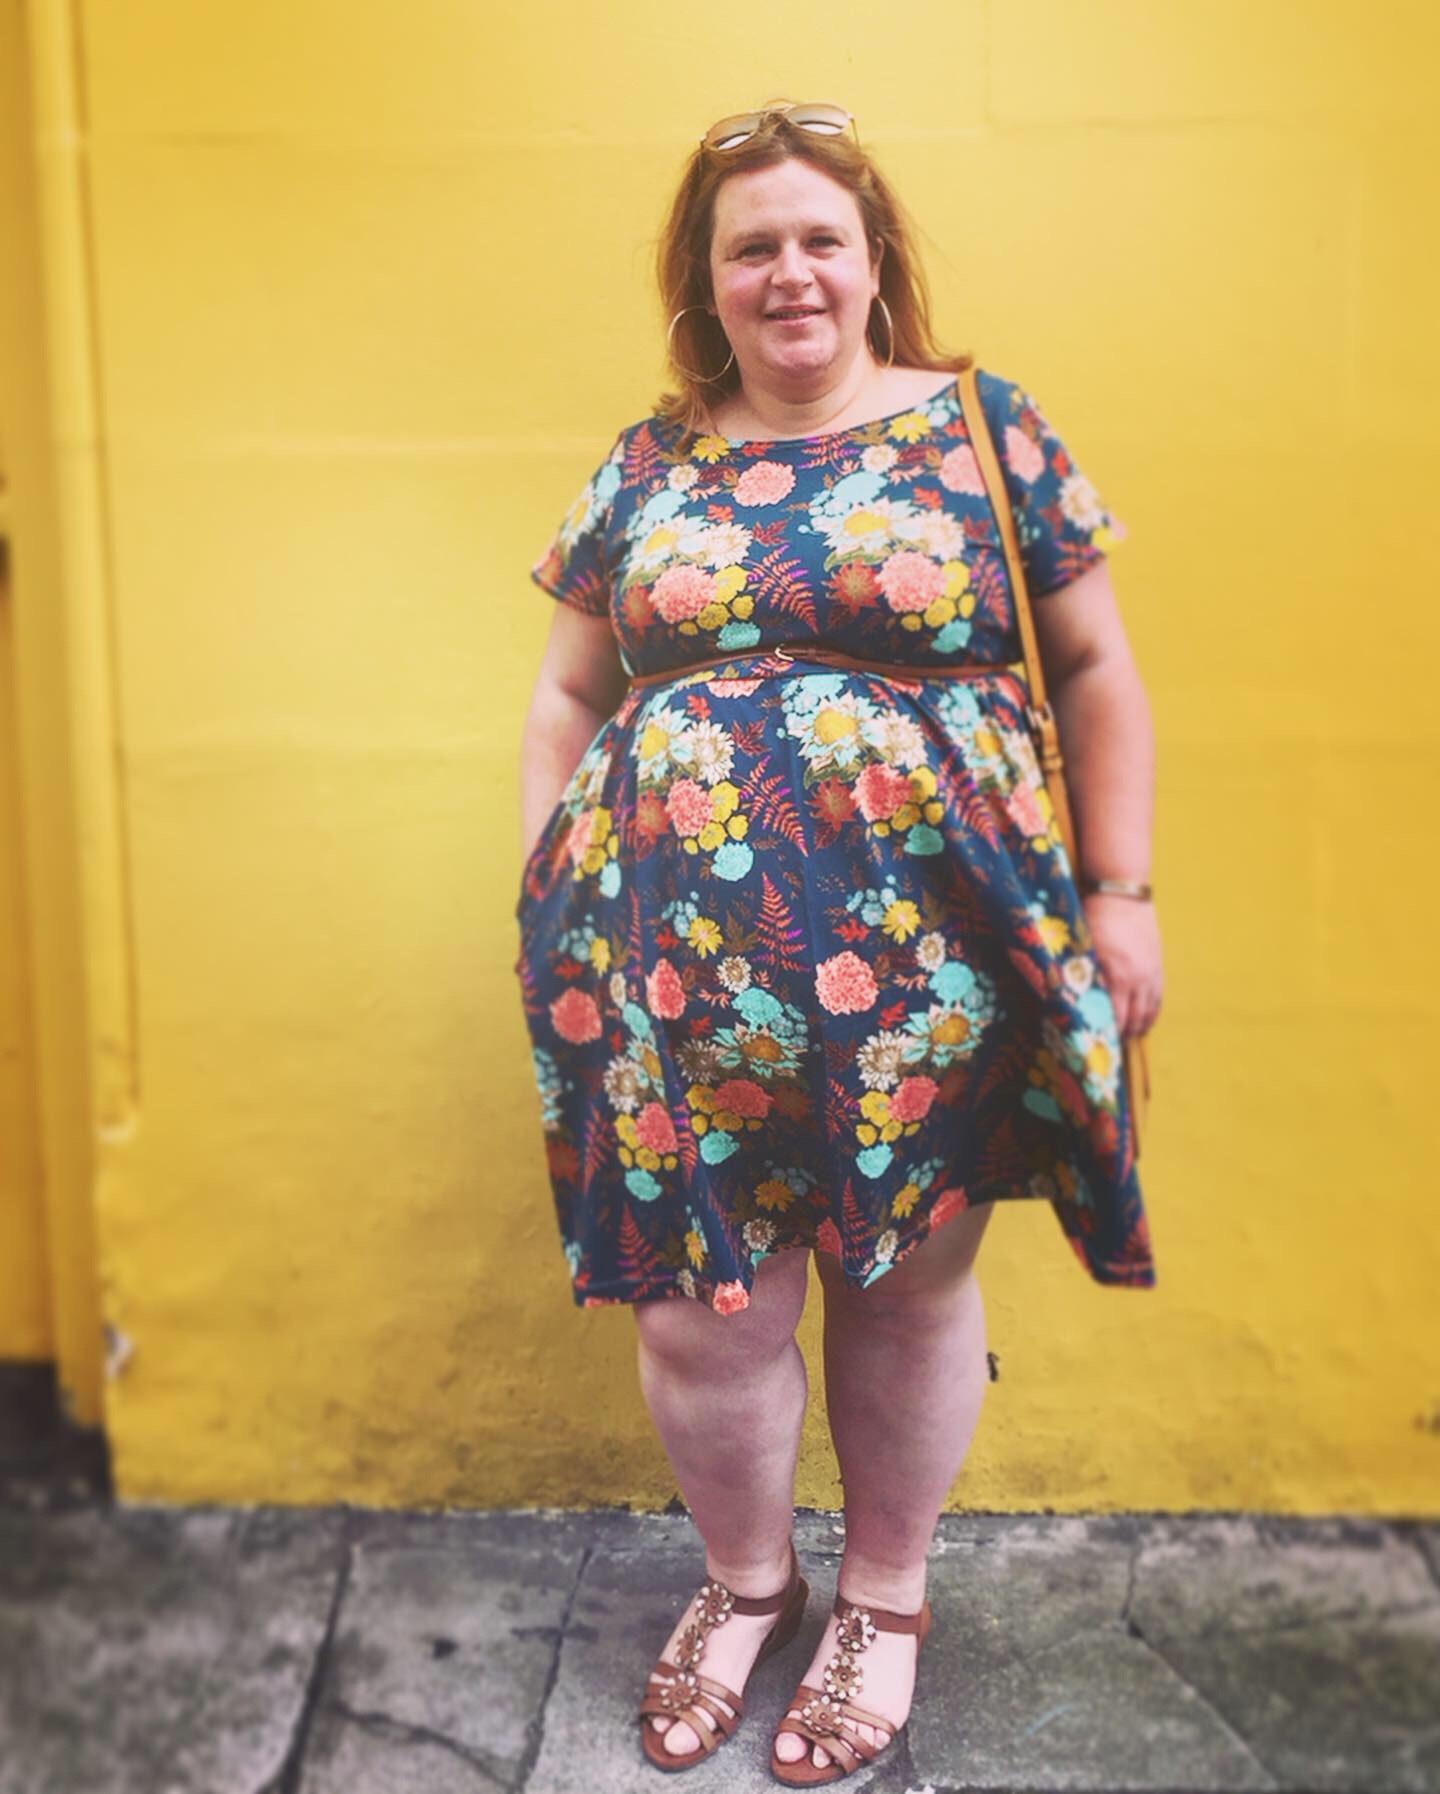
What is happening? After three years of not completing make nine and a year off, I am powering through this years make nines.
Could it be I’ve managed to get confidence with my sewing skills – who knows, but I like it.
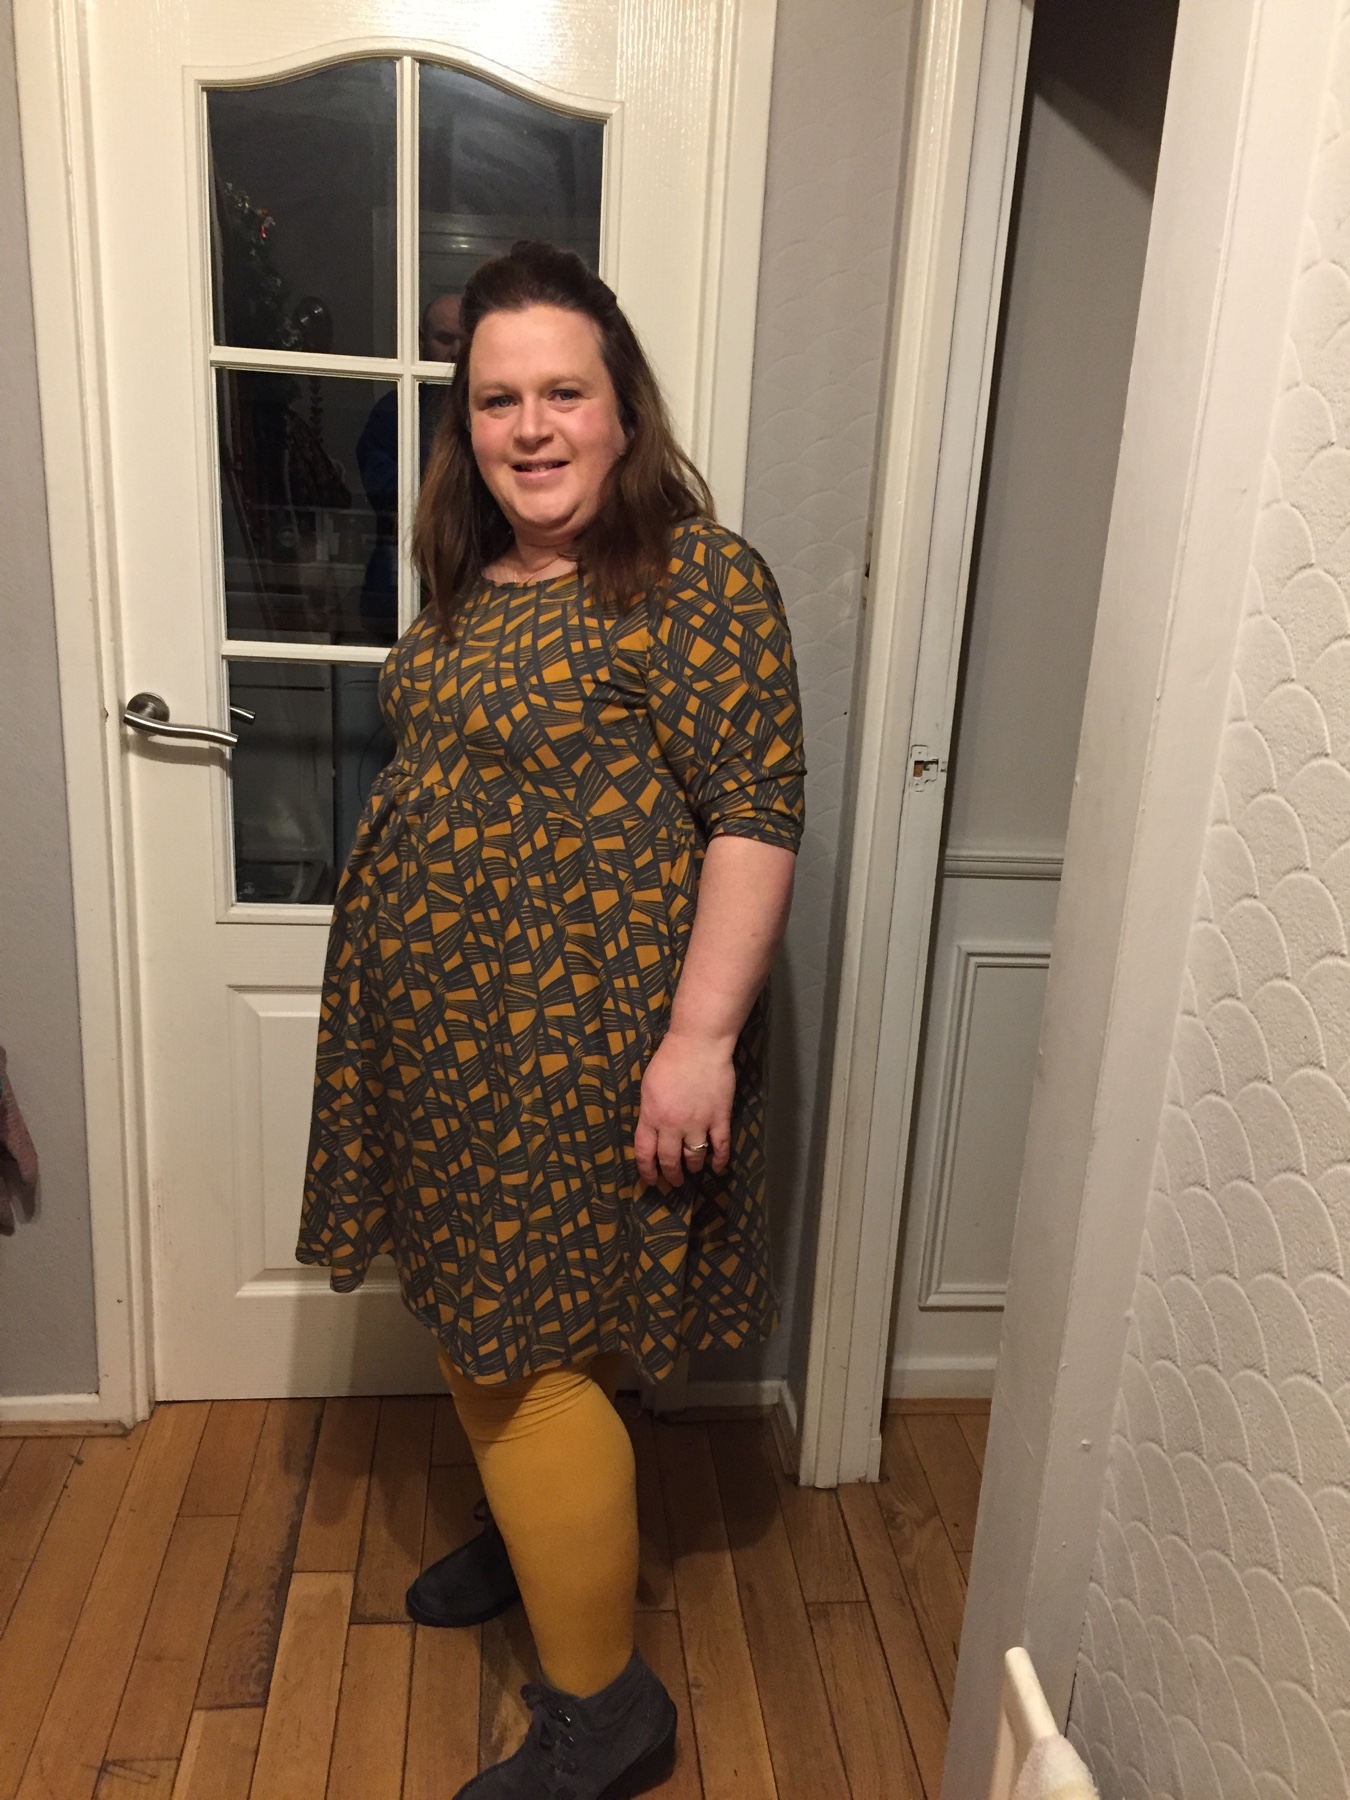
So, the Pona Jacket by Helen’s Closet Patterns kinda reminds me of similar RTW jackets that I’ve had in the past and will be a to go to pattern for the future.
I really enjoyed making the Pona Jacket. Helen’s instructions are second to none one of the best instructions around. I used the lining hack on her blog post on her website to insert the lining to this jacket.
Oh Bakerloo … ha ha (yes easily changed from ABBAs classic “Waterloo” Song.
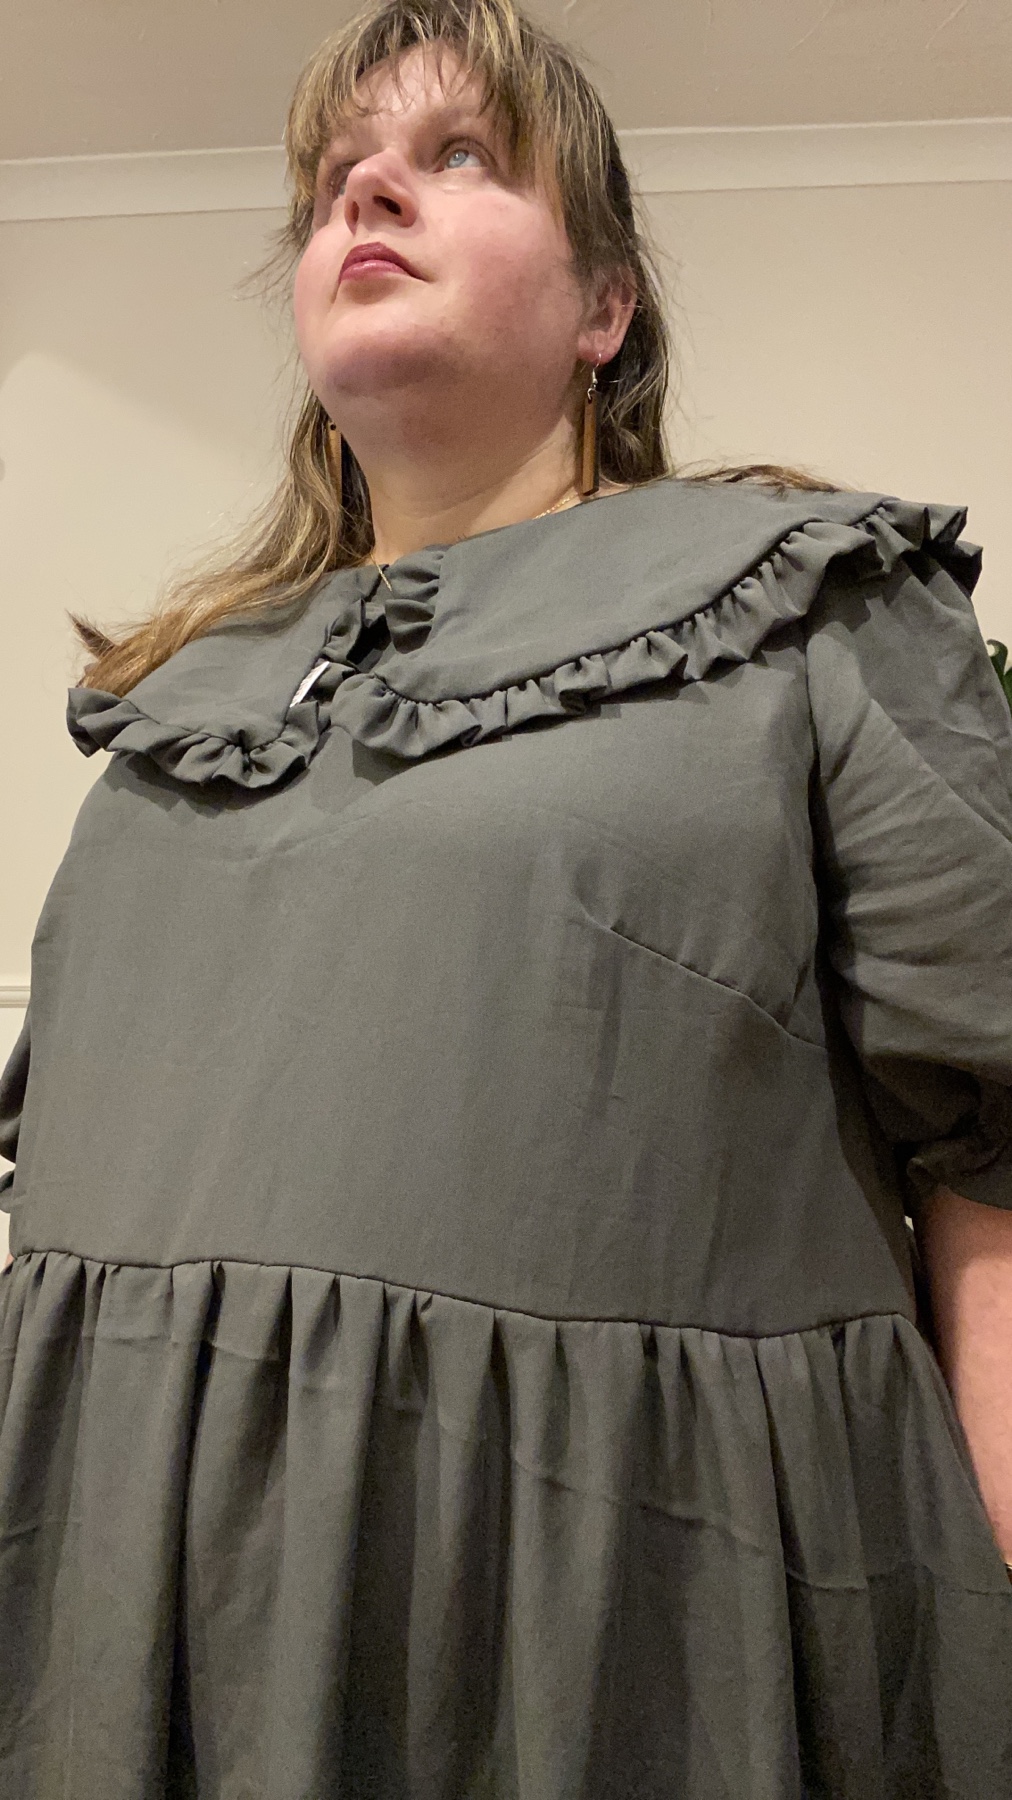
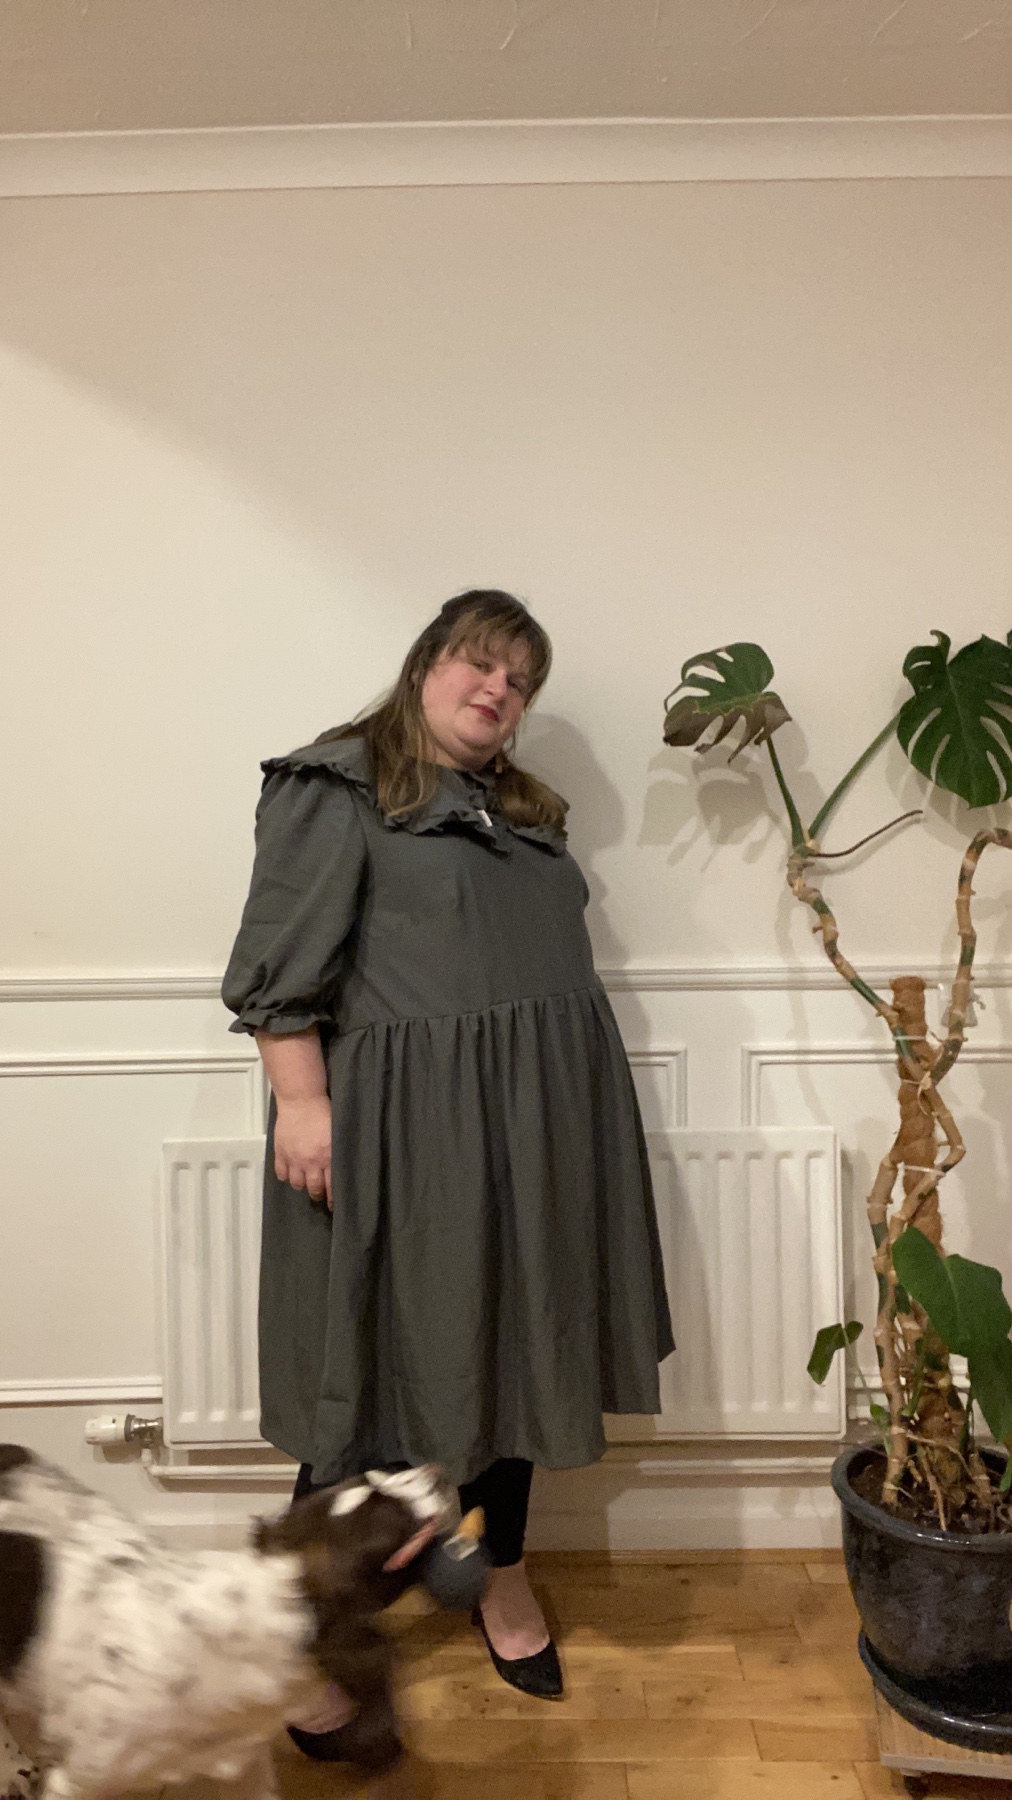
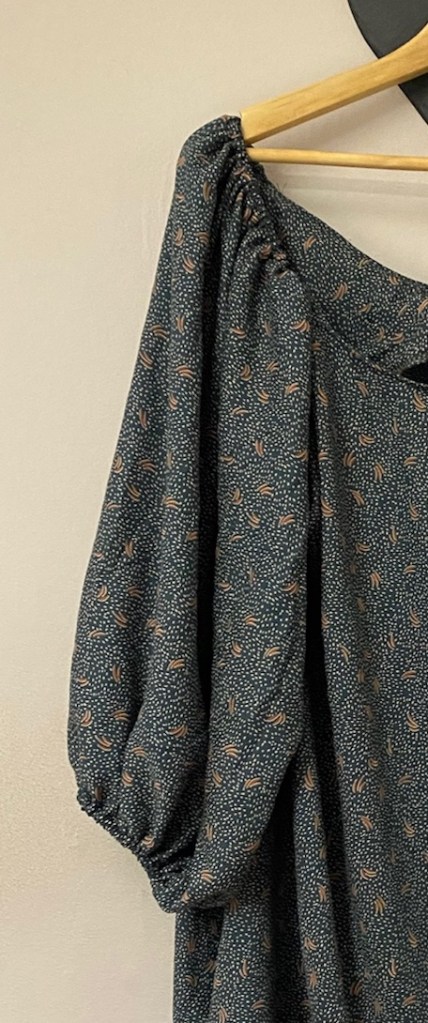
As part of the new inclusive sizing (18-28), I was part of the tester team for Nina Lee’s newest pattern, the Bakerloo Blouse and Dress.
With it’s Statement collar with a frill and big voluminous sleeves, what more could you want?
You can either go for the blouse or you can add a skirt.
For the tester version I made the dress, yes … I am a sucker for a gathered skirt!
Before we get into the details. I want to say thank you to Nina who, after I reached out when the 6-20 range was released to say I was slightly disappointed to not seeing both of the size ranges being released at the same time, asked me to be a tester. So Thank You Nina!
Ok details … I’m sure you want them, yes?
Practicing my dance moves!
Right. The instructions are pretty much really detailed. Lots of illustrations and descriptions with step by step details on how to get the statement collar and fabulous frill perfect.
Size wise, I went with a 22 with the bust and then graded out at the waist to a 28 but could probably go down a size as it is quite roomy. The skirt is a size 28. My measurements are: Bust 46, Waist 46 and hips 57/58.
For my fabric, I chose a tencel twill from The Fabric Room, which I’ve had in my stash for a good while now. I think I heard about The Fabric Room’s Tencel Twill via my good friends in Sew Scottish. Minimum order is 3 metres and the colours are limited but it’s worth a look as it’s £4.50 a metre!!!
The Khaki Tencel Twill
Also, worth noting if you have a plain fabric you can really play around with the cross grain of the woven. For my size, it quoted 3.10metres but I managed to use 2.6metres out of the 3m of tencel, which is pretty good I’d say.
Maybe tencel twill wasn’t the best fabric choice as I think the collar pulls the neck down a little because once you’ve got the interfacing in the collar and added the frills, it’s quite a substantial weight. But it won’t stop me from wearing it – oh no!
Will I make this again?
Yes, but I’ll make the Blouse version with longer sleeves. I might raise the darts at the bust on any future versions. And when I do the dress I’ll shorten the bodice. I think that’s all. But yeah, I’ll make it again 😄
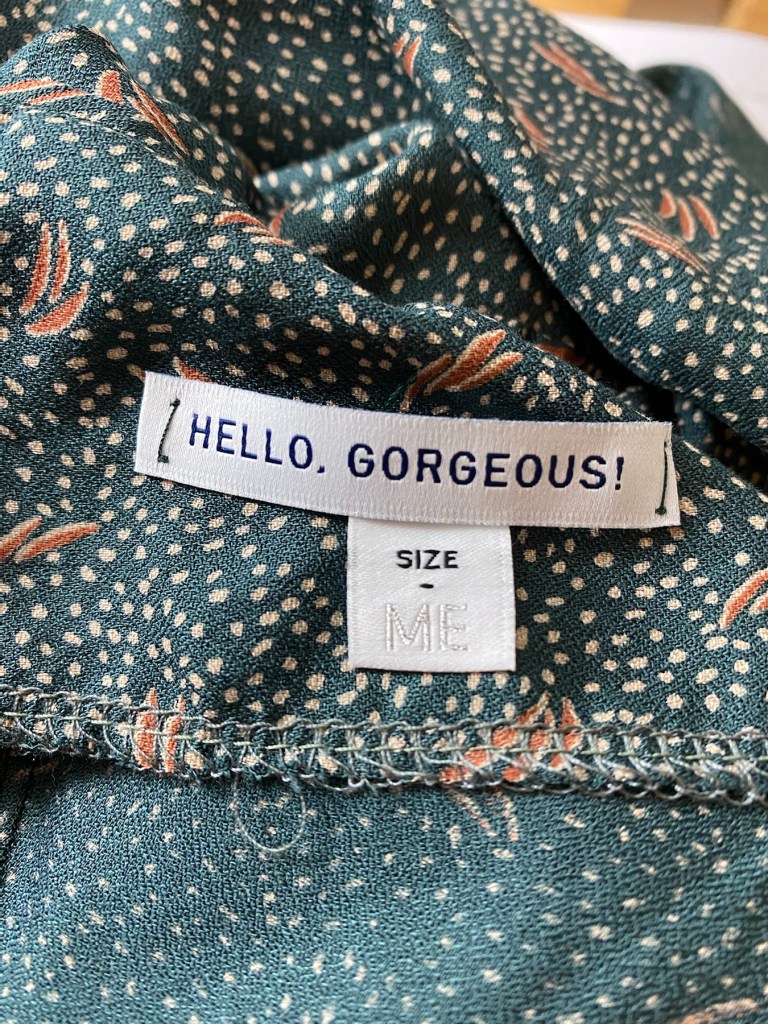
So I’ve added a few labels …
1) “One of a Kind” by Stitch Collective on the Frill.
2) Worth the Effort by Kylie and the Machine at the back closure.
3) “Handmade” by This is for Makers on the inside at the back
I think the most favourite thing about this make is the sleeves! It’s so simple, the elastic cuff but punches a statement as does the collar and the frills. Overall it’s a great dress, It delivers and it’s very now but I’m sure I’ll wear it to lots of occasions in the future.
I think I overlooked it as I didn’t realise it was within my sizes, particularly my hips but I was so so wrong!
So I’m hoping there’s a few of you who would like the juicy bits of how I found this pattern, Yes?
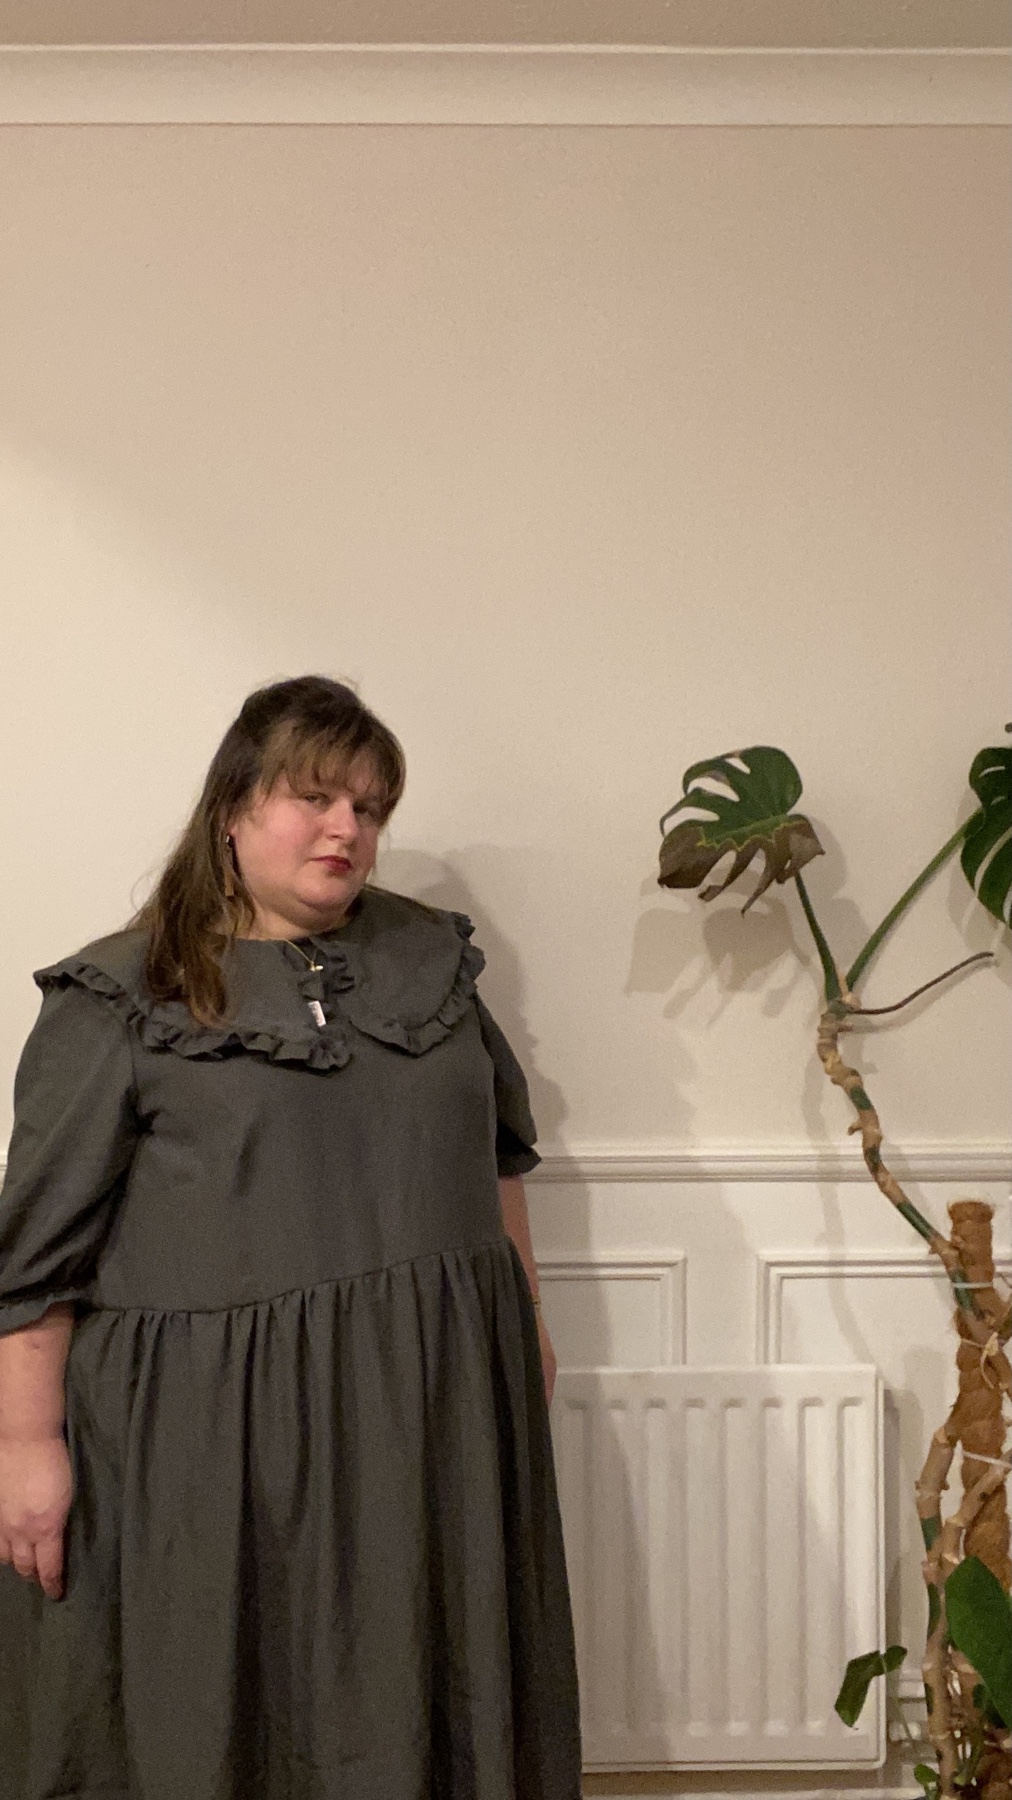
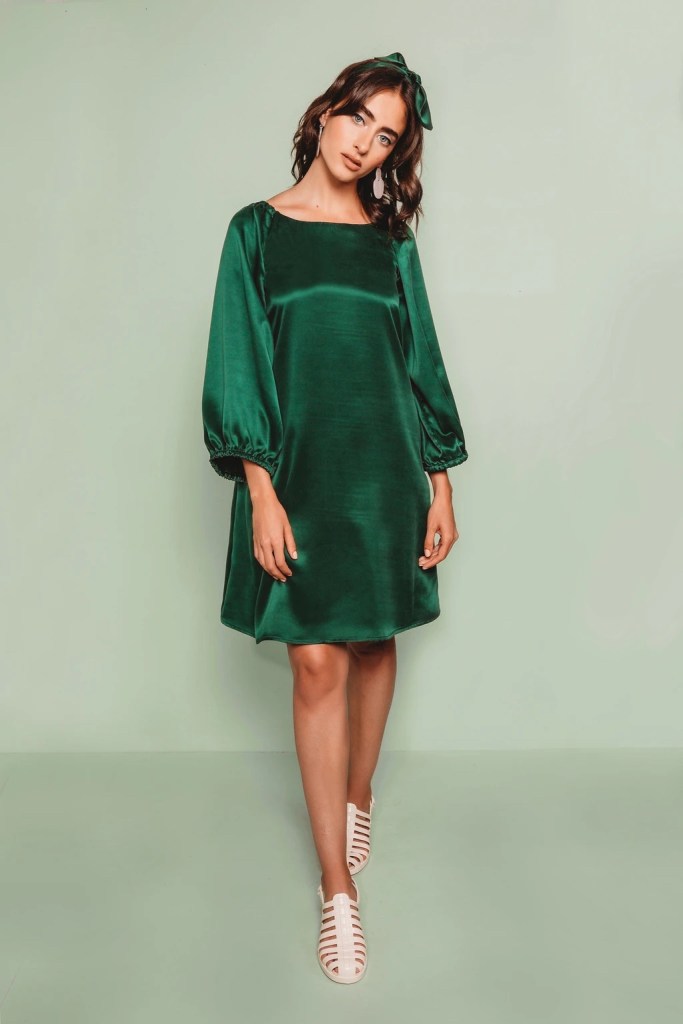
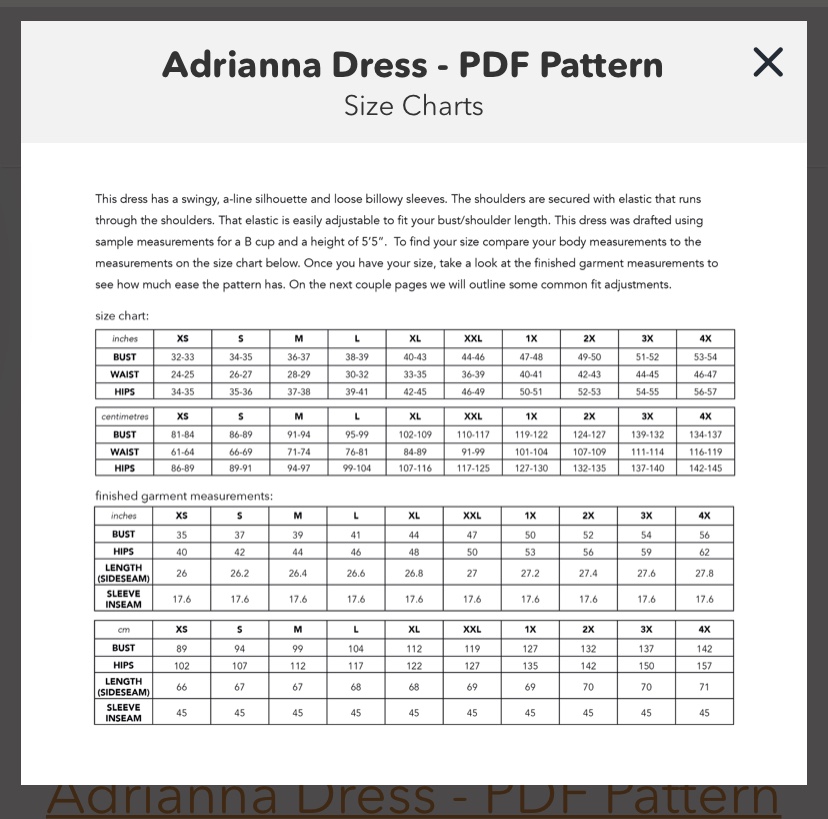
The Adrianna Dress by Friday Pattern Company is kinda like the woven sister of The Adrienne Blouse, whom is a jersey pattern. Adrianna comes in sizes XS-4X. The top sizes are: Bust: 54”/137cm, Waist: 47”/119cm and Hips: 57”/145cm.
This is my second Make Nine 2021 that I’ve completed before the end of January, which in itself a complete and utter shock to myself and probably a few of you as previous years I’ve just fallen by the road side!
On top of the Adrianna Dress being part of the make nine challenge, I also completed it for my birthday and as part of the lovely @SisterMintaka’s #FeelingSewMuchBetter annual challenge. It was really fun to photograph and document my progress through the week on Instagram.
Ok, the instructions were flawless – really easy to follow. There was one area where it wasn’t so clear and I was scouting the web for a sewalong and could find one (or any)! that would just glide me through that part. BUT I figured it out. Yay!!
Oh, now the area I was stuck on was step 11. But once it came relevant, it was plain sailing.
Top Tip: Because I was working with a viscose crepe I overlocked all of the edges and used a microtex needle on the sewing machine to sew it together.
I love how the fabric behaves with the elastic in cased at the shoulders and the cuffs. It’s simple to do but the drama it gives is just lush! Chelsea is a genius.
There’s one thing I really shouldn’t have overlooked though. In the instructions booklet on page 5 is a but/hip adjustment guide. Now I usually just grade from my bust-waist-hip but I think I should’ve just went and did this adjustment as I wouldn’t have got this excess (see photo below).
But apart from that, I really enjoyed reading the instructions and sewing this pattern up. On top of that the Viscose Crepe was a dream to work with, yes I’m surprised as it’s Atelier Brunette and sometimes (I have heard of mixed reviews!) notoriously difficult to work with. But it sewed up like a dream!
You can bet on your cotton socks that I will be sewing more Adrianna Dresses in the future. But I’ll be adding a little more length on future Adriannas’ as I’m a little scared I’ll reveal too much if I bend over!
For This Adrianna Dress – I used Atelier Brunette Viscose Crepe “Dune Smokey”, purchased from @ohsewshop with a voucher that I won a while ago. It was a decent remnant and I was completely impressed with myself that I got all the pattern pieces cut out of 2.40cm when the pattern call for between 2.88 and 3.88!
Although I didn’t have to pattern match, I managed to wow myself … and on top of that used the crossed grain to fit all the pieces in. This was really down to the print not being directional and I think I got away with it by the skin of my teeth!!
The Pattern for Adrianna can be found here. I mean, what are you waiting for? Yes, I am a enabler but come on!!
I used #SizeMe label from Stitch Collective, if you are in the Uk and don’t want to wait ages due to the pandemic postage delays then you can buy some of stitch collectives labels at a brilliant online shop run by the lovely Amy, which is Craft and Thrift.
But I just don’t use one label … I mean come on, I am a label fanatic! The #HelloGeorgeous label, I think just finished the insides nicely … don’t you? This is a Kylie and the Machine label, which are stocked in quite a few places now (worldwide) – yes I’ve had them shipped from KATM HQ a couple of times too and it didn’t cost that much extra to be sent over. But that was pre-Brexit and pre-Covid!
Oh! That necklace was a generous gift to myself. I saw it on wolf and moon’s Instagram and was like instantly magpied – it’s such a statement piece and yet flawlessly goes with the Adrianna perfectly! I’ve got a few me mades planned and the fabric will match this beauty very nicely.
Ever since I did my tester on Friday Pattern Company‘s Sagebrush Top, I’ve been hooked!
The brilliant Sagebrush Top – definitely a TNT pattern with me!My Sagebrush Tester
Hooked in the sense that recently I did a batch cut and I’ve already sewn one of the up – yes already I’m churning Sagebrush Tops out!
I really love this pattern and the details of it. From the frill at the front to the gathering at the sleeves it just makes me happy.
This Sagebrush is slightly different to the others and I’ll explain why, in a moment.
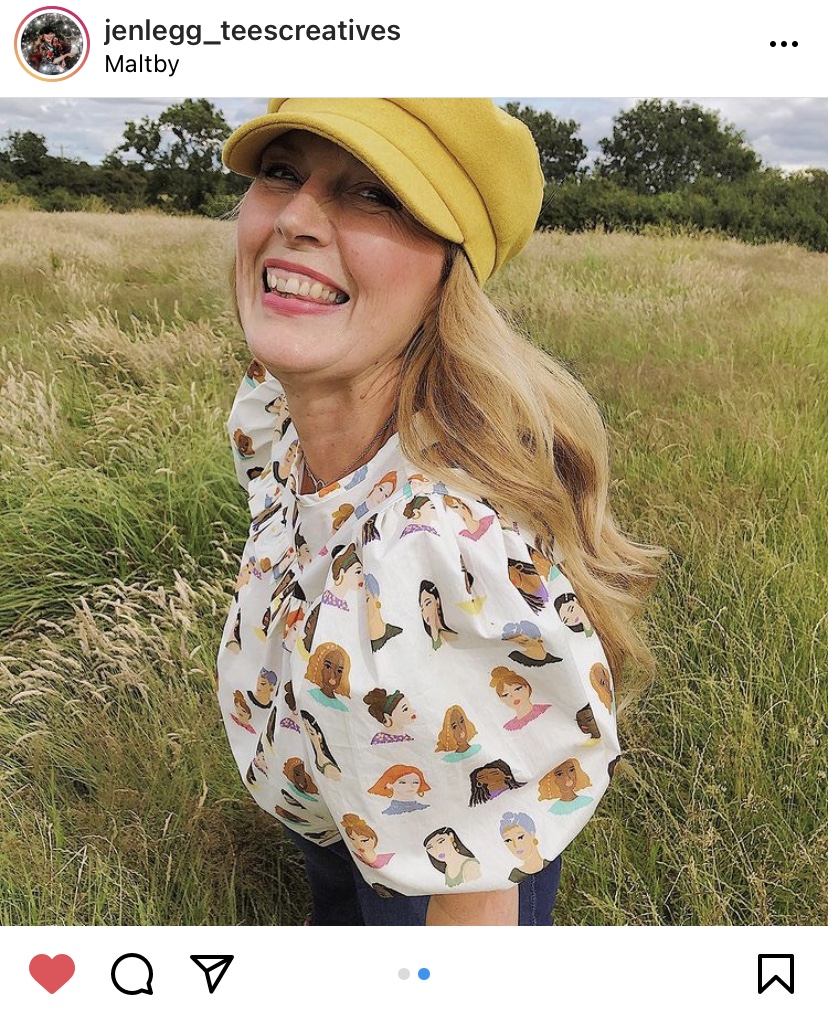
You see it lies with the fabric choice. Previously I’ve went with a viscoses and a viscose-linen blend but I decided to take inspiration from the lovely Jen (@jenlegg_teescreatives) (I’ve met her in real life, as she came up to Edinburgh Frocktails, October 2019 and she is really lovely) who has already sewn the Sagebrush in the very same fabric.
The fabulous Jen in her “Ladies” Sagebrush Top
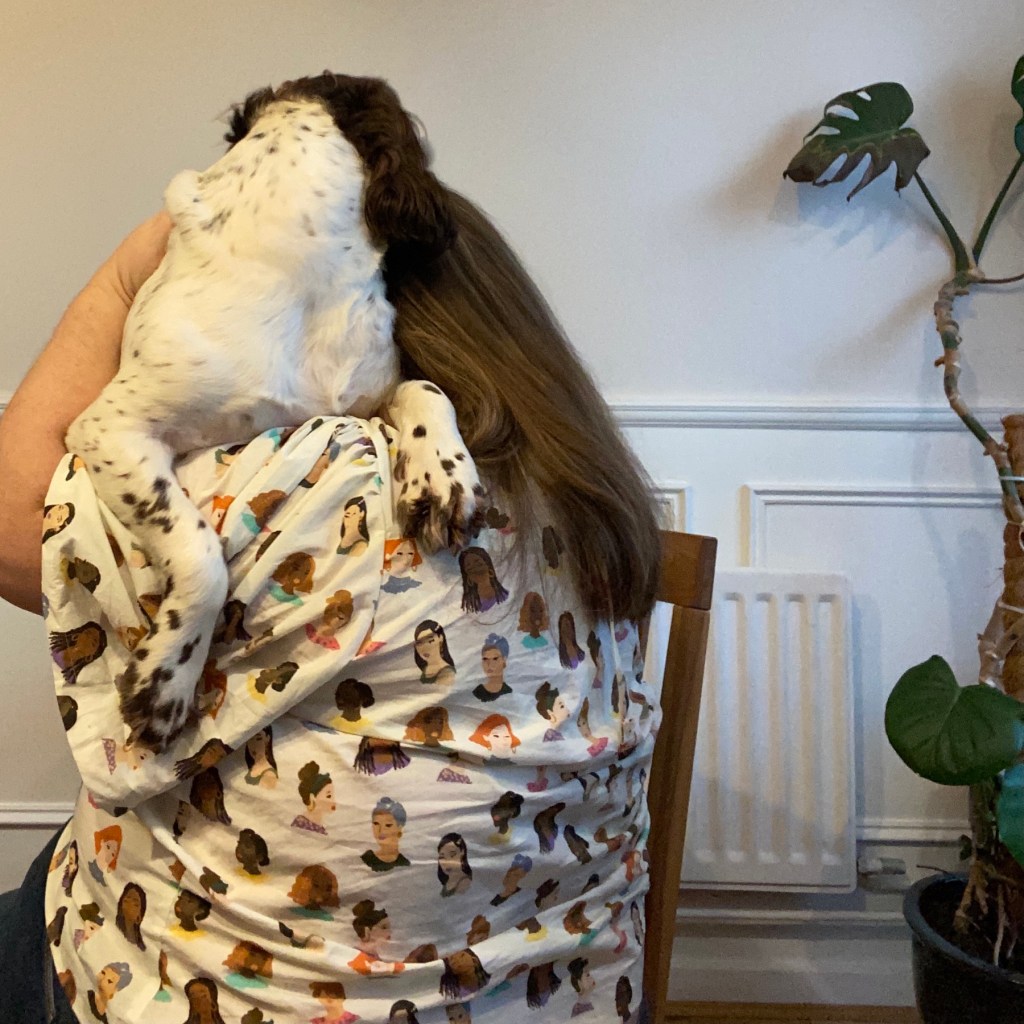
The fabric is a Lady McElroy Chantilly Single Ladies Cotton Lawn from Sister Mintaka which I bought a wee while ago after seeing Jen’s version and looks like there is some in stock. It’s a lovely quality and has sewn up a treat. I love the colours of the print, it will be so diverse! I’ve already thought of a few outfits featuring this top, including pairing it with Jeans, as shown in the photos.
And apparently I’m not the only one who was inspired by Jen, Louisa was too!
@LouisaLovesToSew in her Chantilly single Ladies SagebrushTop.
Ok, my top was going so well until I decided to use my overlocker to finish the seams on the sleeve and front and back pieces …
I was seriously lost for words!
At that point of seeing the blade chop into the shoulder what like watching a horror movie. Urgh. I had to step away. It didn’t stop me from sharing my disaster on Instagram stories that night – but it also helped me come up with a plan to save this make.
I had two options, one seeing if I had enough fabric to cut out a new sleeve altogether but I couldn’t really justify using it as I was going to try and make a scrunchie and hair band plus other things from it. The other option was two interface the wrong side and the right side and hope that I wouldn’t need to do a patch work … my needlework is erm shockingly bad 😂
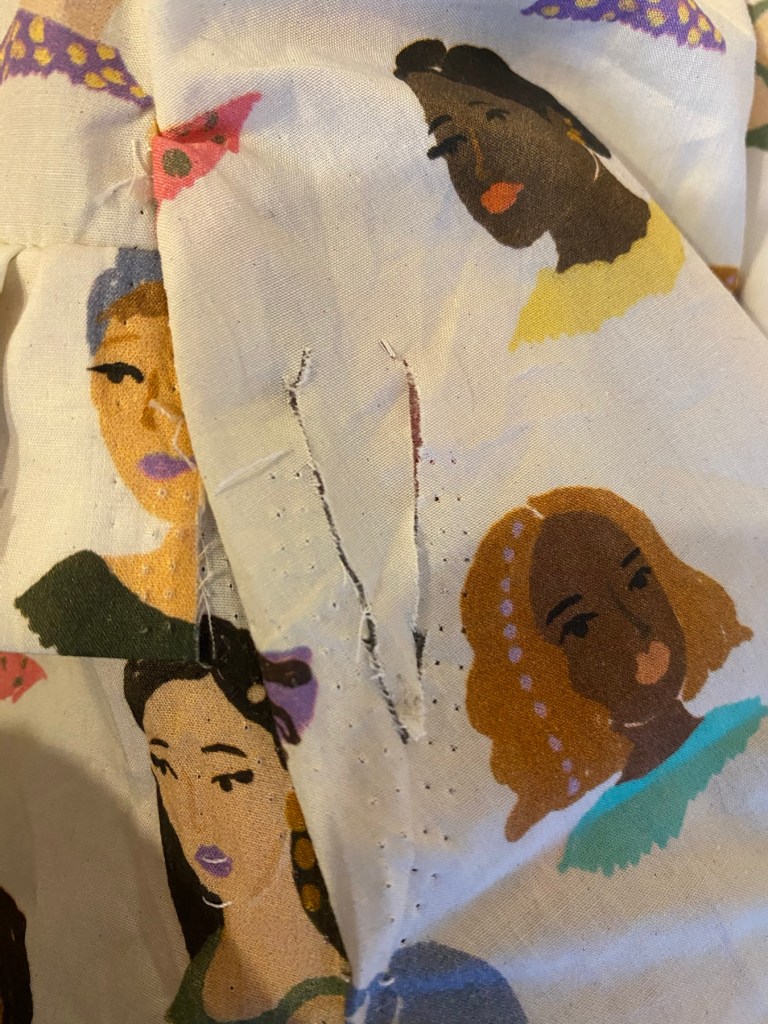
This is a close up of the repair after being interfaced. Not bad and if I don’t point it out I doubt people will notice.
So once I got that bit out the way I could move on and get it finished – yes that’s what we like – a happy ending!
On this Sagebrush I took a bit off the length off and made the hem deep And I actually really like it. So I think I’ll do the next couple this new length.
All smiles!
As you can see, using the cotton lawn gives the frill real structure and the sleeves extra va va voom! I do really like the effect that this cotton lawn has on the pattern.
I love the new length!
Well, that’s the 4th Sagebrush of many more to come … I’m excited to do more!
Already into a month of lockdown and I’ve been buying fabric left right and centre from little independent fabric businesses across the UK.
It’s good that I’m buying though but seriously I have no more space. I keep trying to tell myself this, but now it has to happen!
Anyway, as you probably guessed by the title of this post is that as from May 1st, there will be no more buying fabrics for at least three months and maybe even longer.
Reasons for going on this fabricsabbatical:
1. I really not NEED any more fabric!
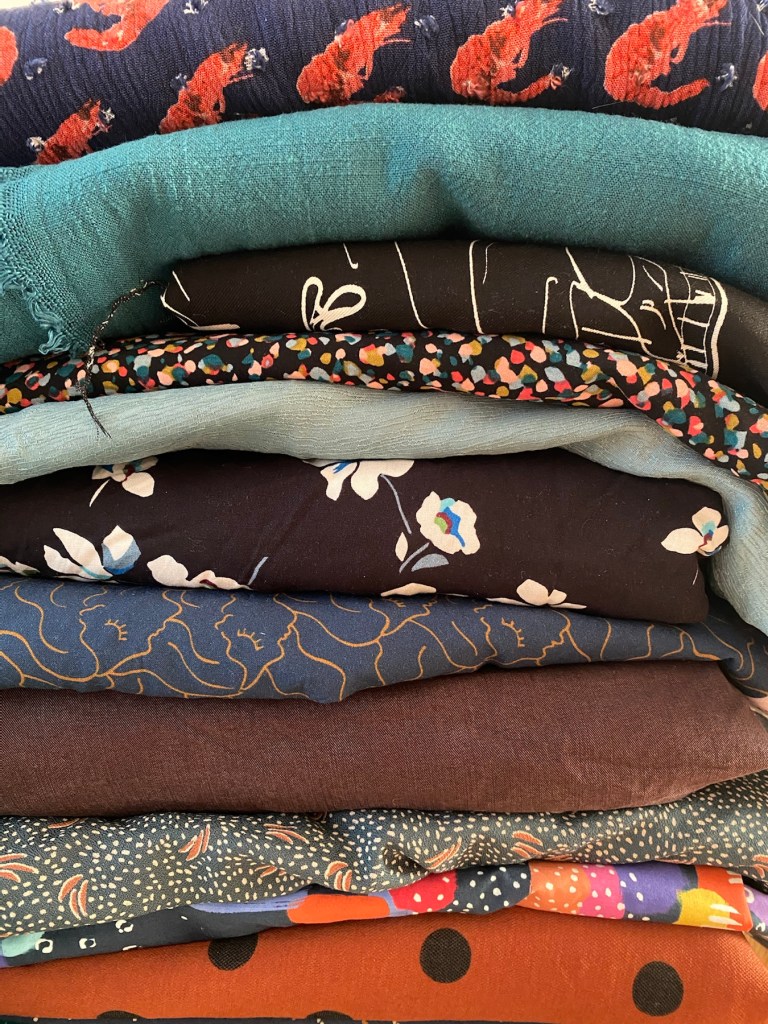
You’ve seen pictures of my 20 odd boxes bins and counting full of knits and wovens! Metres and metres of used but beautiful fabrics!
Some of the gorgeous fabrics in my stash just itching to be used!
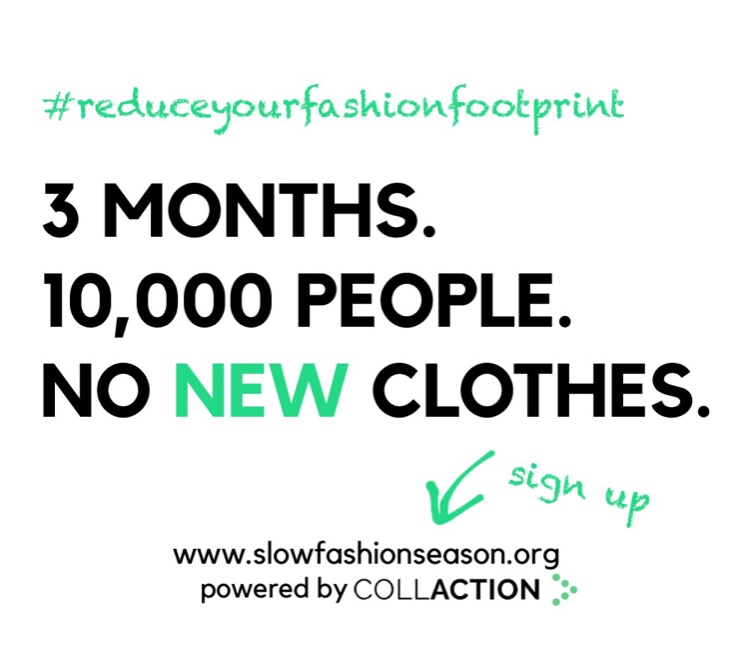
2. I’ve managed to do three months last year as part of slow fashion season, which started in June.
Admittedly, it was hard but I stuck at it and miraculously I survived unharmed. The original idea was to get 10’ 000 people not to buy ANY clothes for three months. I did both – pat on the back for me!
Last year’s challenge.
3. Another destashing will be coming to the destash grid.
Soon. Once this horrid pandemic is over. Once the Royal Mail gets back on its feet. Just now it’s slow and as I keep saying there’s no point putting more pressure on it with me adding more parcels. I’ll be putting the fabrics on the destash grid and you can have a mosey, Just don’t expect me to sell it to you right there and then. Let’s keep it simple! I’ll be just posting piccies of fabrics with zero, squad all details until the destash opens, don’t freak – I’ll be notifying on stories when it is going to live! Oh @sdie_destash is where it’s happening.
The Destash!
4. Another reason to stop buying fabrics is to actually see what I’ve got and record it!
That’s right, I’m going to record what I’m going to keep! It’s simple, it’s not technical either. It’s in black and white on “flat white” recycled cardstock! Kudos to Anna @annatriestosew for letting me know how she did it. Why not trello? Hmm, it’s way to meh to start with such a massive stash. And I get to keep a “touch and feel” of the fabric too!
My Stash records!
5. I won’t have a job come mid May.
My contract ends on the 13th, which is really sad as I enjoyed working with fabulous colleagues. I have to say that these 3 months which turned out to 9 nine as they kept renewing my contract, has been the best! I don’t have any bad feeling against the company especially in the current climate for their decision not to renew my contract, just a bit of anxiety for what will happen in the coming weeks, if not, months for me and my future job. I won’t be the only one in this situation.
So I’m going to have to tighten up the purse strings and I’ve got plenty of fabric to see me through many years.
Before I finish, I’m allowed haberdashery items, such as interfacing, buttons, trims and all that jazz, just not Fabric meterage!
Although I’ve published my photos on Instagram, I thought it would be good just to have my thoughts on the pattern and fit here for my first myosotis dress.
So before I started I check my back measurements according to the pattern piece and shortened the bodice. I think it’s a tad too short in this version but hey ho I’ll still wear it. For my next version I’ll definitely used the for bodice piece and original length. I cut the largest size and instead of 1.5cm/5/8” seam allowance I went for 1cm. The bodice fits really well.
The skirt has no real issues and was fairly straight forward although I only cut one of the lower ruffle and had to do a last minute panic of “ok where’s the remaining pieces of fabric” – which was fine. I pattern match this piece because there’s an extra seam at the back of the dress now because of this rookie mistake!
I think my favourite part of the dress is the sleeves. I’m just loving the ruffles and to me that’s something that’s surprising to me!
The fabric is a Lady McElroy Cotton “Marlie” lawn. The print is digitally printed onto the fabric. The print itself is called “Shades of Autumn – Midnight”. I bought this from The Cloth Shop by Remnant Kings, Edinburgh a good year ago for a myosotis dress and who knew it would turn out so well! I’m pleased it didn’t have too much time in the stash.
I found the collar to be a bit of a nightmare though. The instructions aren’t clear to be frank and if you follow them it leads you into a fiddle. So conferring with my sewing buddies, I’m advised to go and have a look at Professor pincushion on youtube and hey presto, the dress lives!
So there you go – my first and not last Myosotis Dress by Deer & Doe patterns. Thanks for reading and see you back here soon!
So you might gather I’m quite a sucker for the “Moneta” by Colette Patterns and the fact that it’s been a few months since I’ve last wrote a blog post, would be too good an opportunity to miss to give the wee blog a bit of a boost!
So in no order here’s my “Moneta Collection”
🧵Fabric from Pin & Sew
🧵Hacked neckline and sleeves from Seamwork Alice and added a polo neck!
🧵Fabric from the Edinburgh Dress Fabric Company
🧵Hack – scoop back
🧵The Moneta that started it all!
🧵Fabric from John Lewis
🧵Fabric from Fabric Focus
🧵First scoop back hack
🧵The Scoop back with petal sleeves dress
🧵Fabric bought from Fabricate Mirfield
🧵Made it for my 39th Birthday
🧵Fabric from Sewisfaction
🧵Scoop back – ooo er.
🧵Made this for going out to dinner for our 10th Wedding Anniversary
🧵Fabric from Fabric Focus
🧵Scoop back hack
🧵Fabric from Holm Sown
🧵My Christmas Day 2018 dress
🧵Fabric from Fabric Focus
🧵Scoop back & 3/4 length sleeves (must be my favourite combo)!
Would it surprise you if there a few others that are works in progress? Once they are completed, I’ll share them on Instagram @sewdoitemma.
Ok, well hopefully it won’t be as long as last time until I write a blog, but until then … see you soon!